
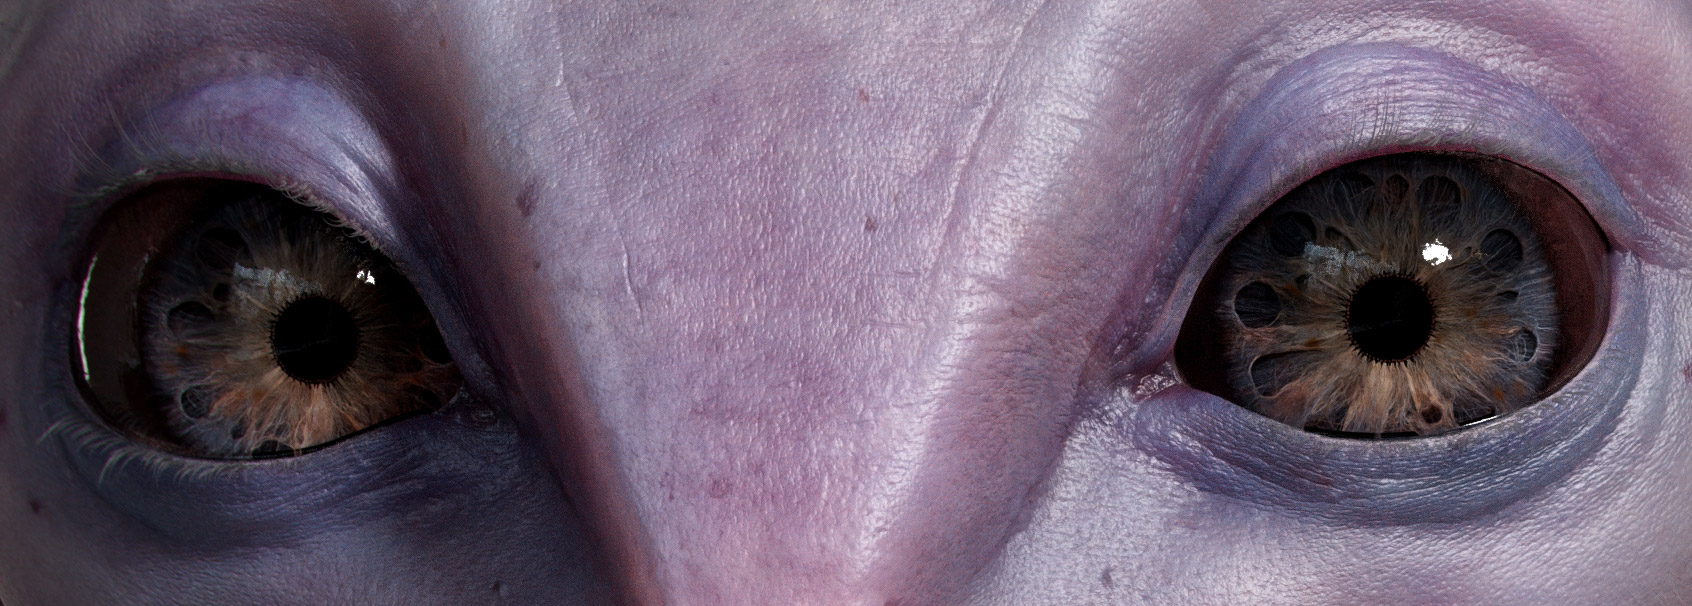
Kyka
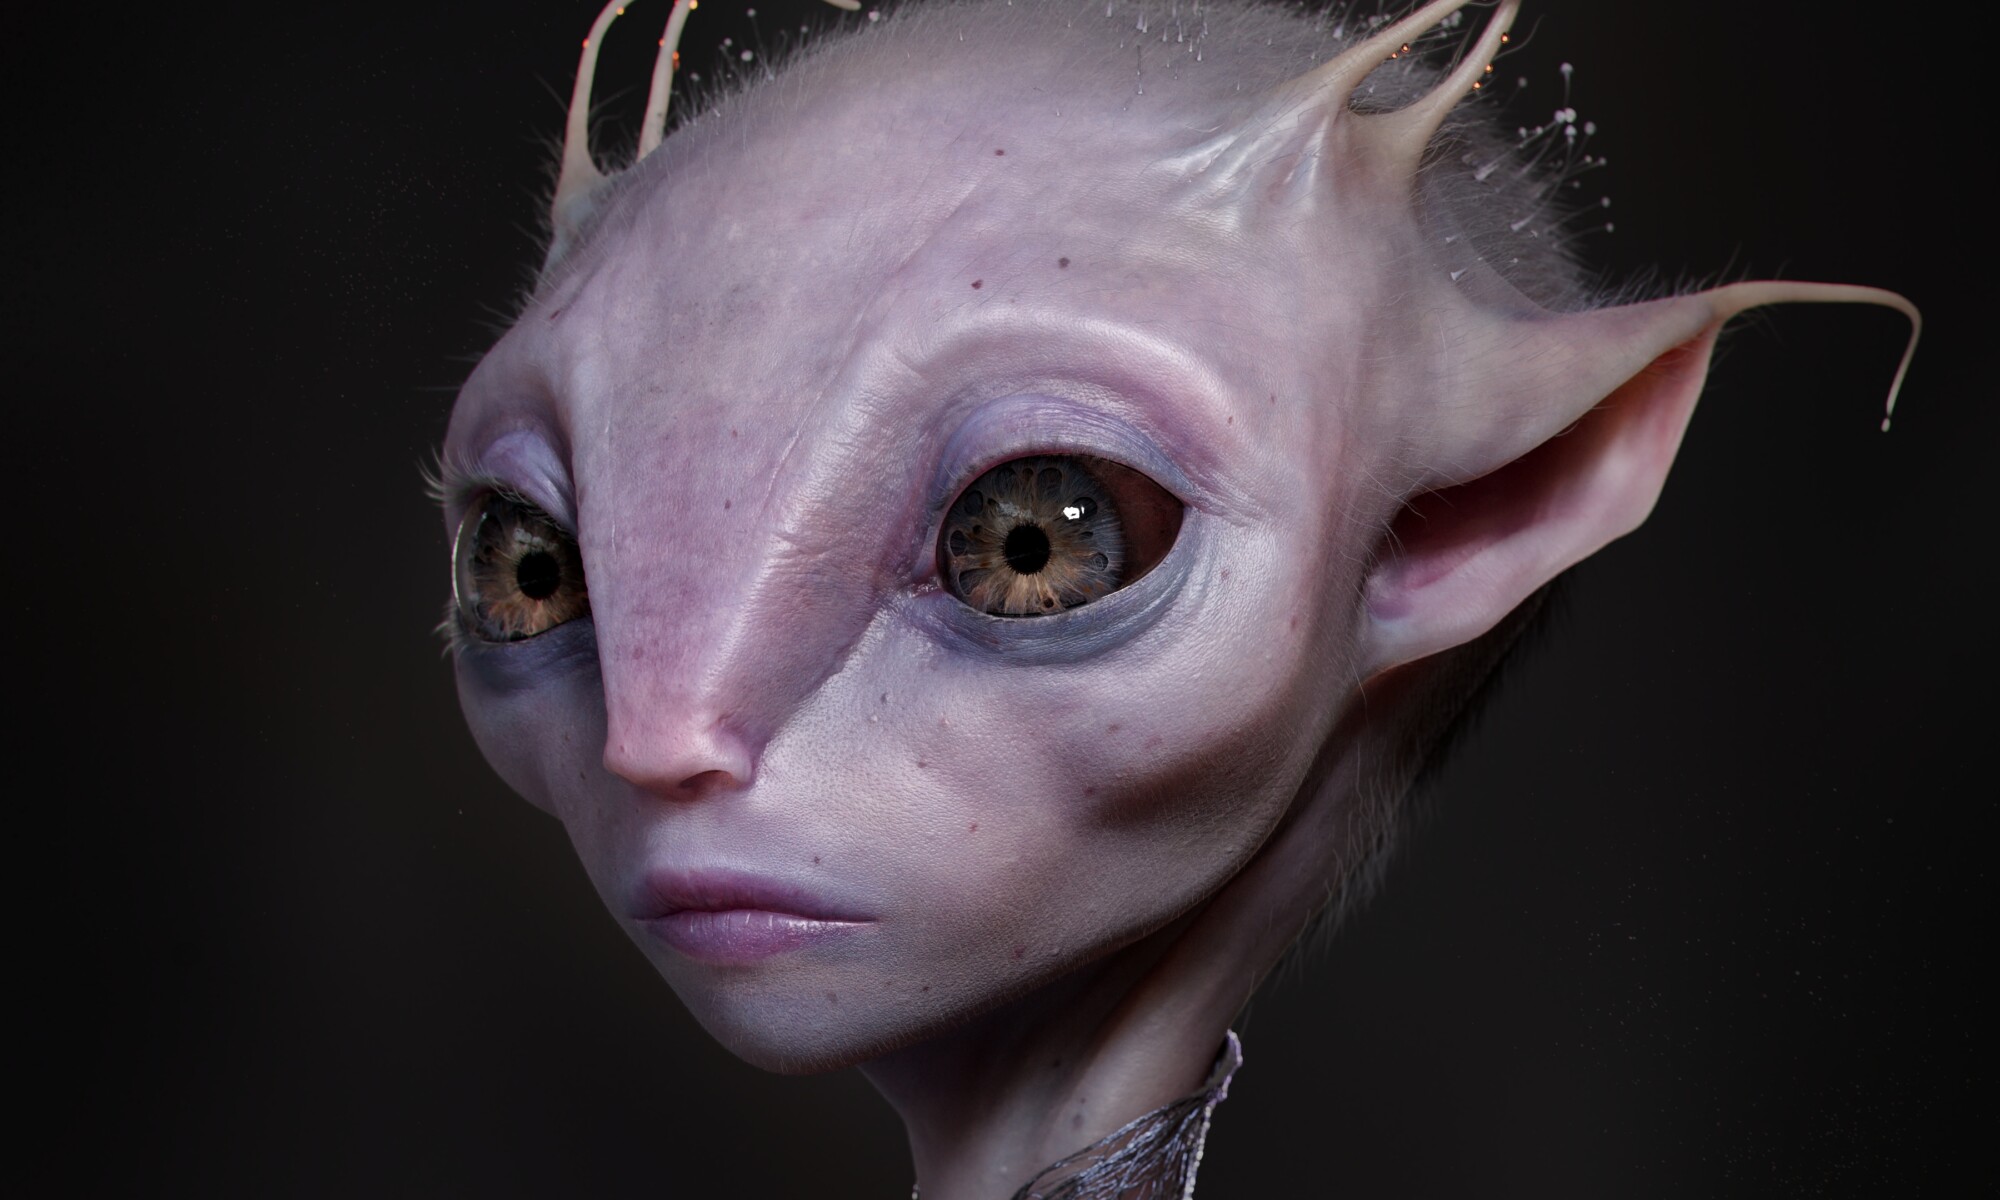
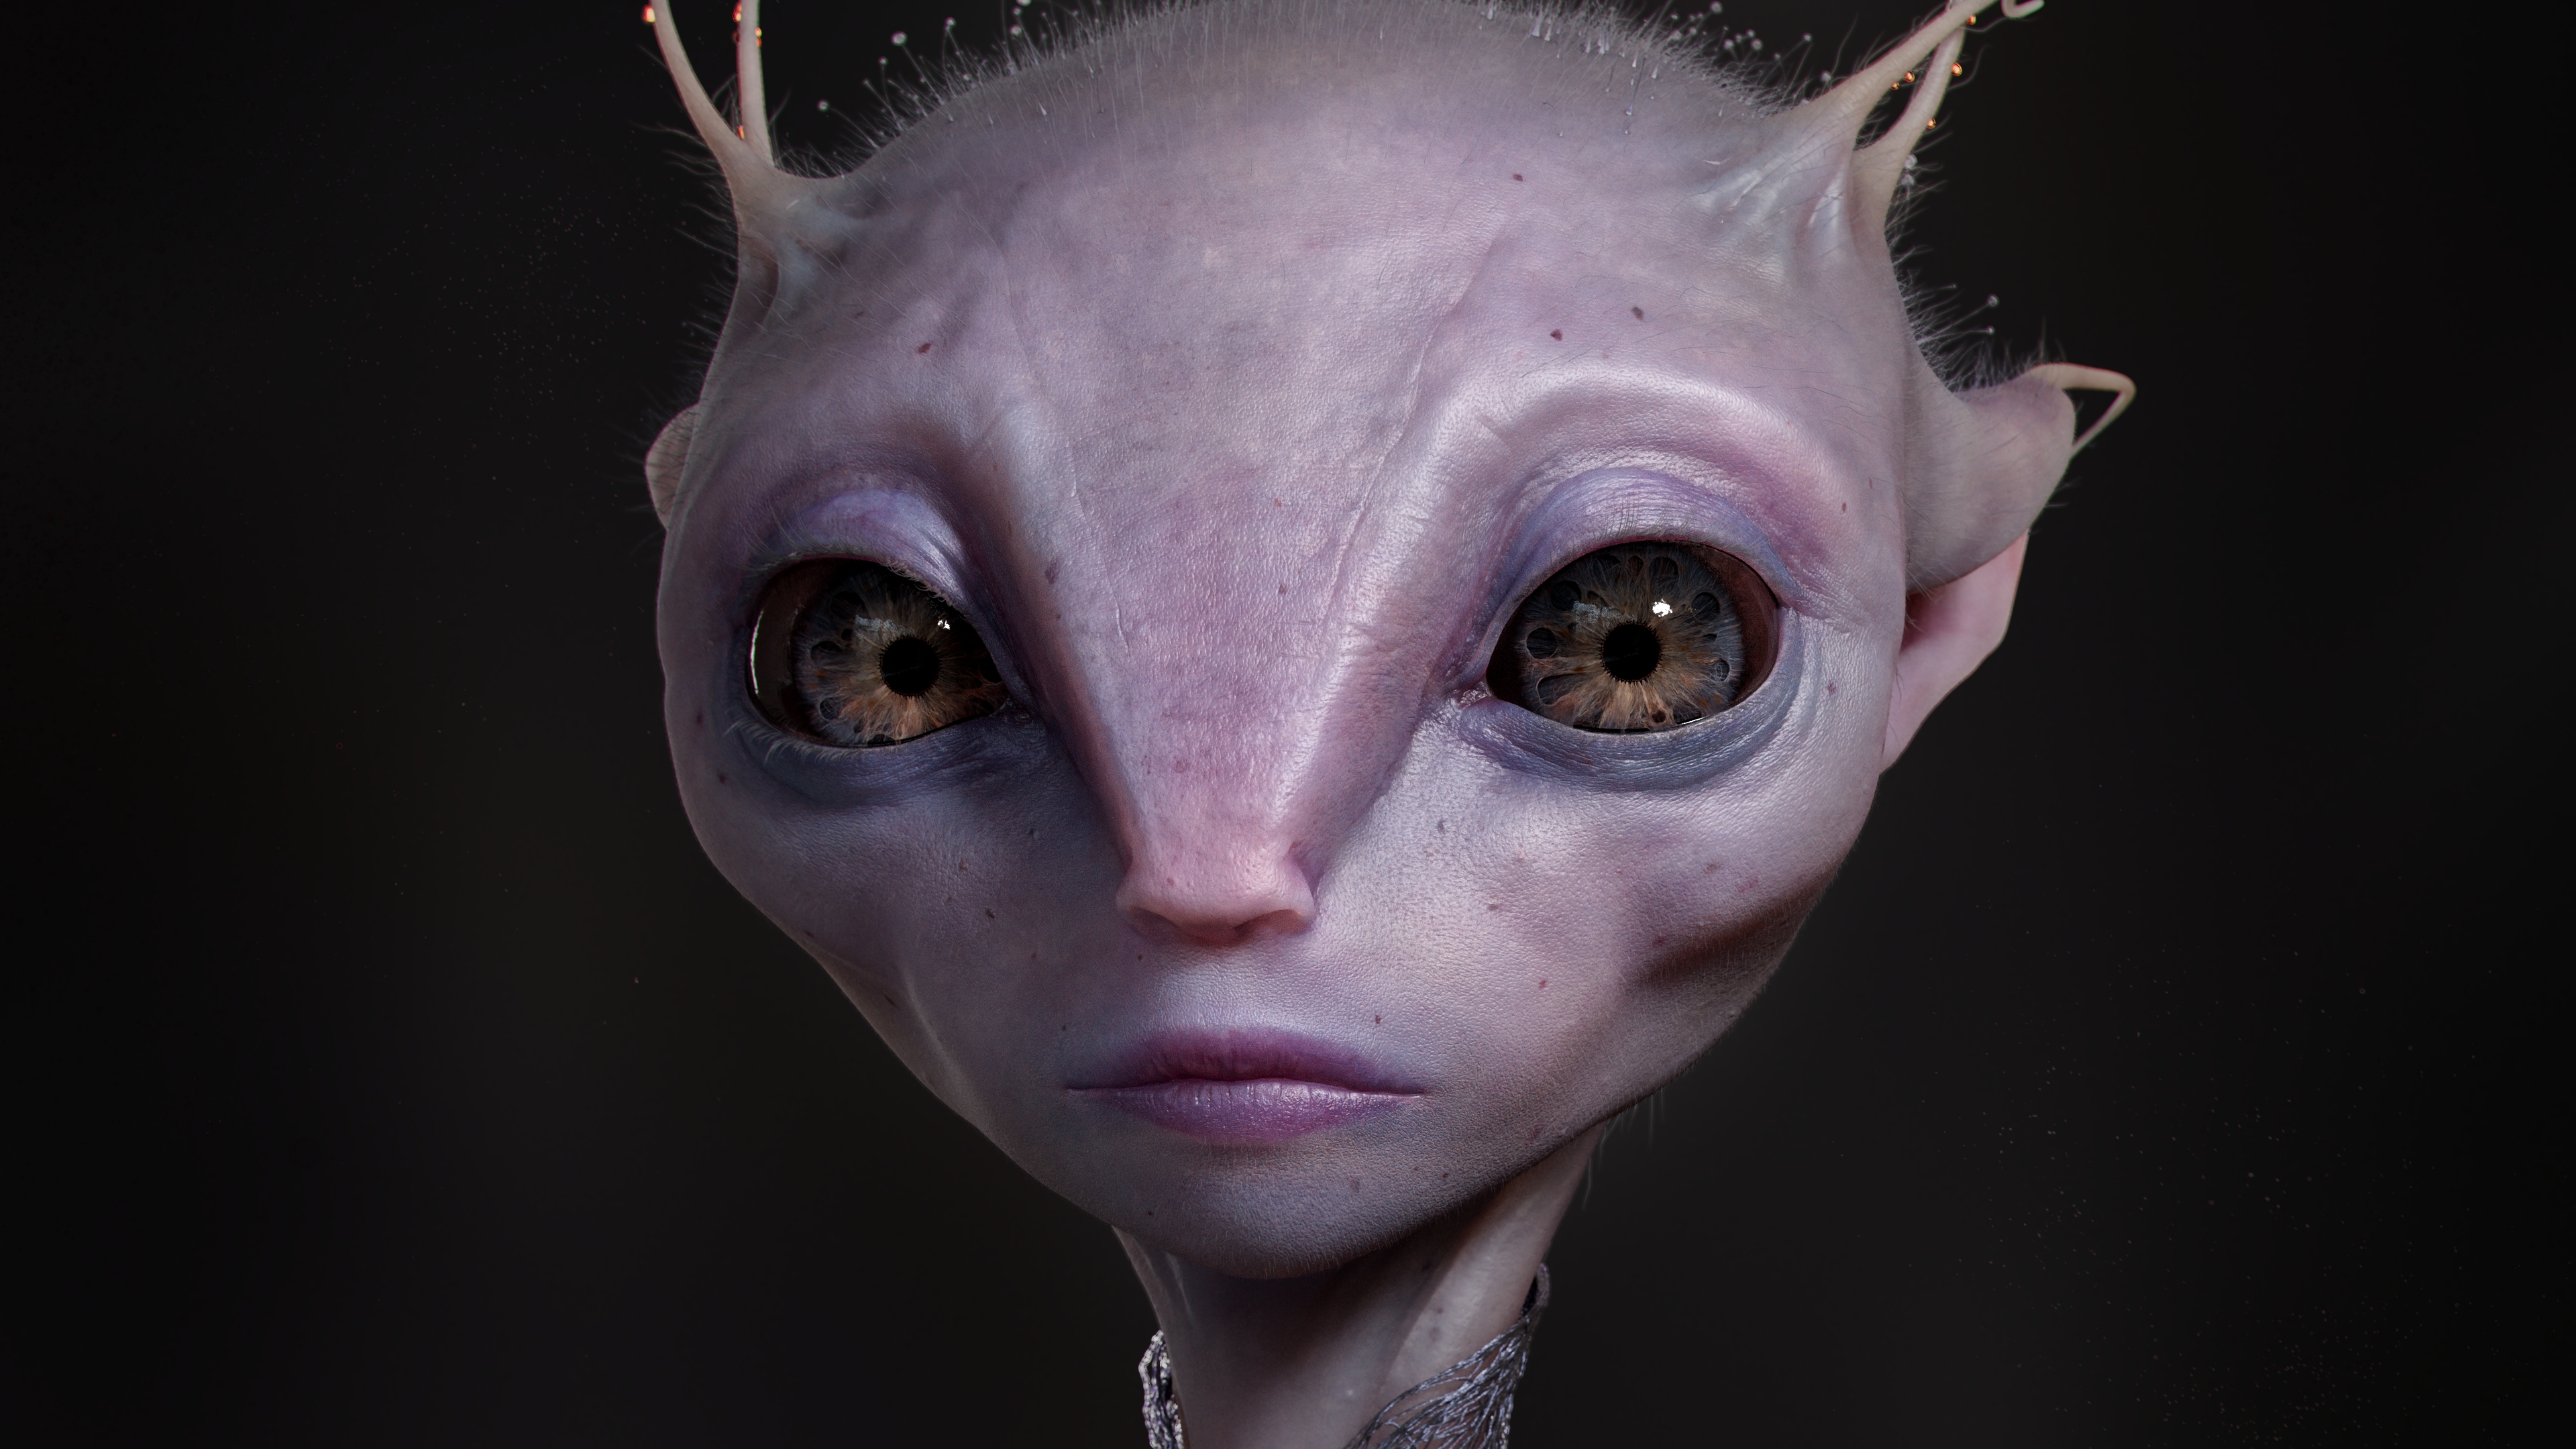
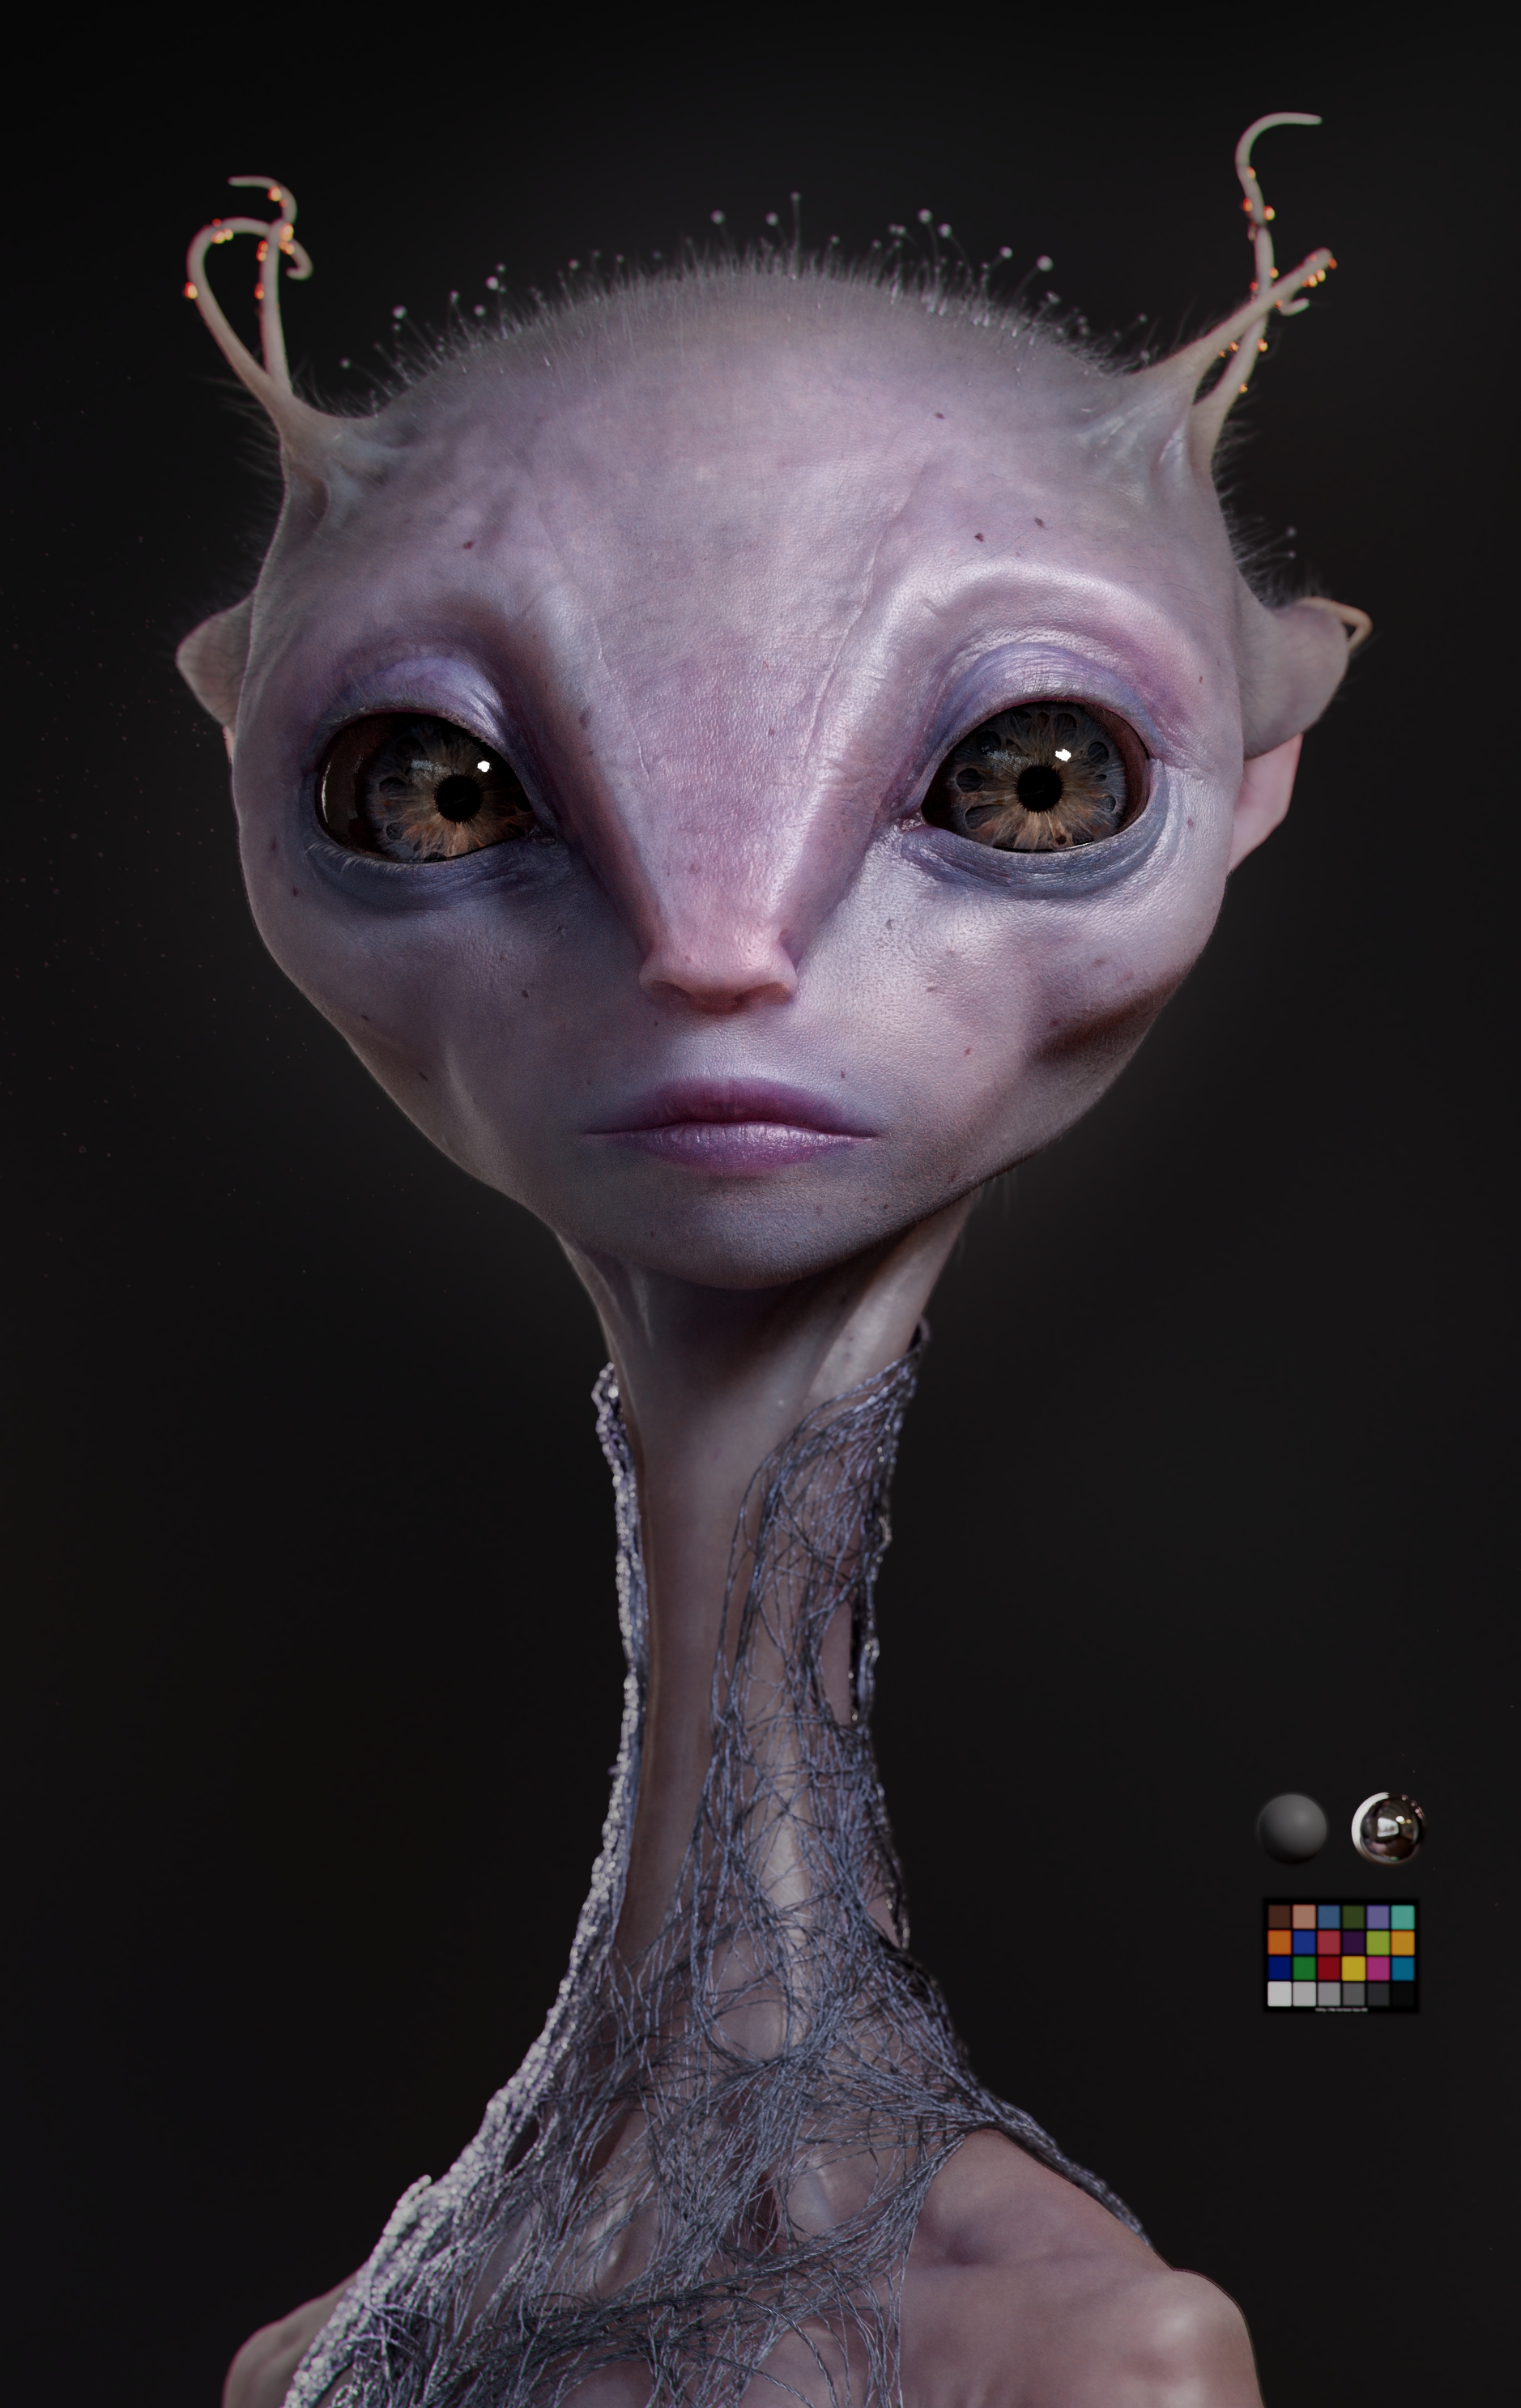
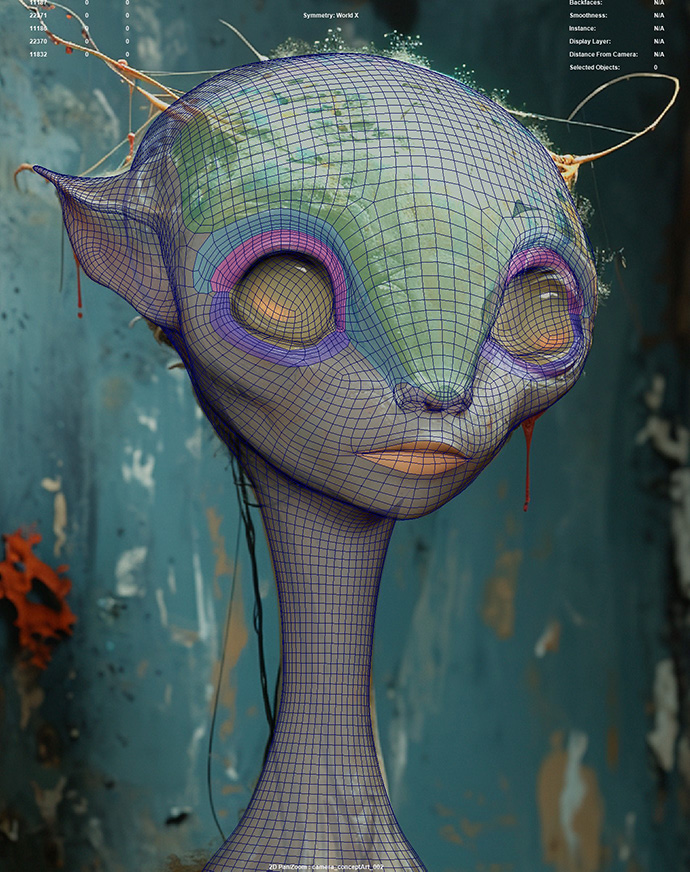
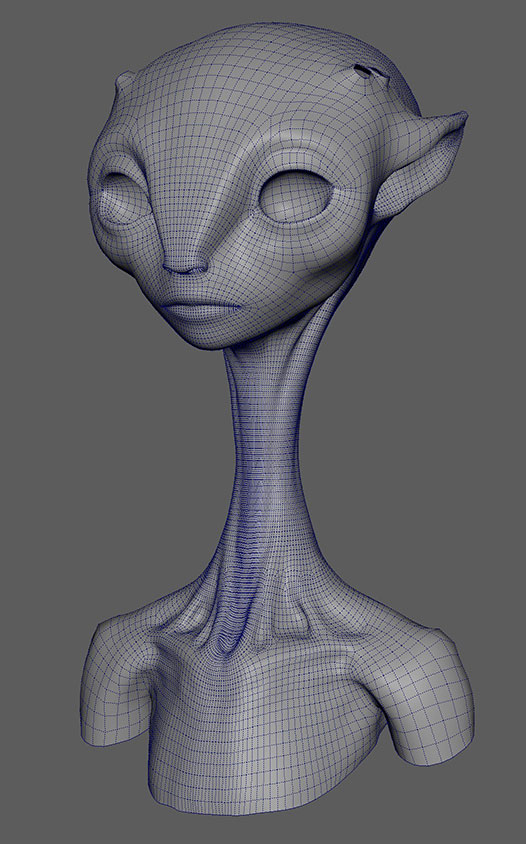
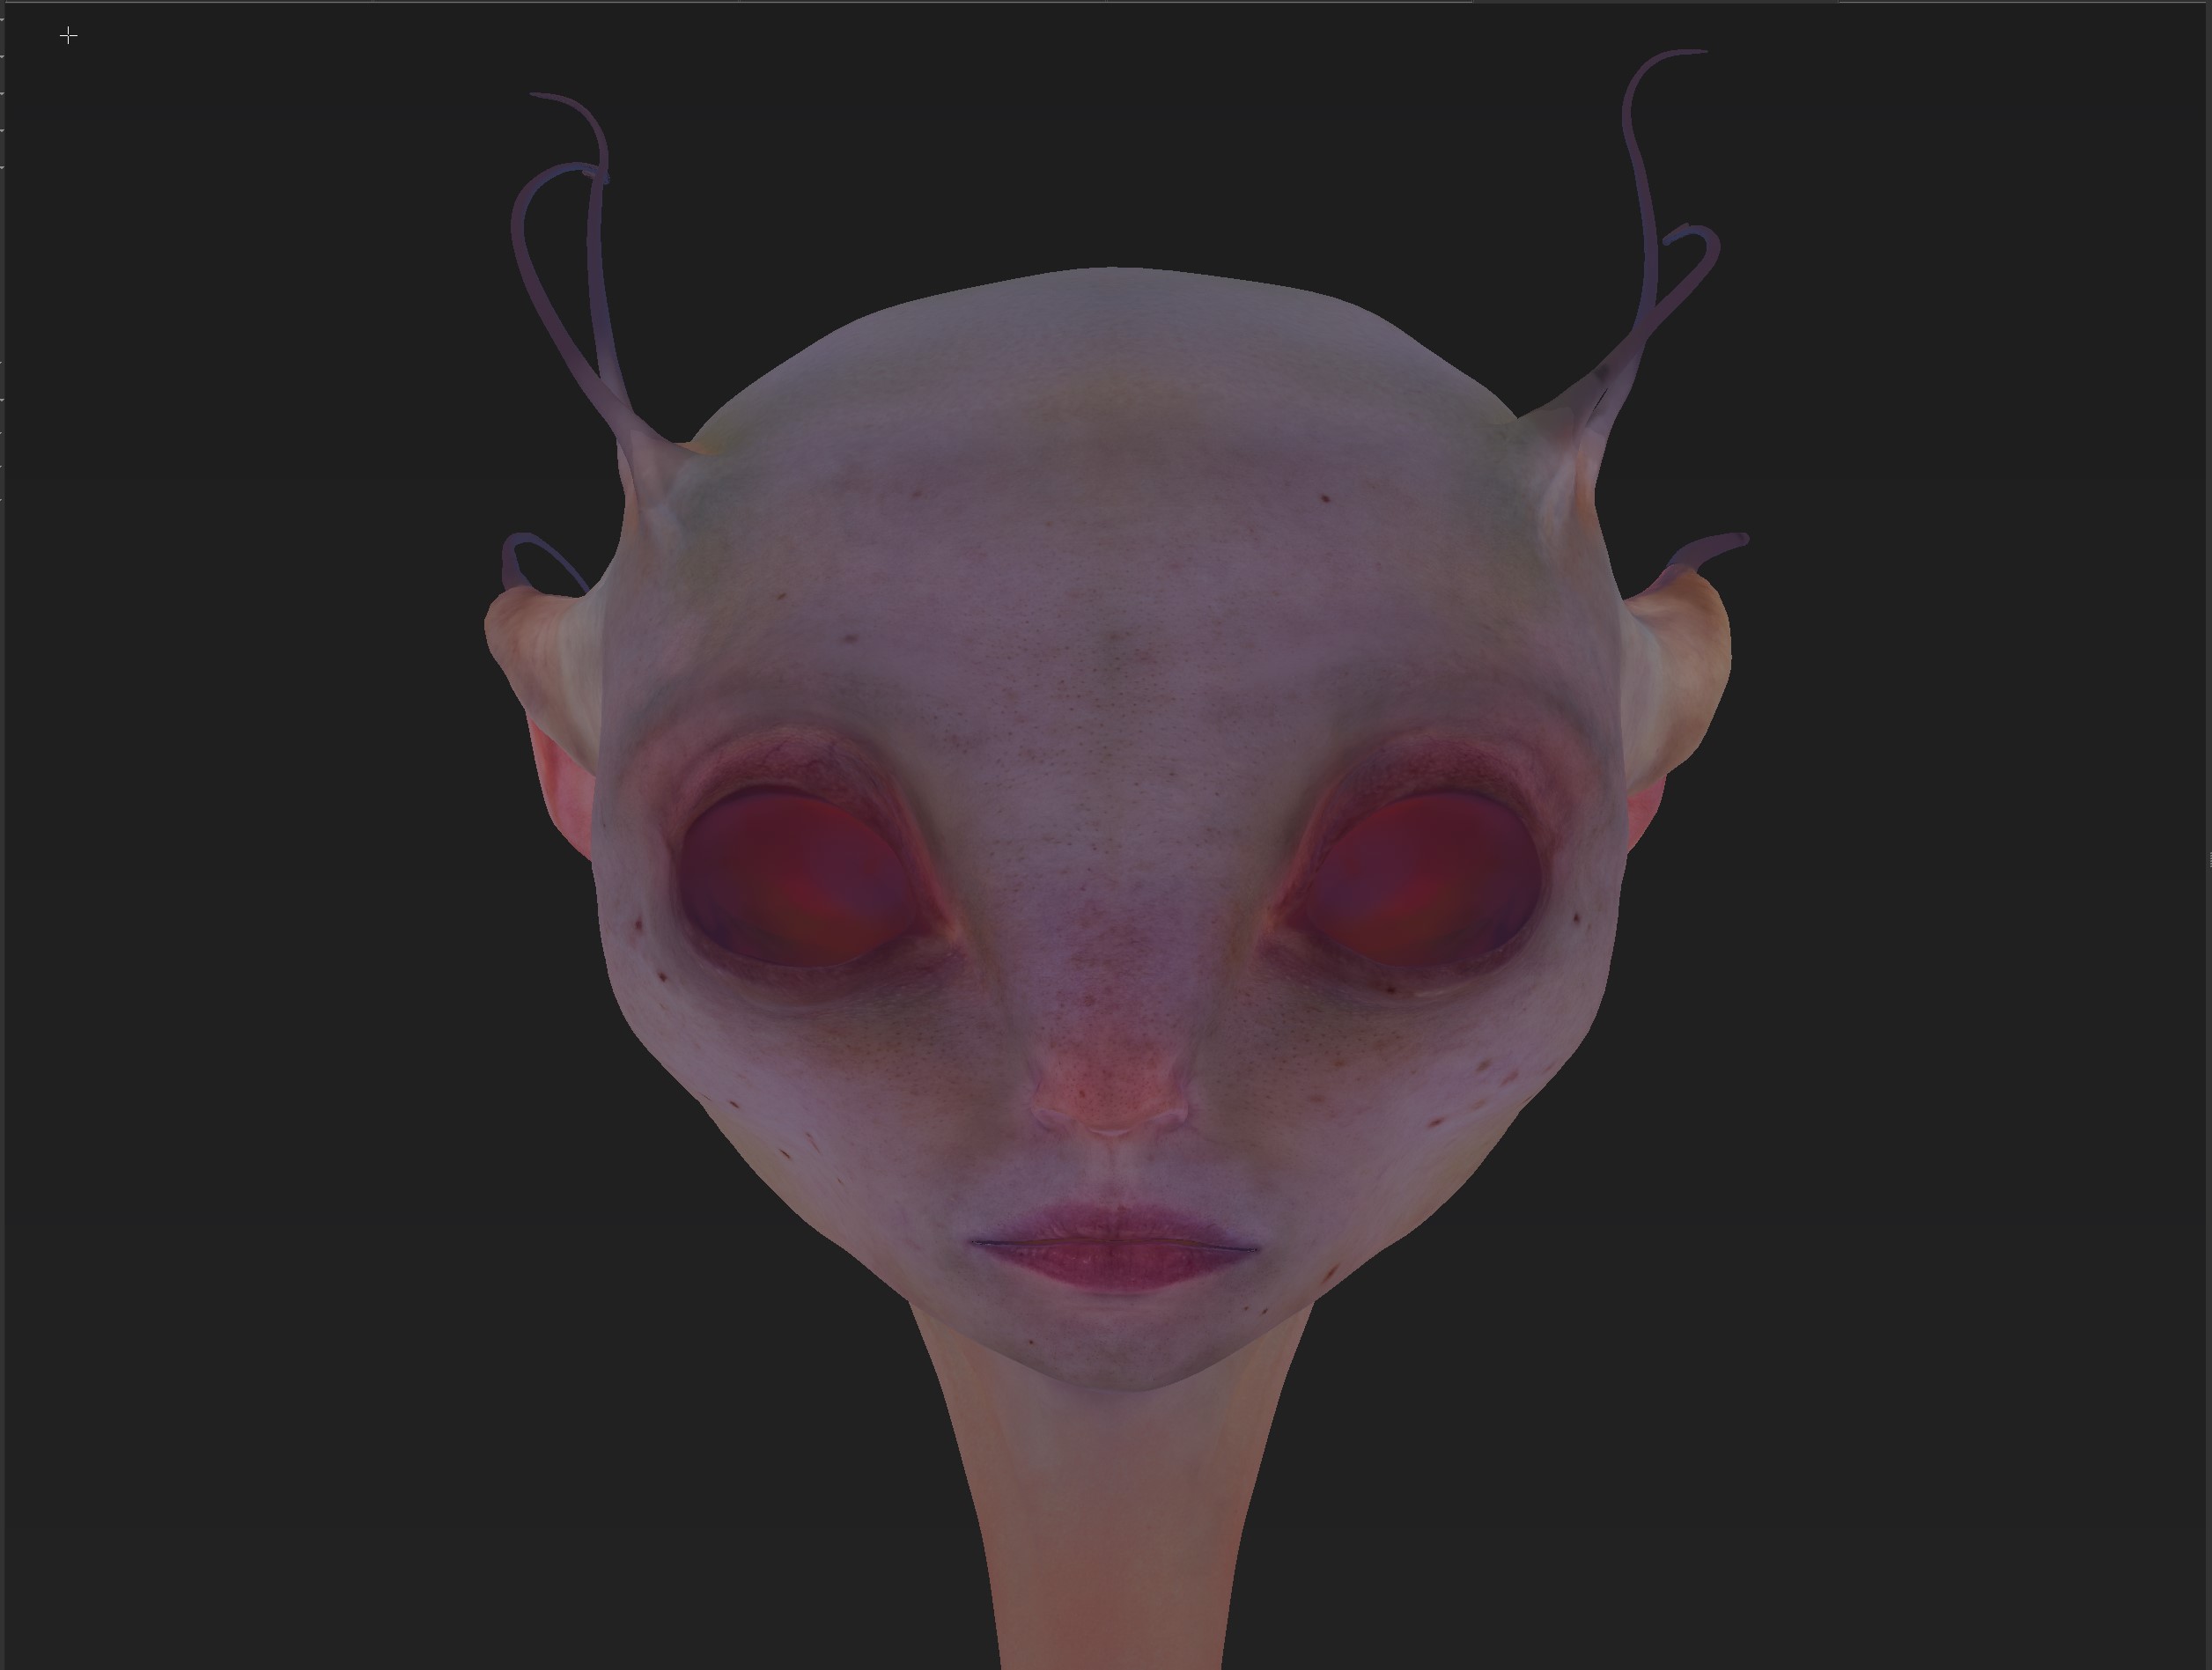
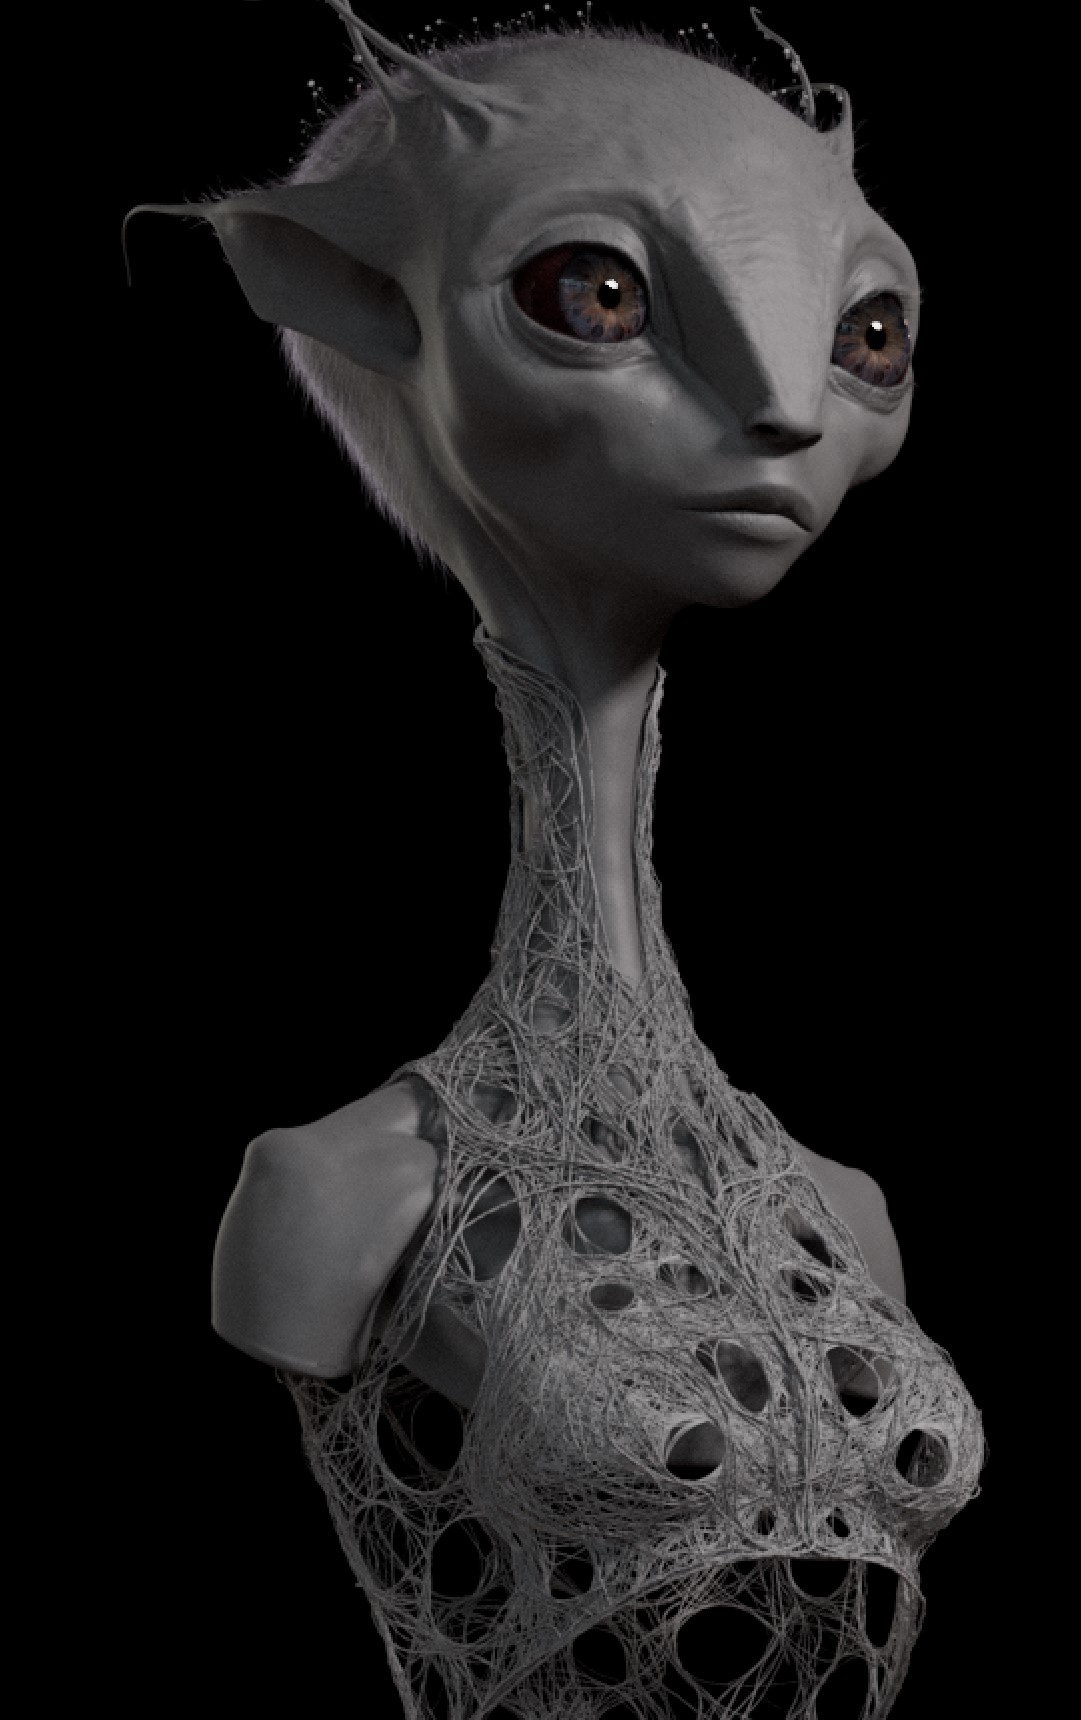
The goal for Kyka was to create a beautiful, compelling character with fascinating alien features and a sense of calm determination and intelligence behind her gaze. I wanted to emphasize hyper-realism, especially in the skin which is aided tremendously by Symbiote, the new creative studio by TexturingXYZ. The eyes were also very important and I wanted to complete a procedural system in Houdini which would produce the iris as individual fibers which would add detail and depth.

Symbiote
For this character I worked with Symbiote to produce the final skin. This was a really fascinating way to create highly detailed and accurate skin detail.
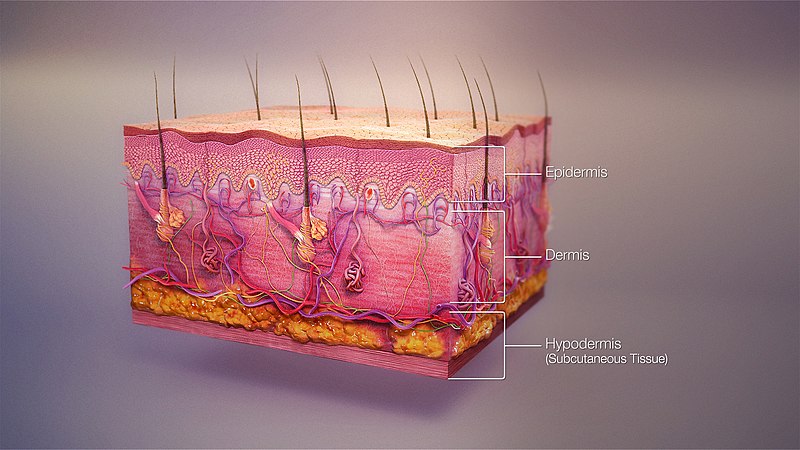
Traditionally skin was done in the texture phase of character creation due to polygon count limitations in model and sculpt. This allowed for high resolution maps but was limiting artistically because the final surface relief had to be imagined based on the 2d black and white bump or displacement map.
When ZBrush was released as a 64bit version it allowed for an obscure function called HD Geo to be used effectively. This let artists sculpt up to a billion polygons which is enough for fine skin wrinkles and pores. This method can achieve an extremely detailed surface but still has technical and artistic limitations compared to regular Zbrush sculpting and can be difficult to use in production.
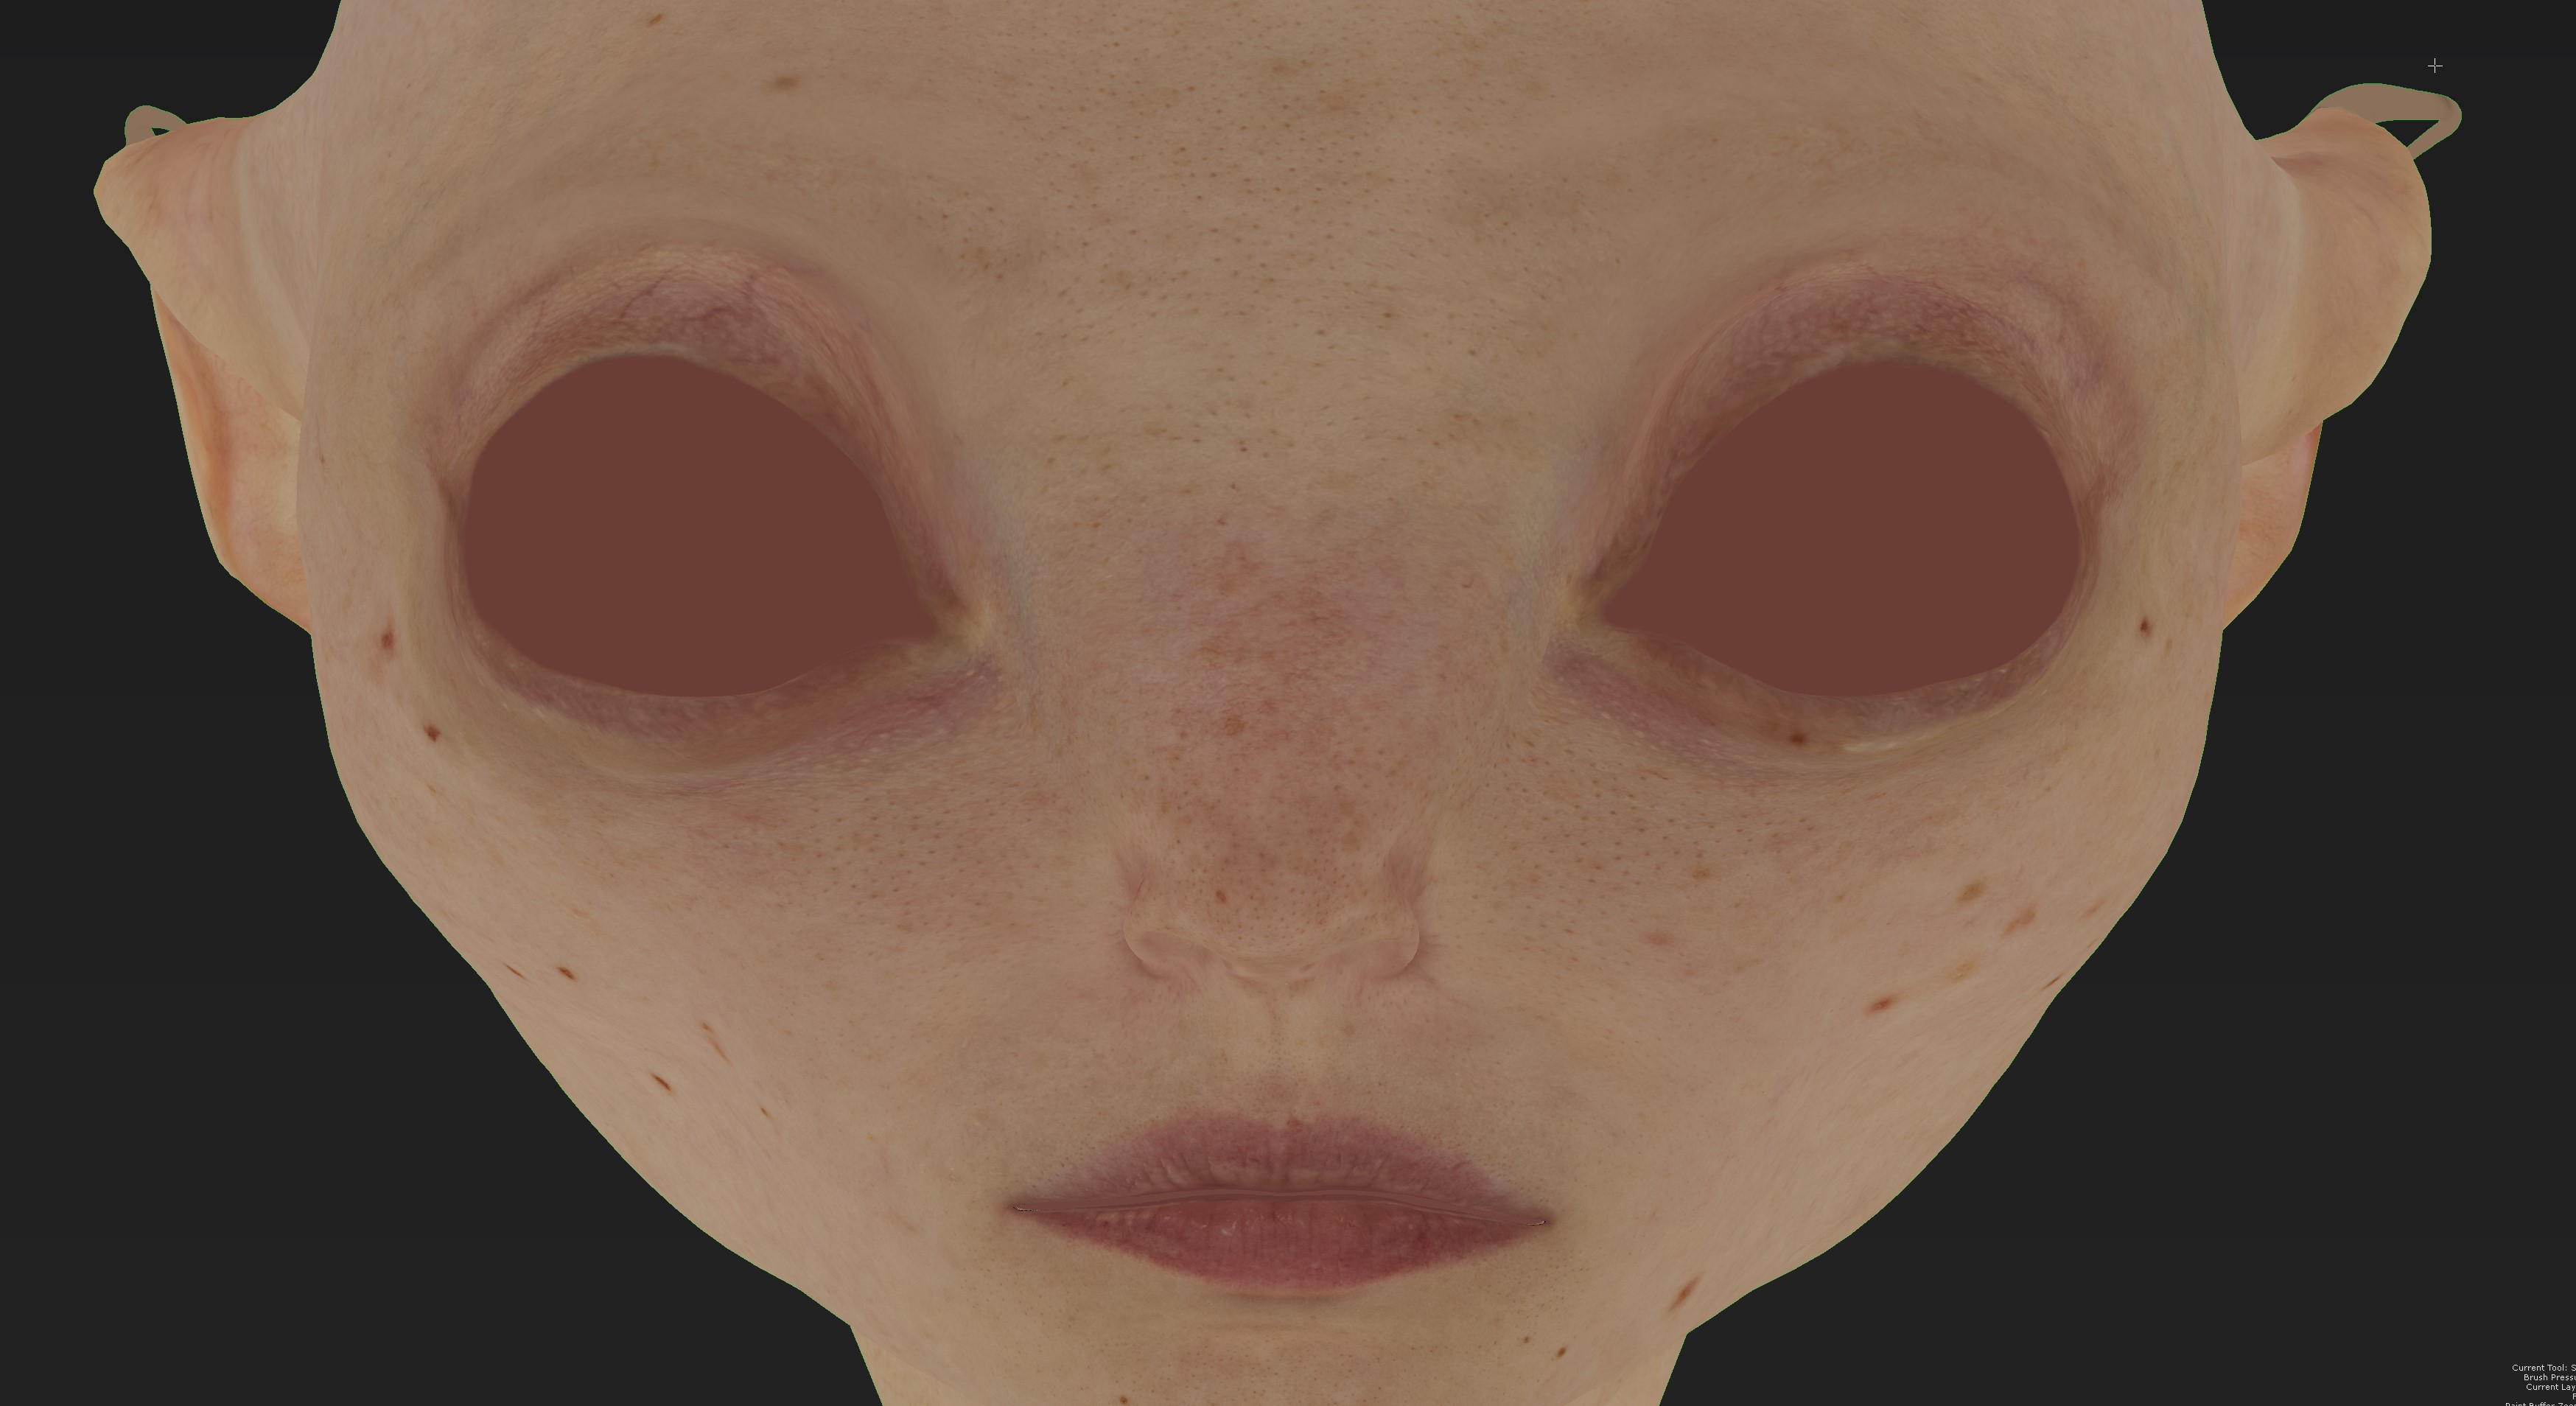
Symbiote offers a new way to create very accurate skin detail using their Hyperskin 2.0 displacement process. This allows for an input, which could be a scan of an actor or a medium resolution sculpt from zbrush and produces a map which holds the intricate detail of every pore and wrinkle on the face. This results in a new level of realism and quality of detail.
Concept
For this project I wanted to build on some of the elements I’ve explored previously with Elucidae. This includes themes of alien beauty, communicating intelligence and emotion through the expression and gaze, and creating a character with refined sophistication and a sense of story. As I developed the design I was able to come up with a fitting name Kyka, quite early in the process.
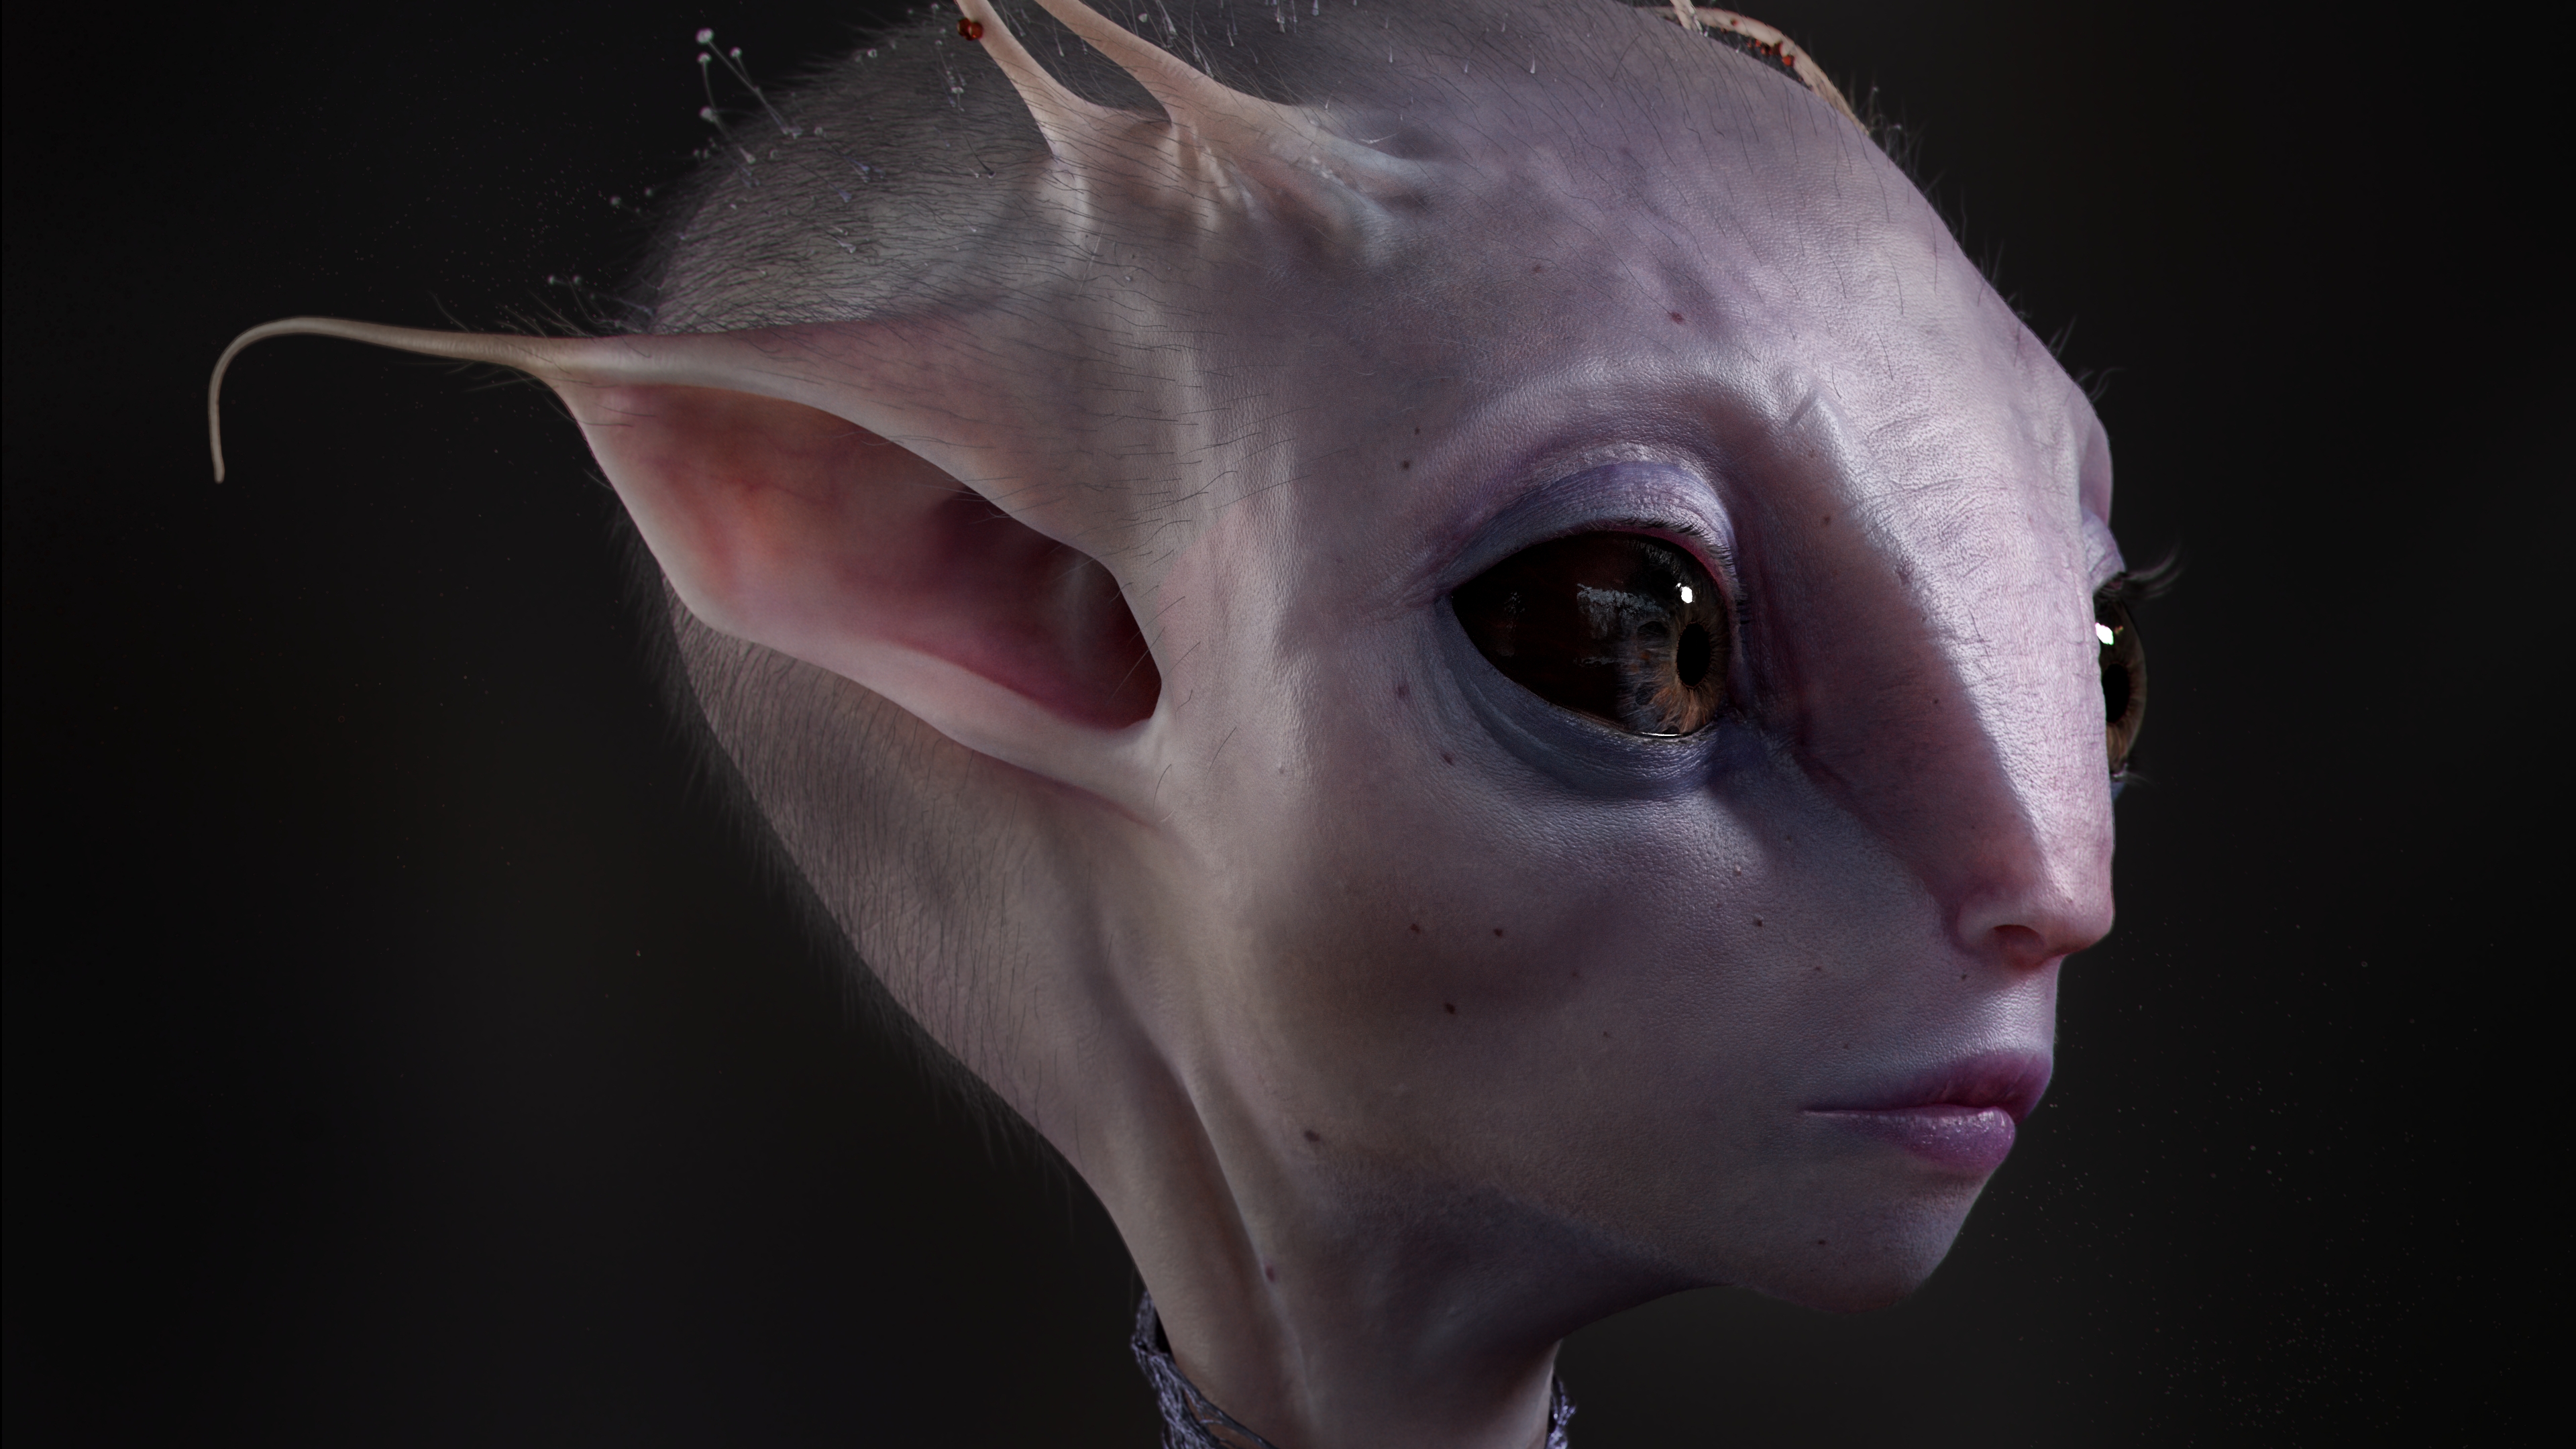
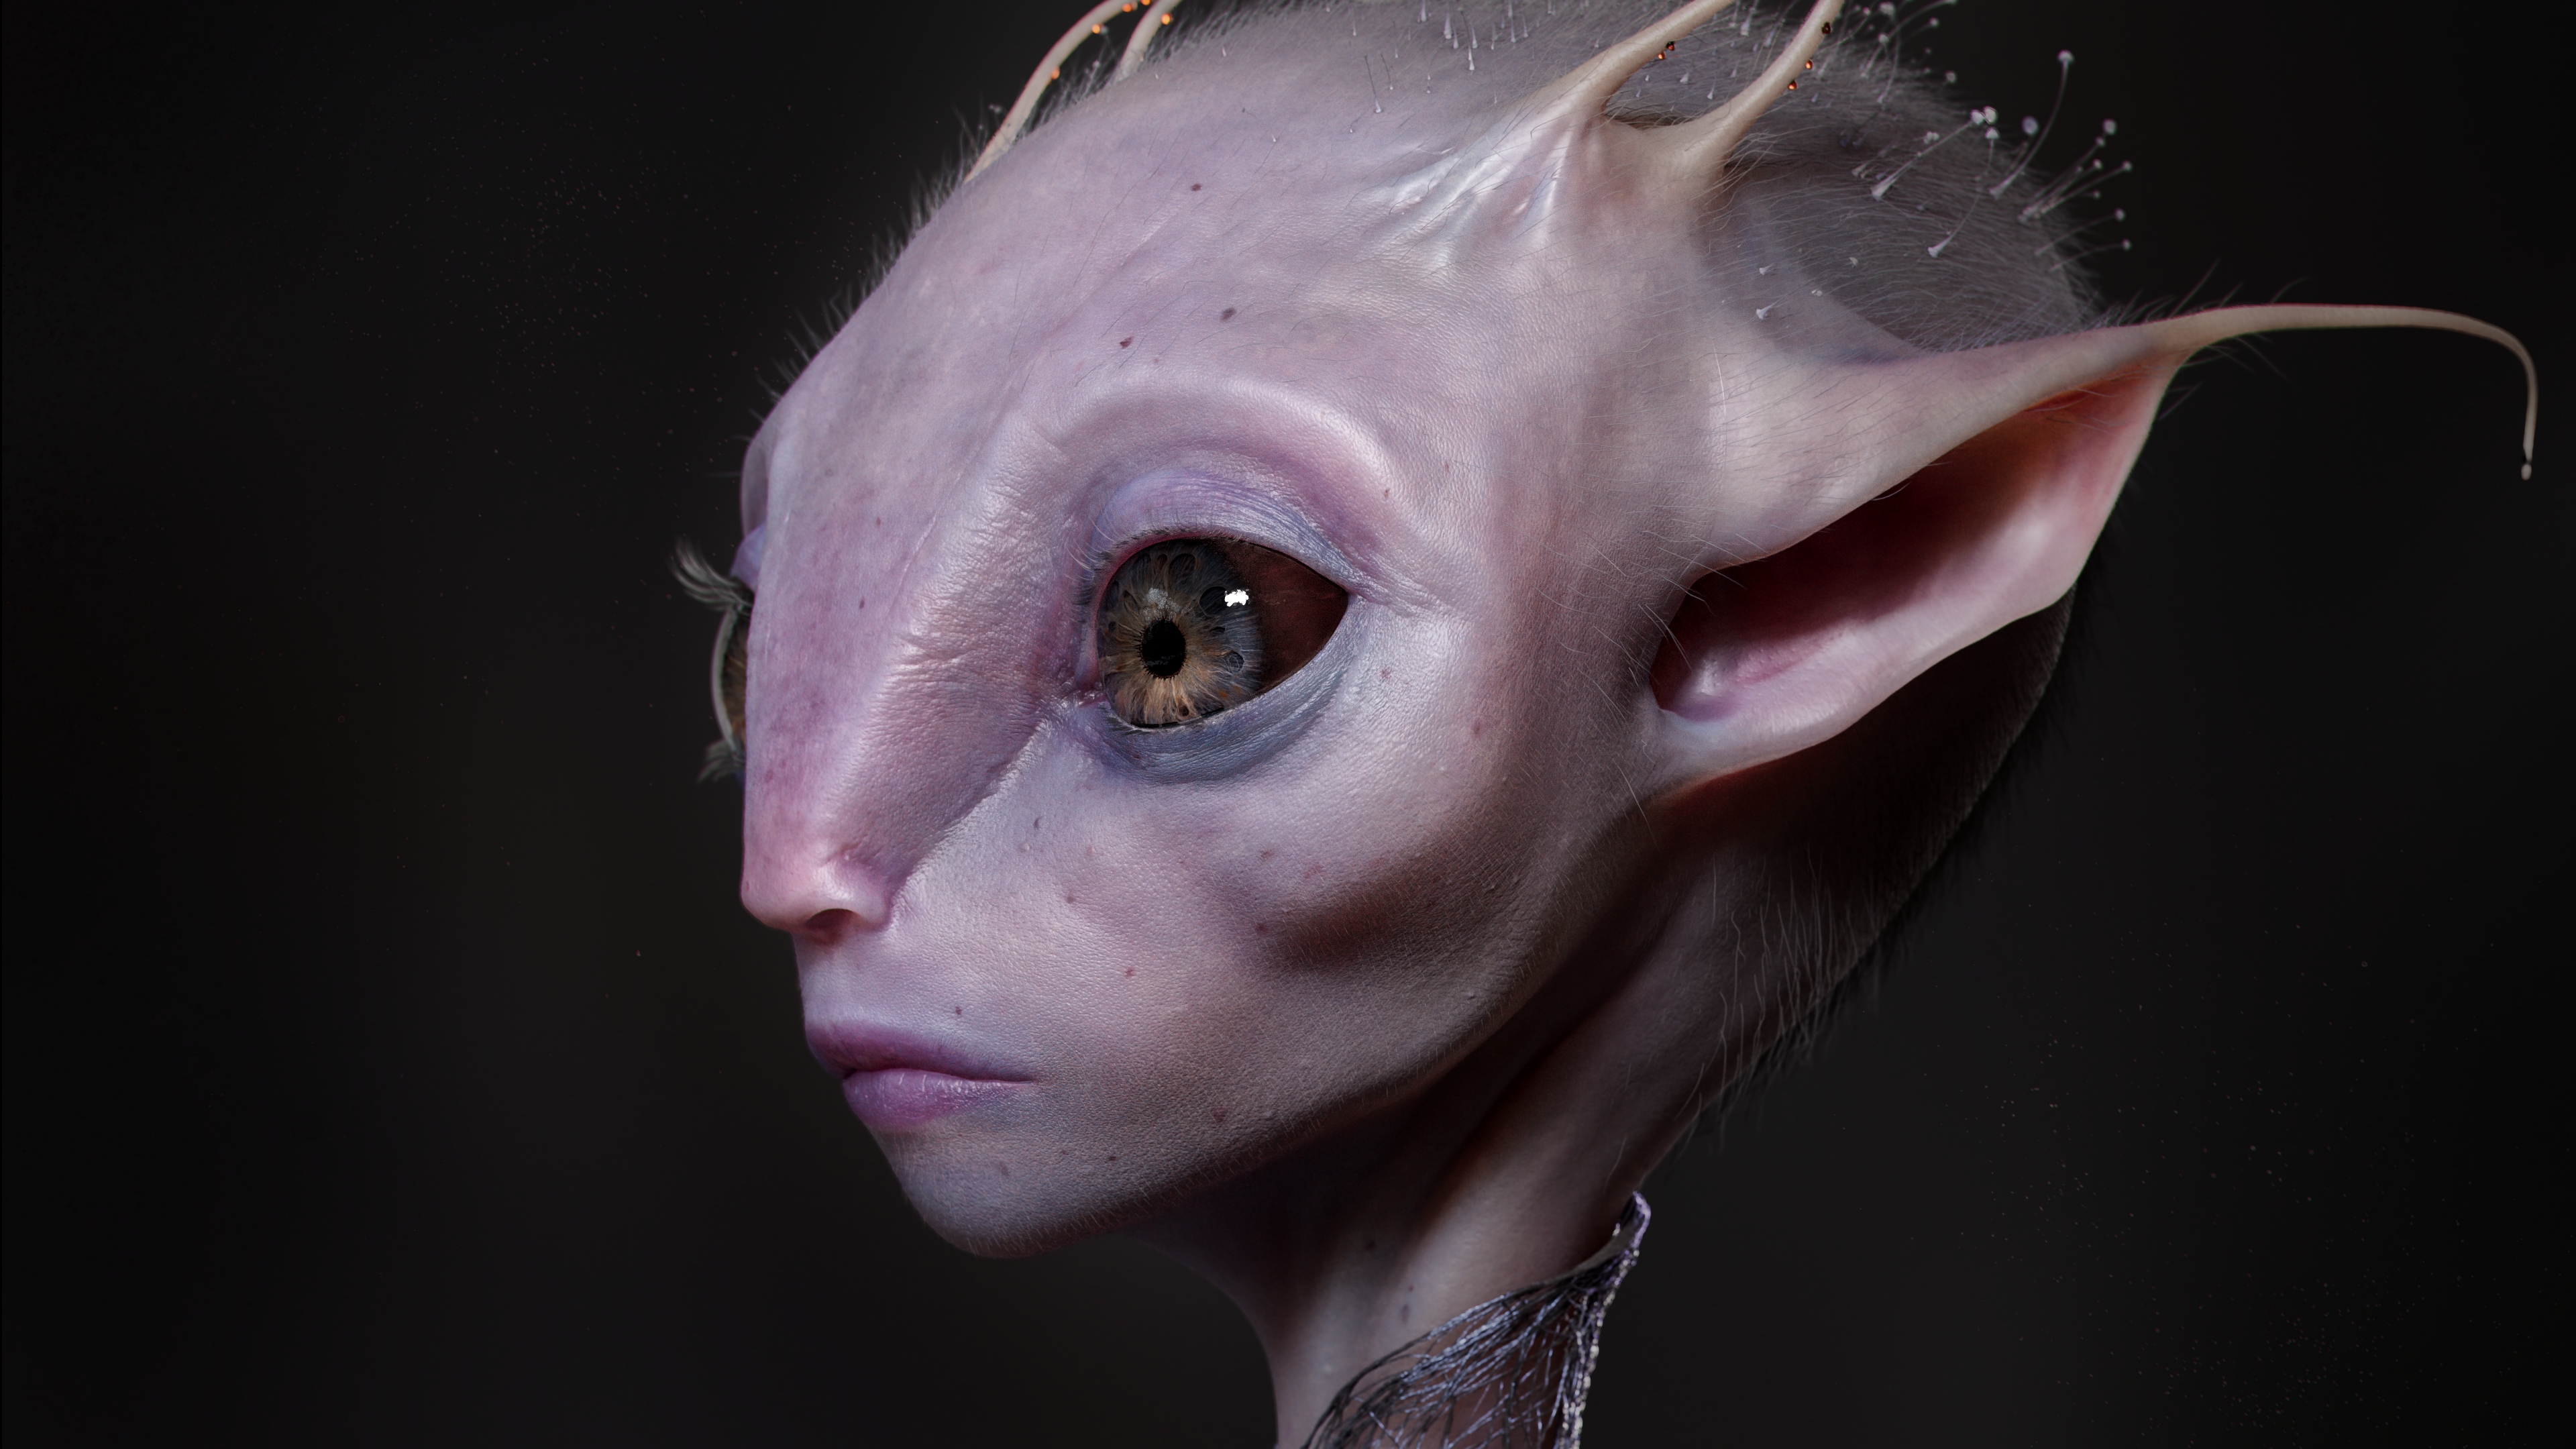
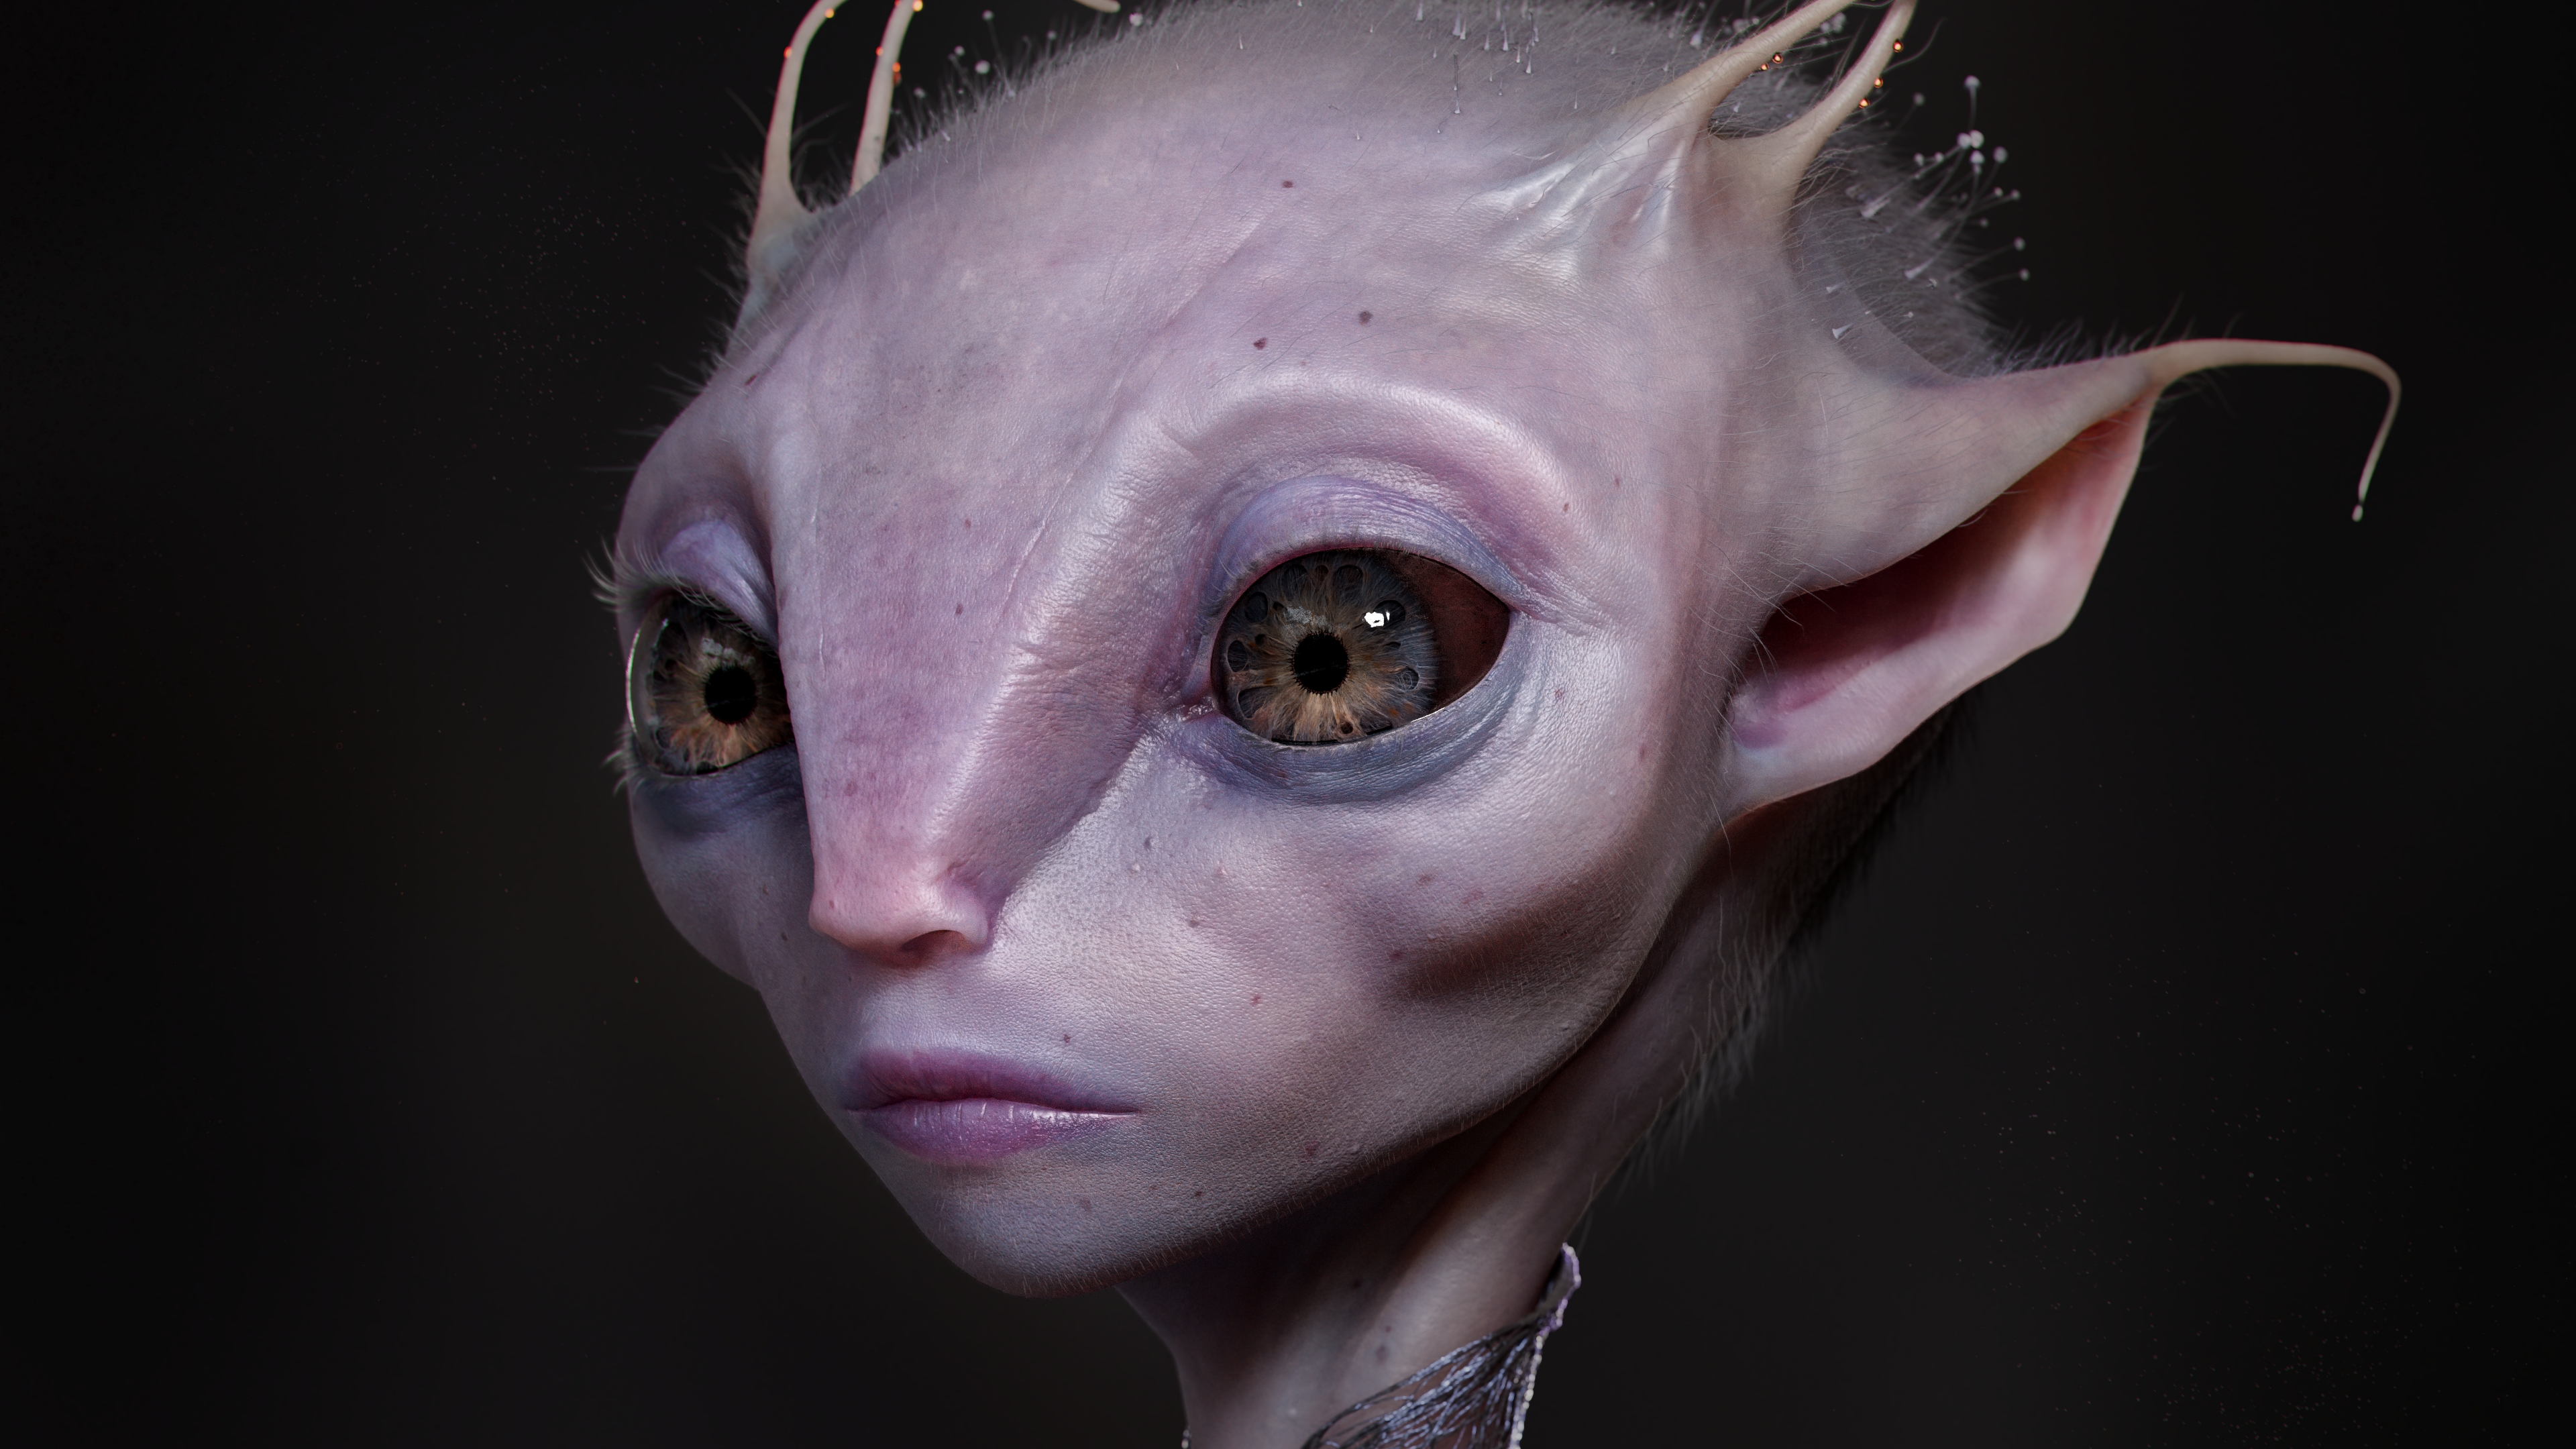
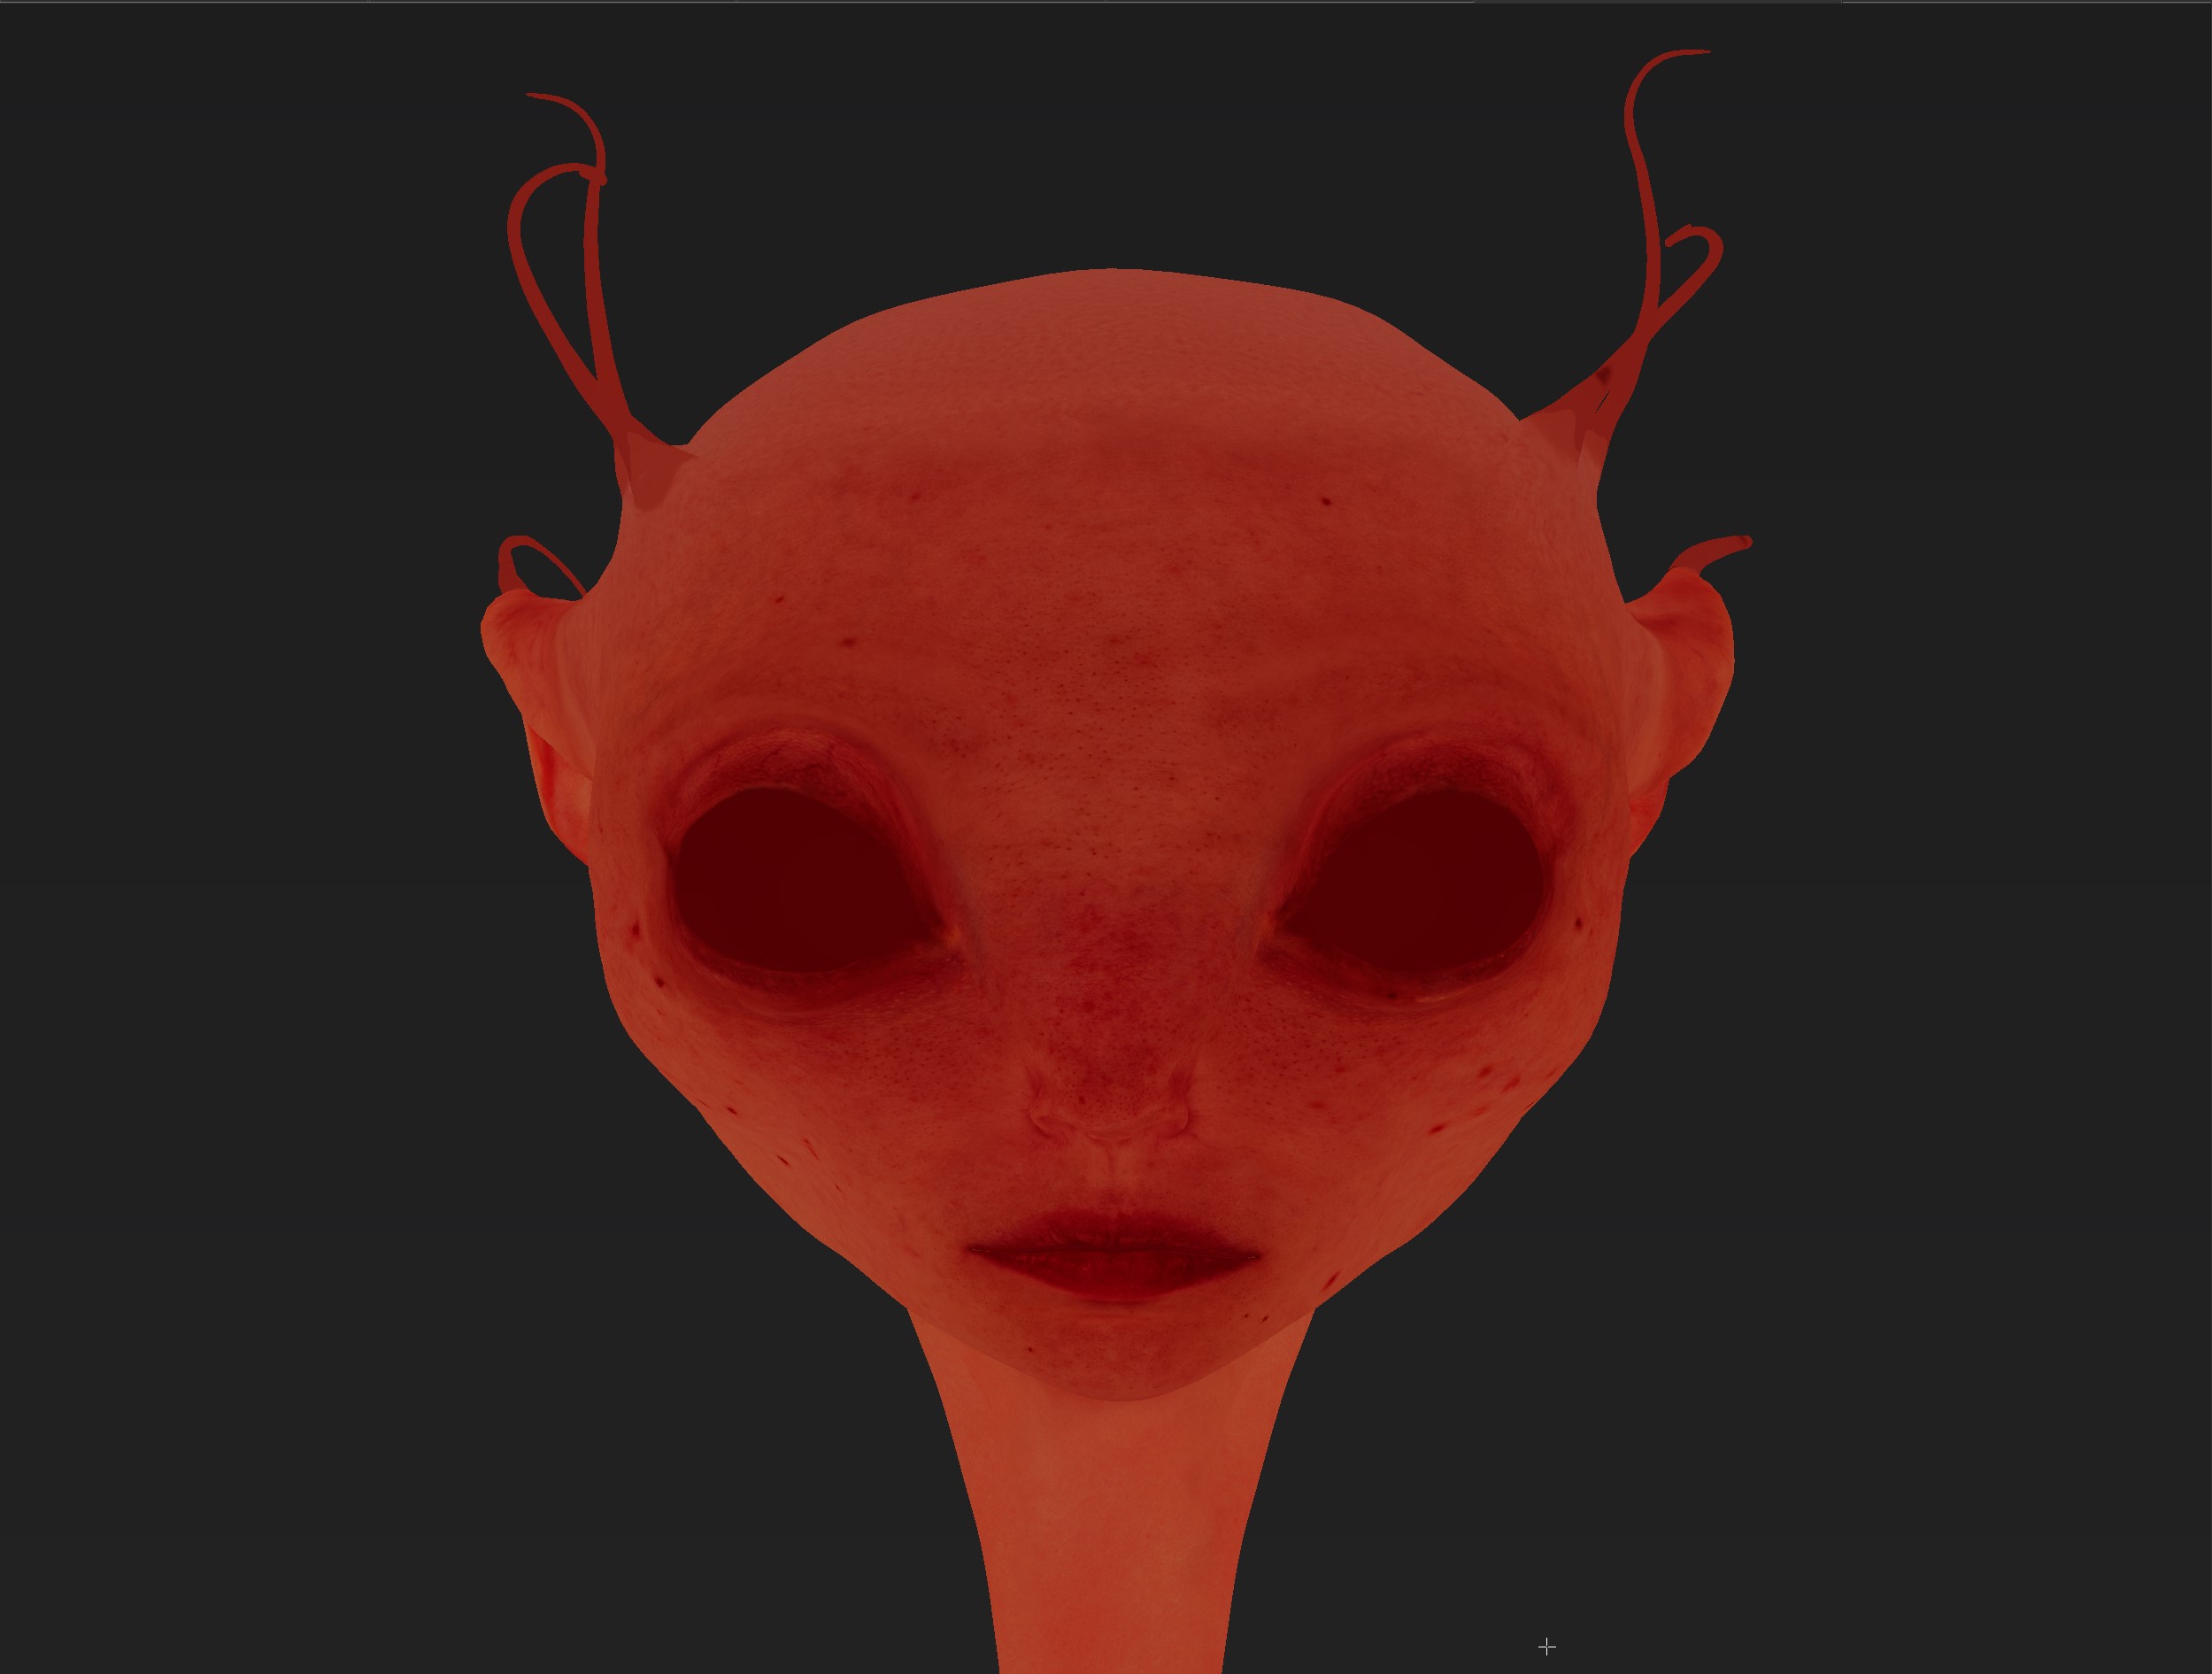
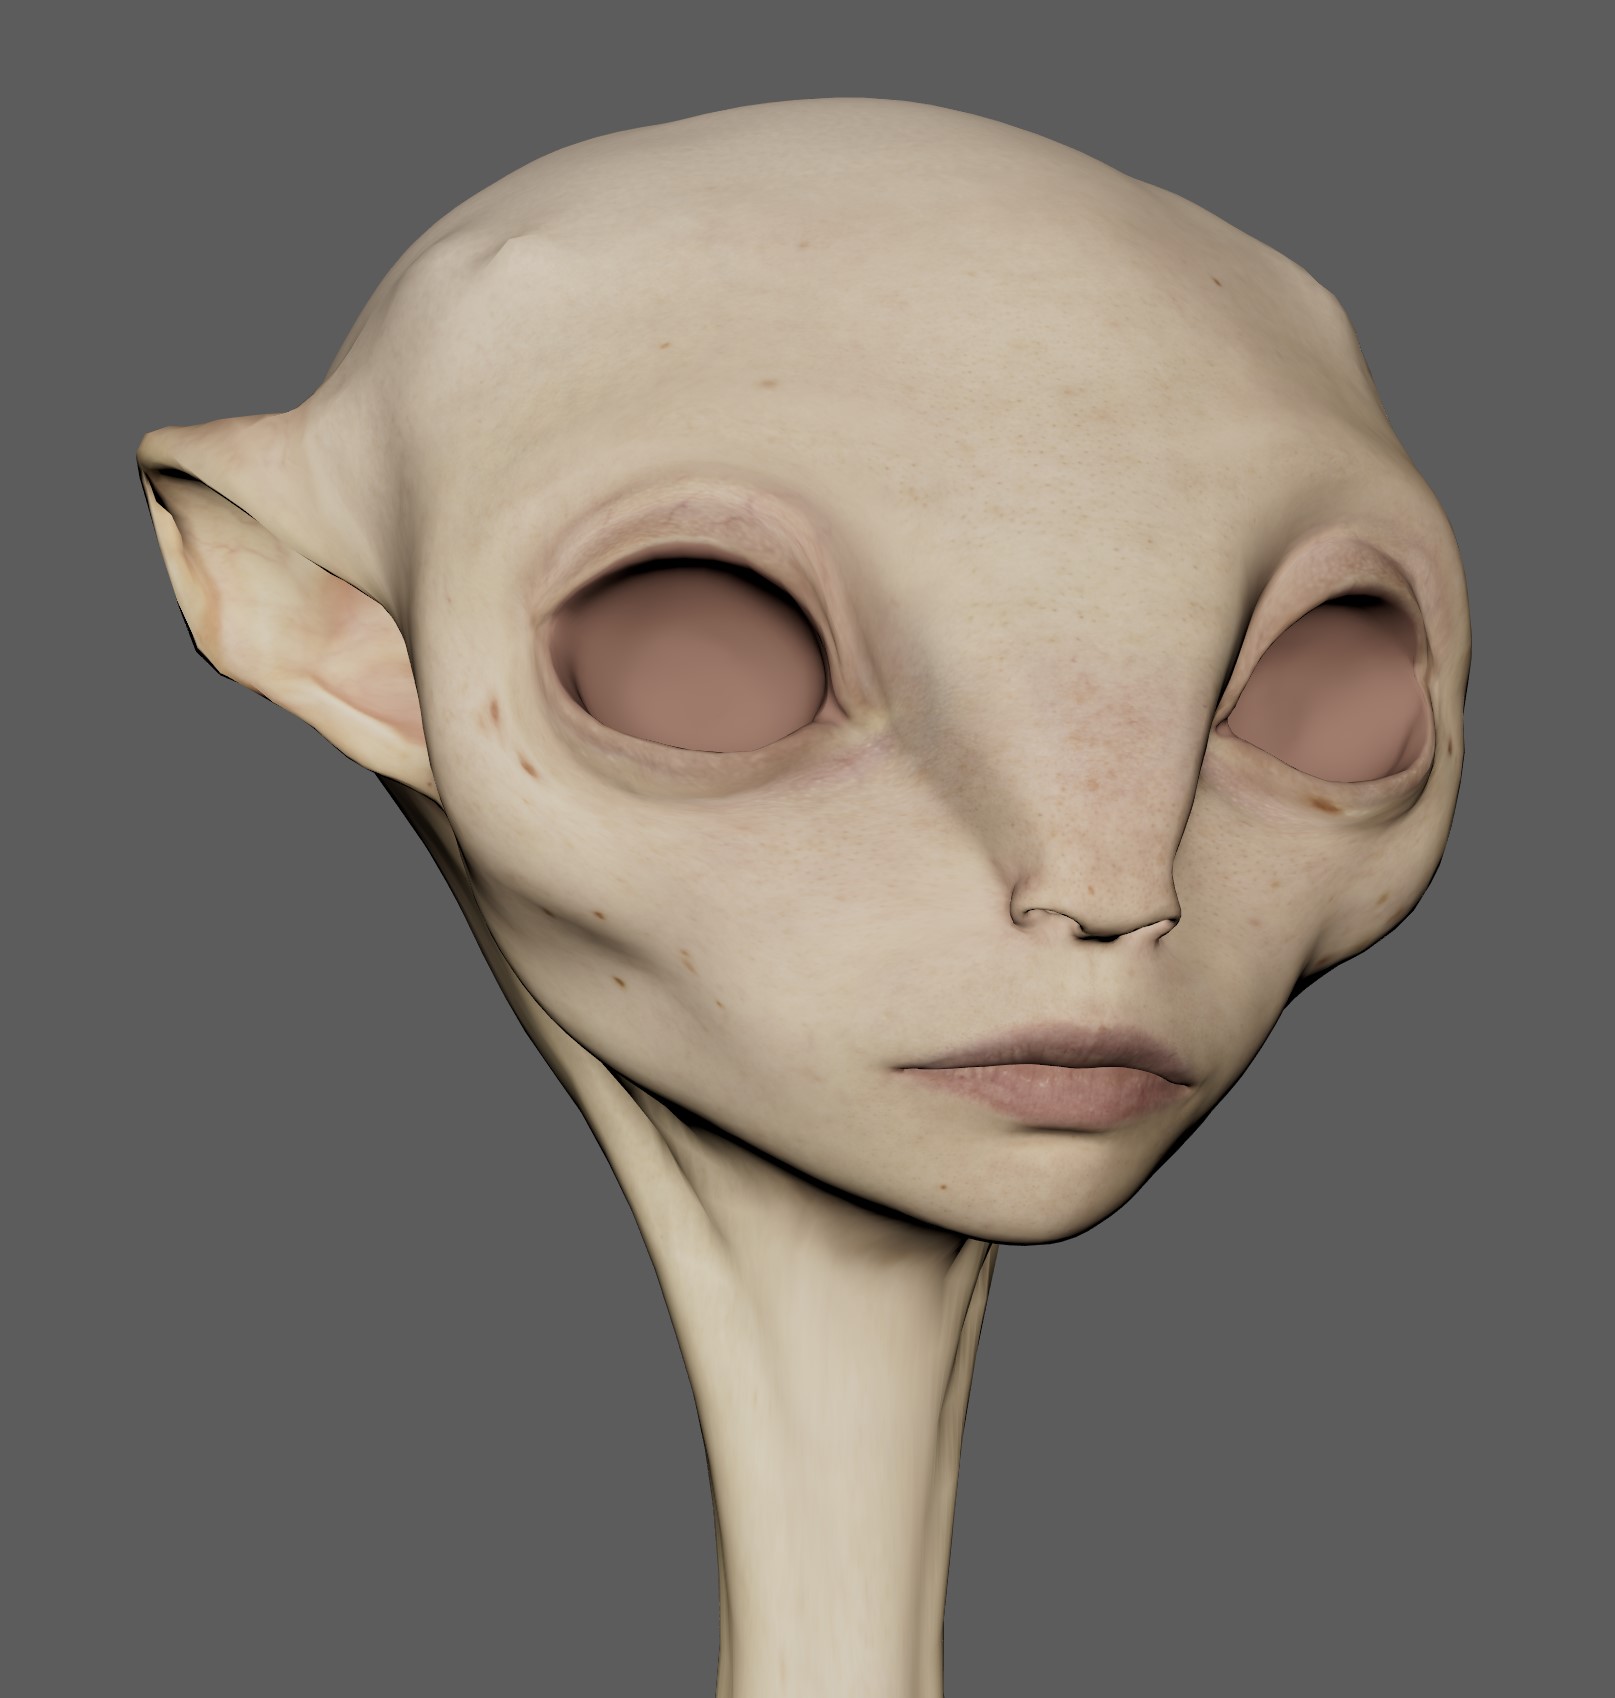
An enjoyable aspect of character design is hinting at the history of a species through anatomy. Her eyes, for instance are extremely large which indicates enhanced vision needed to see in the dark. She may be nocturnal or come from a planet with low light. She also has sensory tentacles on her head and large ears which are useful for low light environments. Her eyes are front facing which is common on carnivorous or omnivorous animals that need to hunt or track prey.
Her anatomy is also an indicator of intelligence. Having a large cranium, smaller teeth and a less powerful jaw all make it likely that her species survives using intellect rather than brute force.
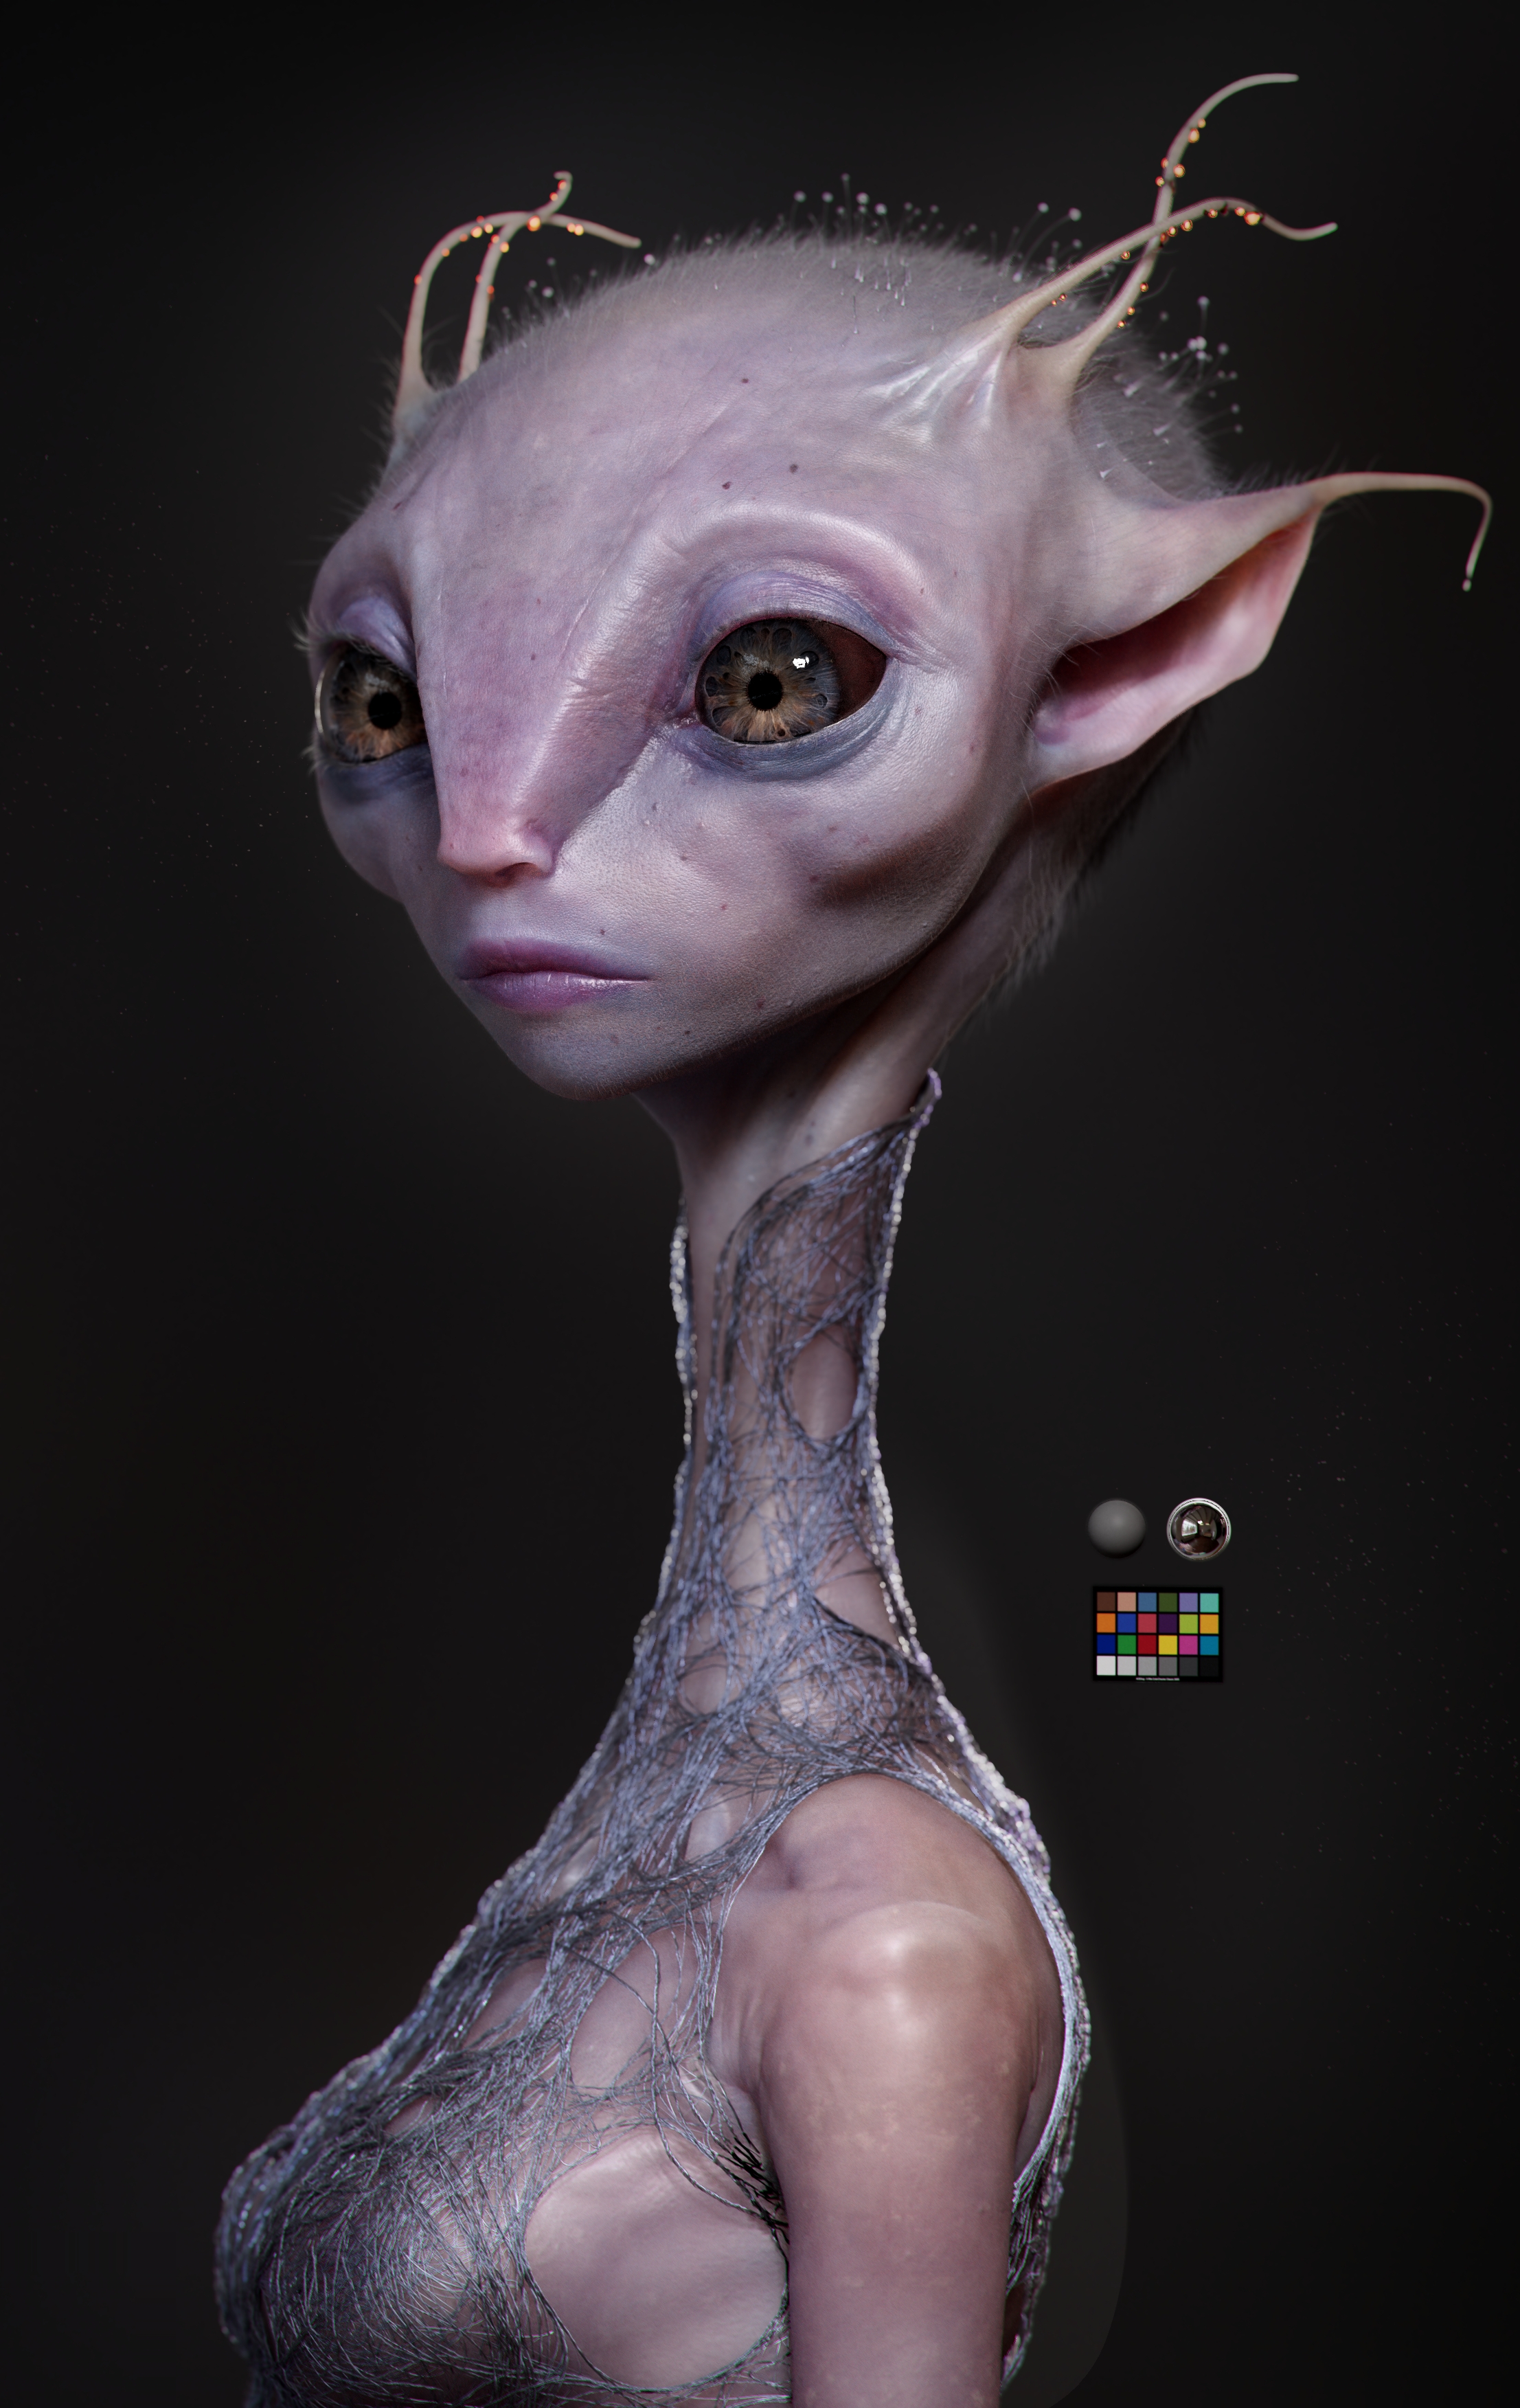
Kyka is about 4ft tall but the length of her neck and her elongated proportions mean that her species has been accustomed to low gravity and likely space faring for thousands of years. She also has a very elegant costume made of advanced material. Her people likely have a complex society with art, music and science but they’re comfortable enough not to flaunt their technology.
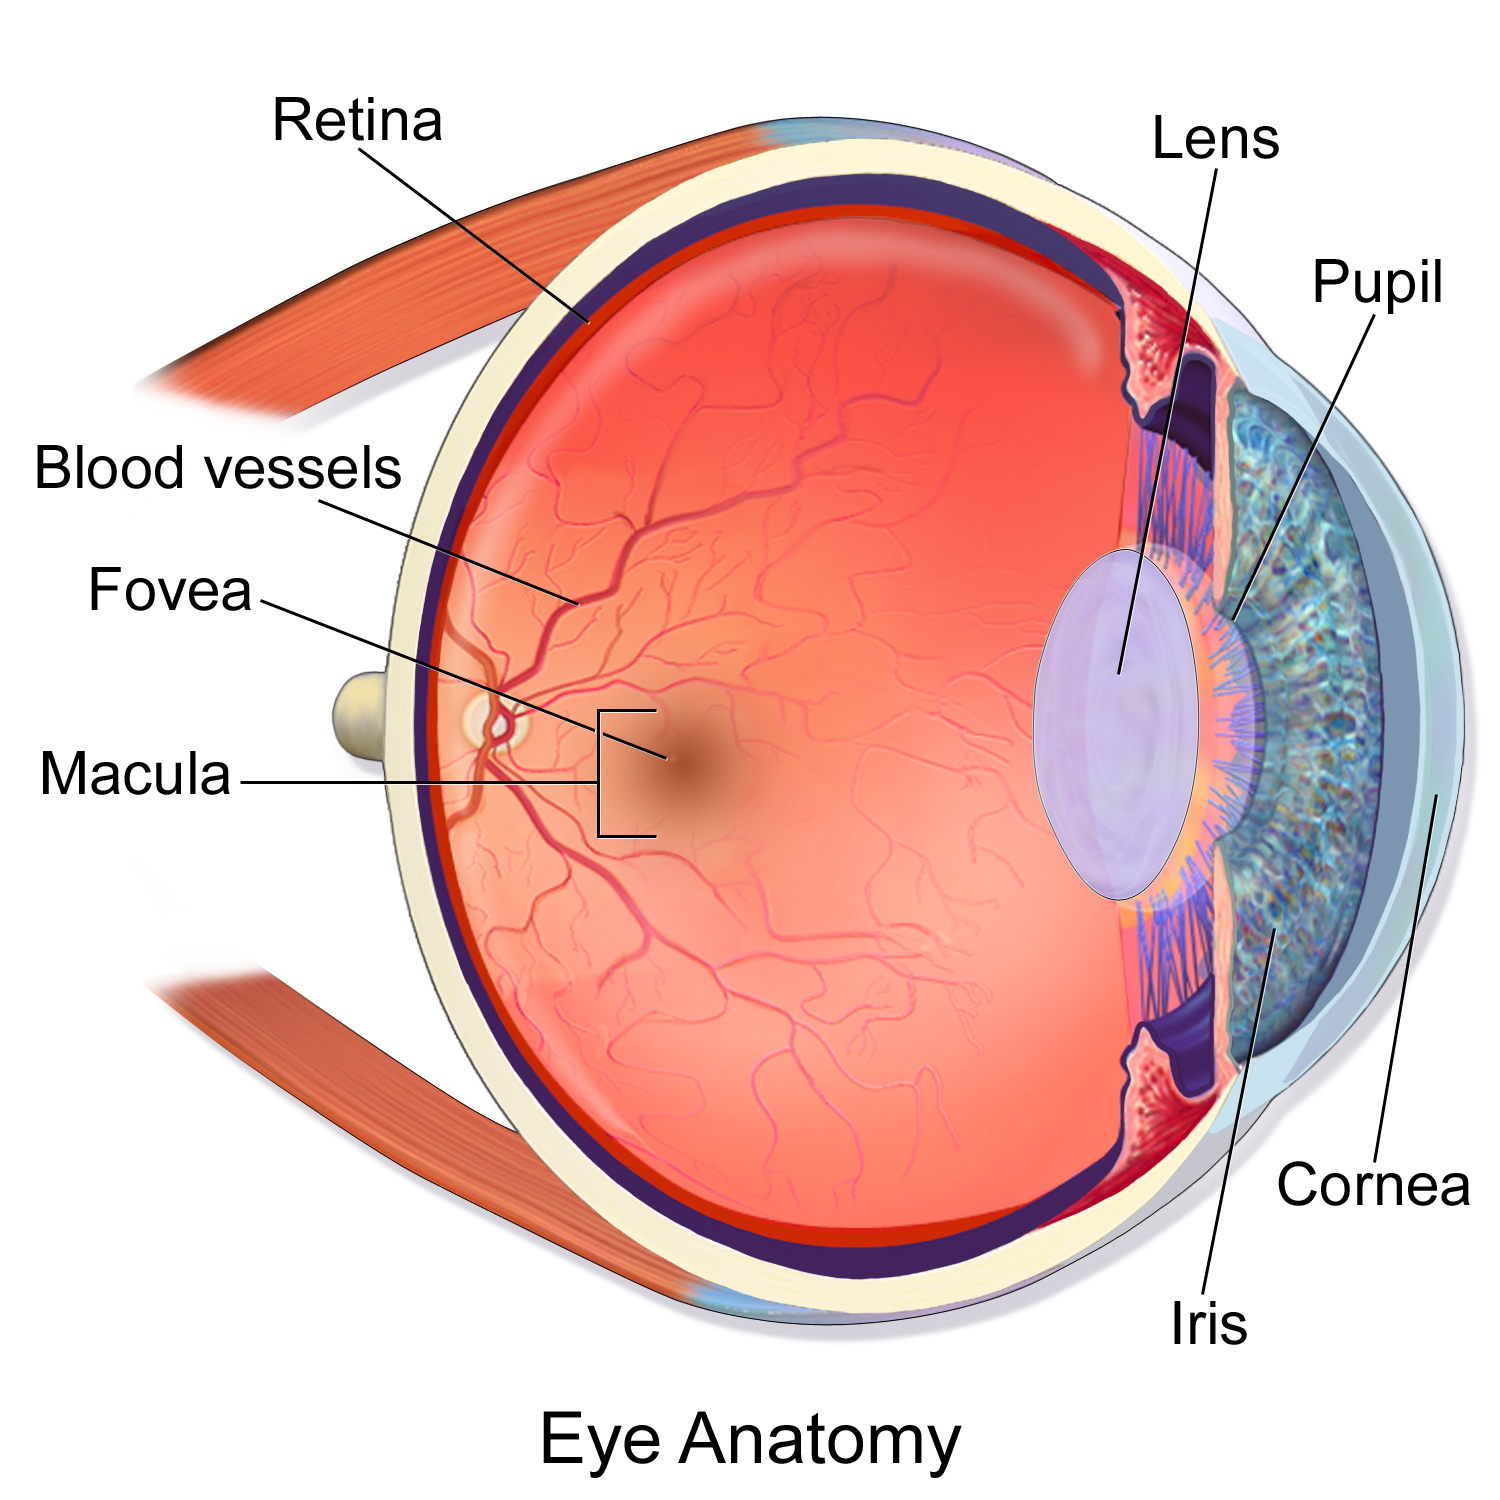
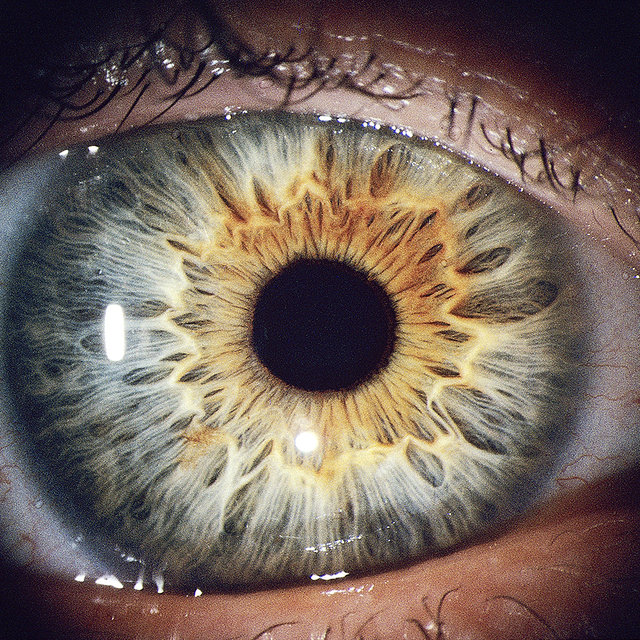
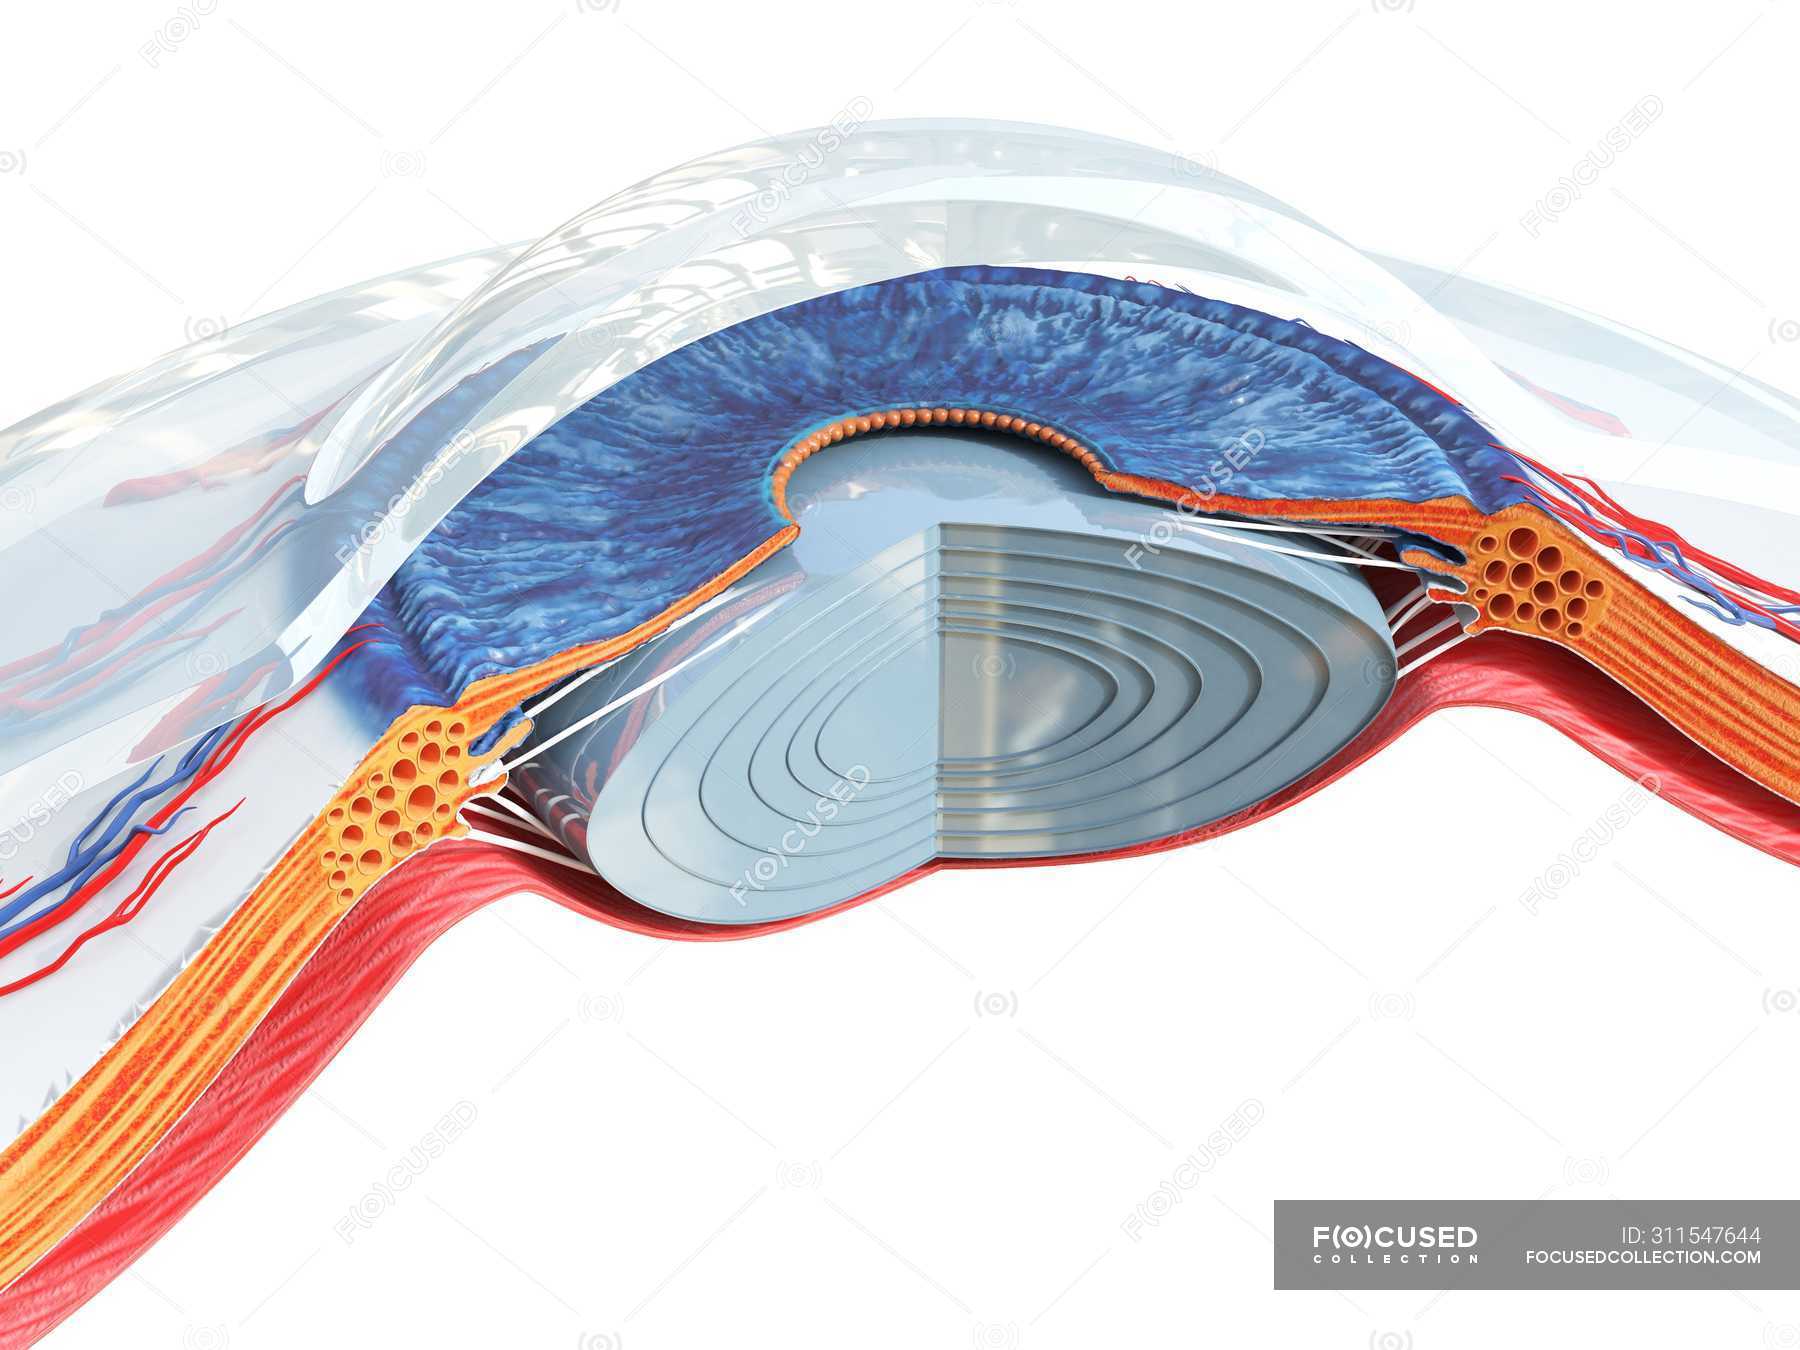
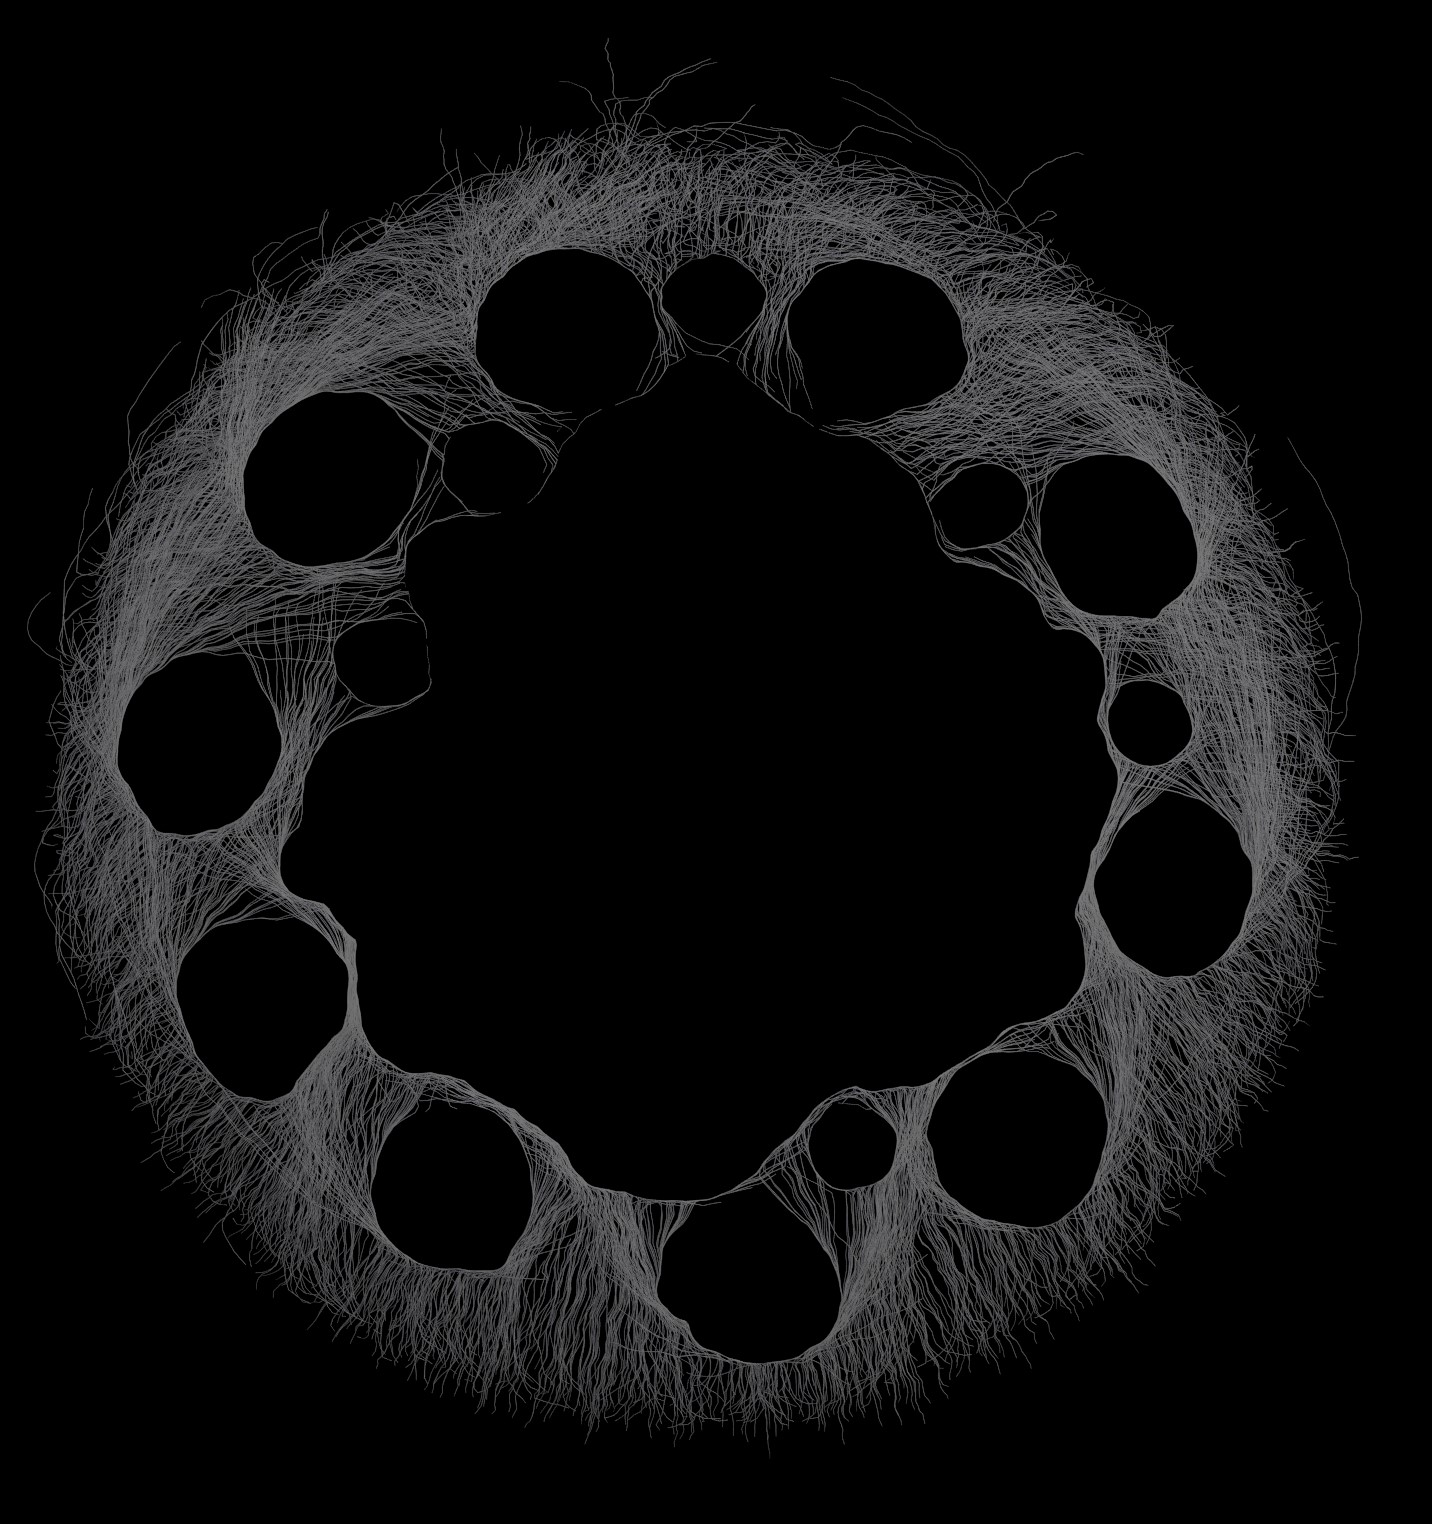
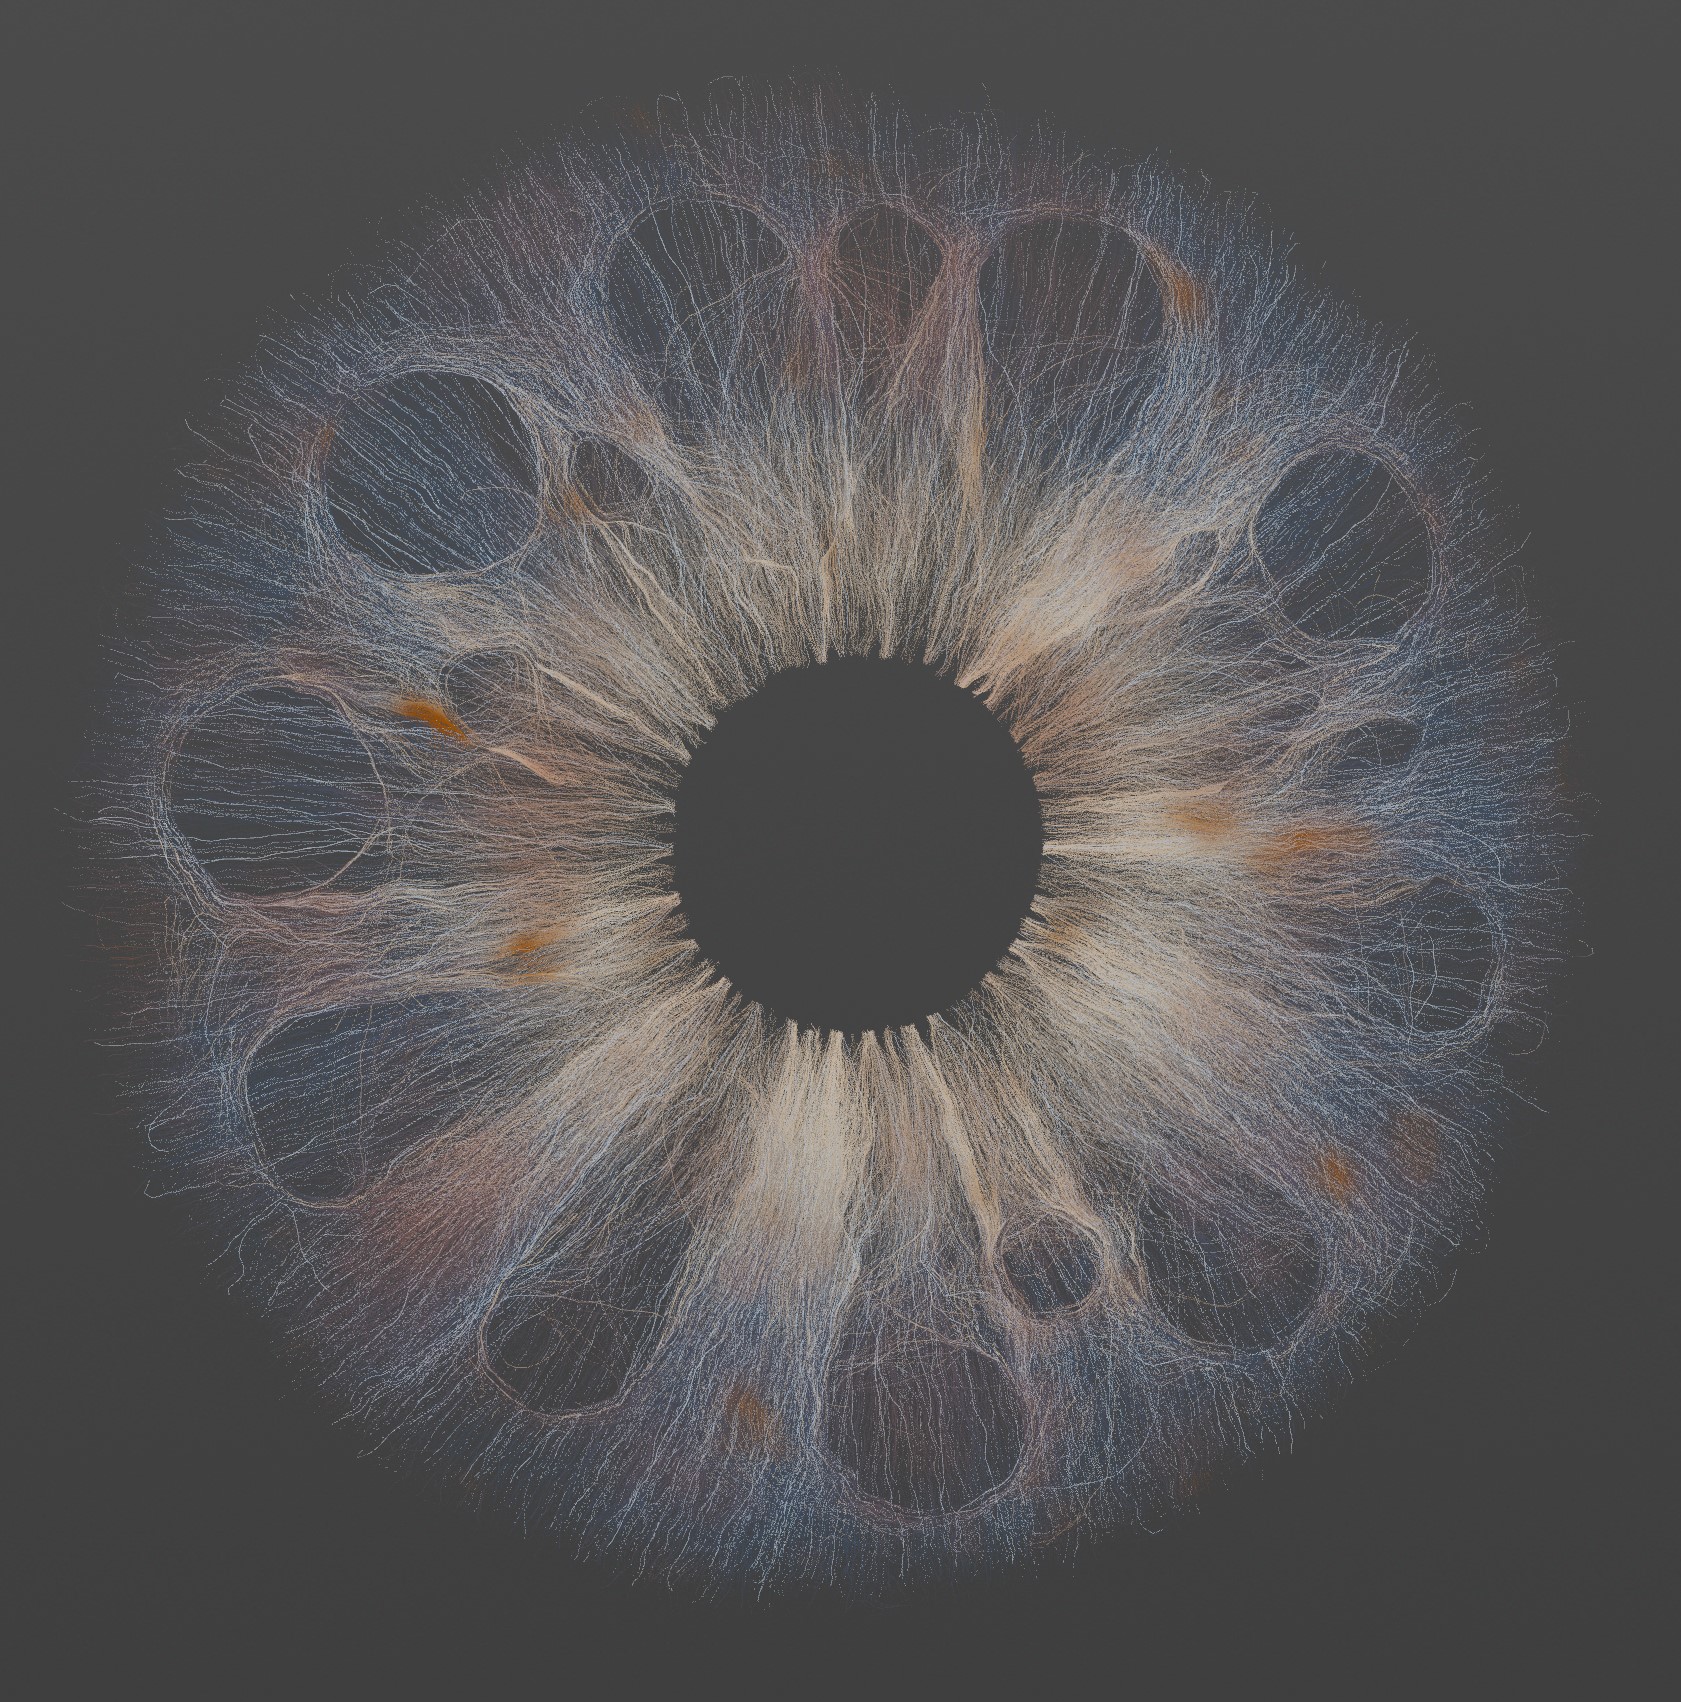
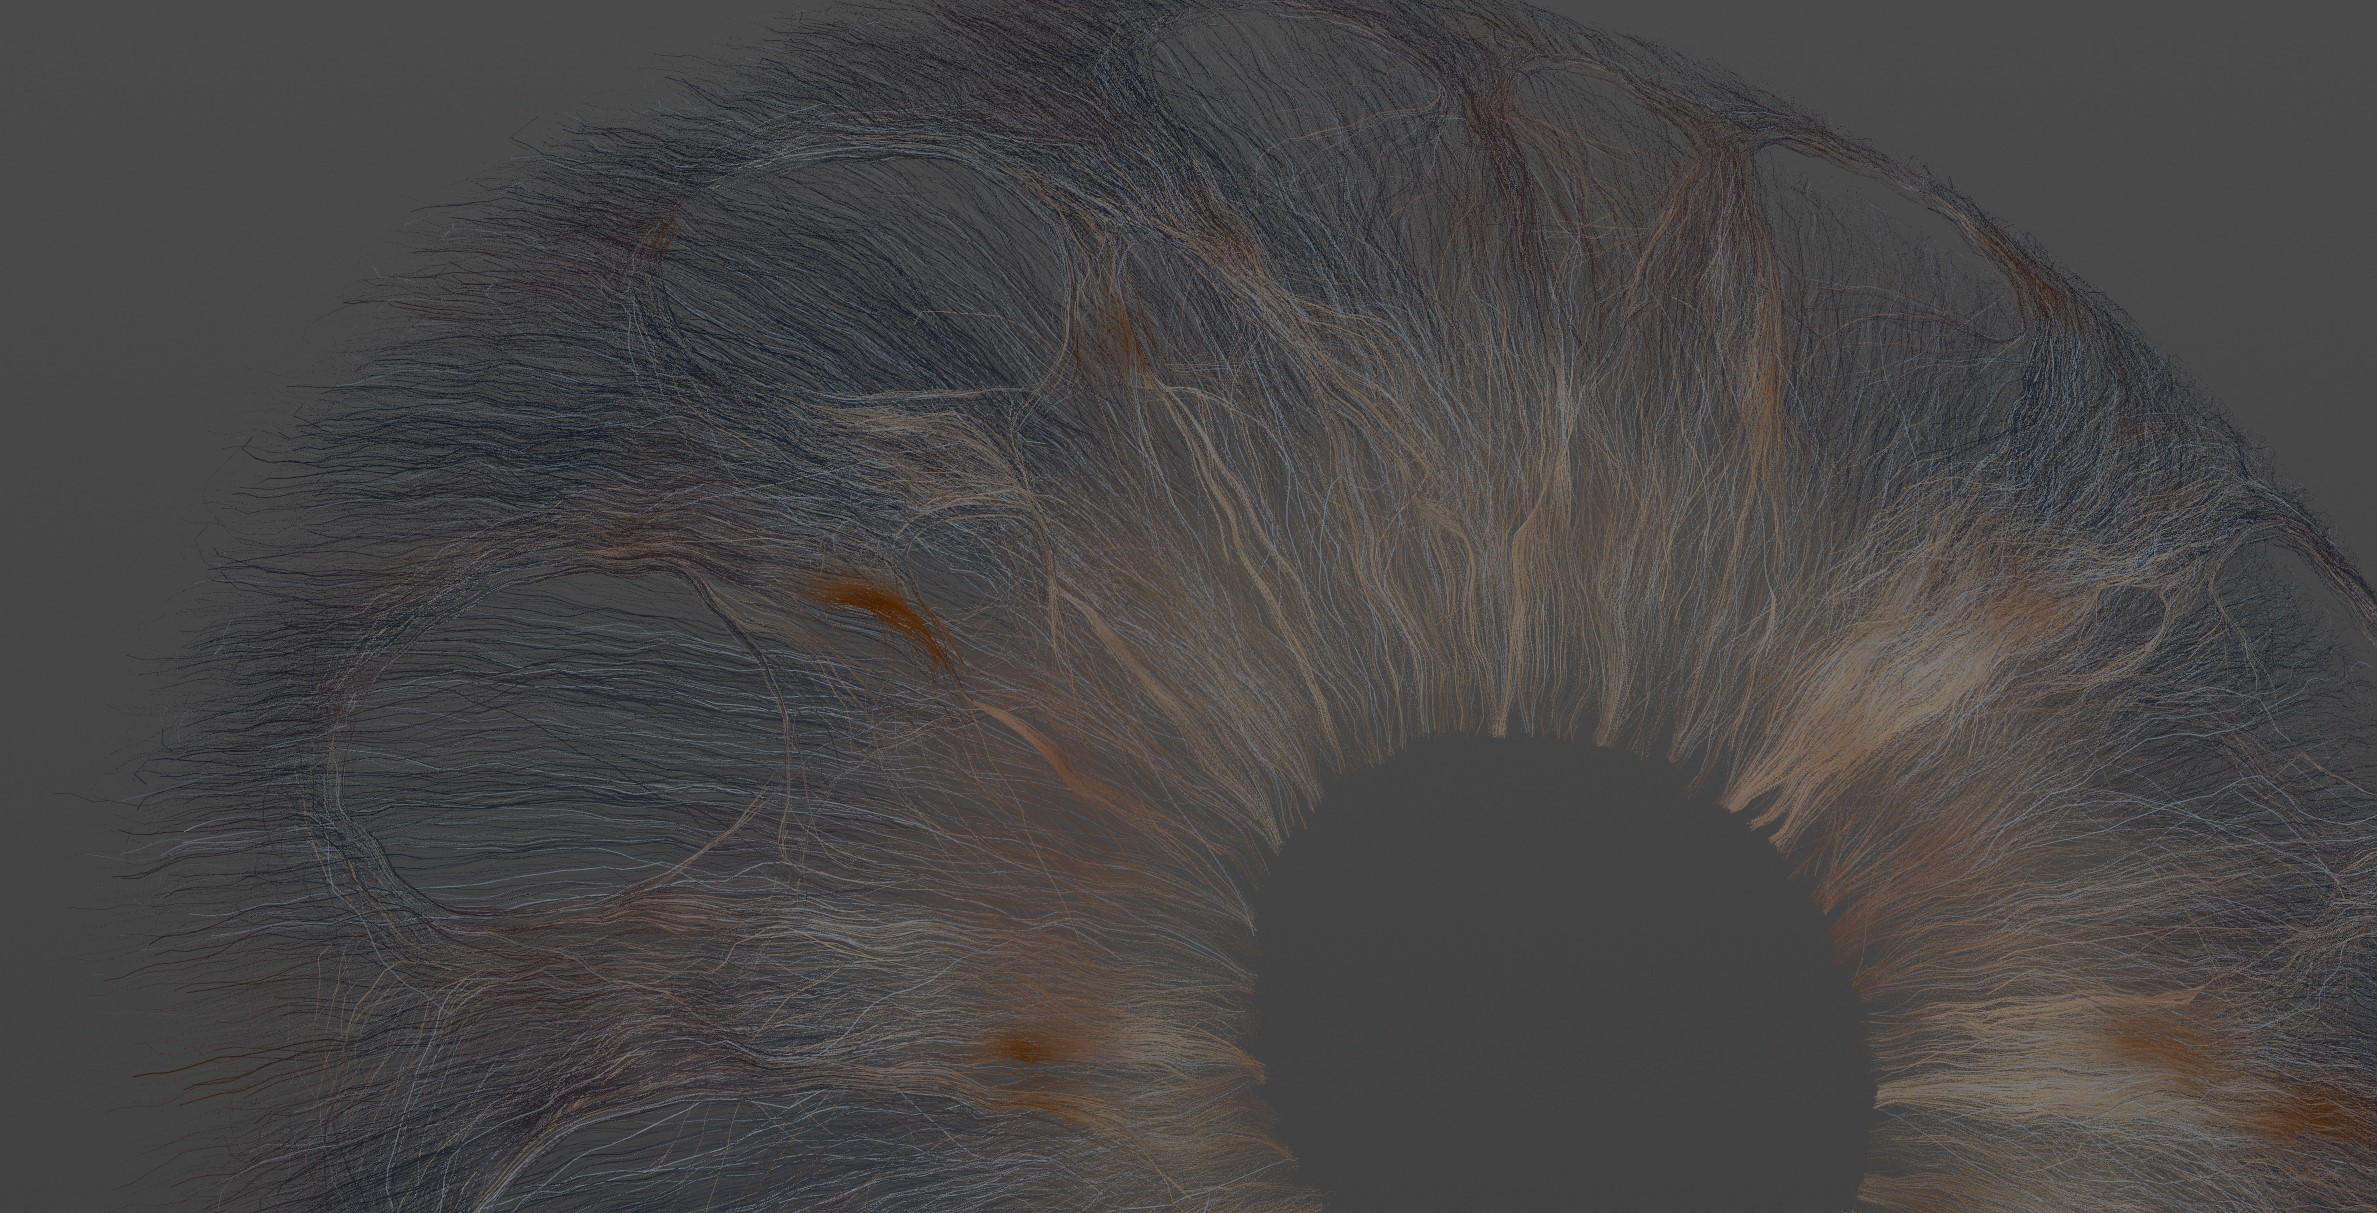
Eyes
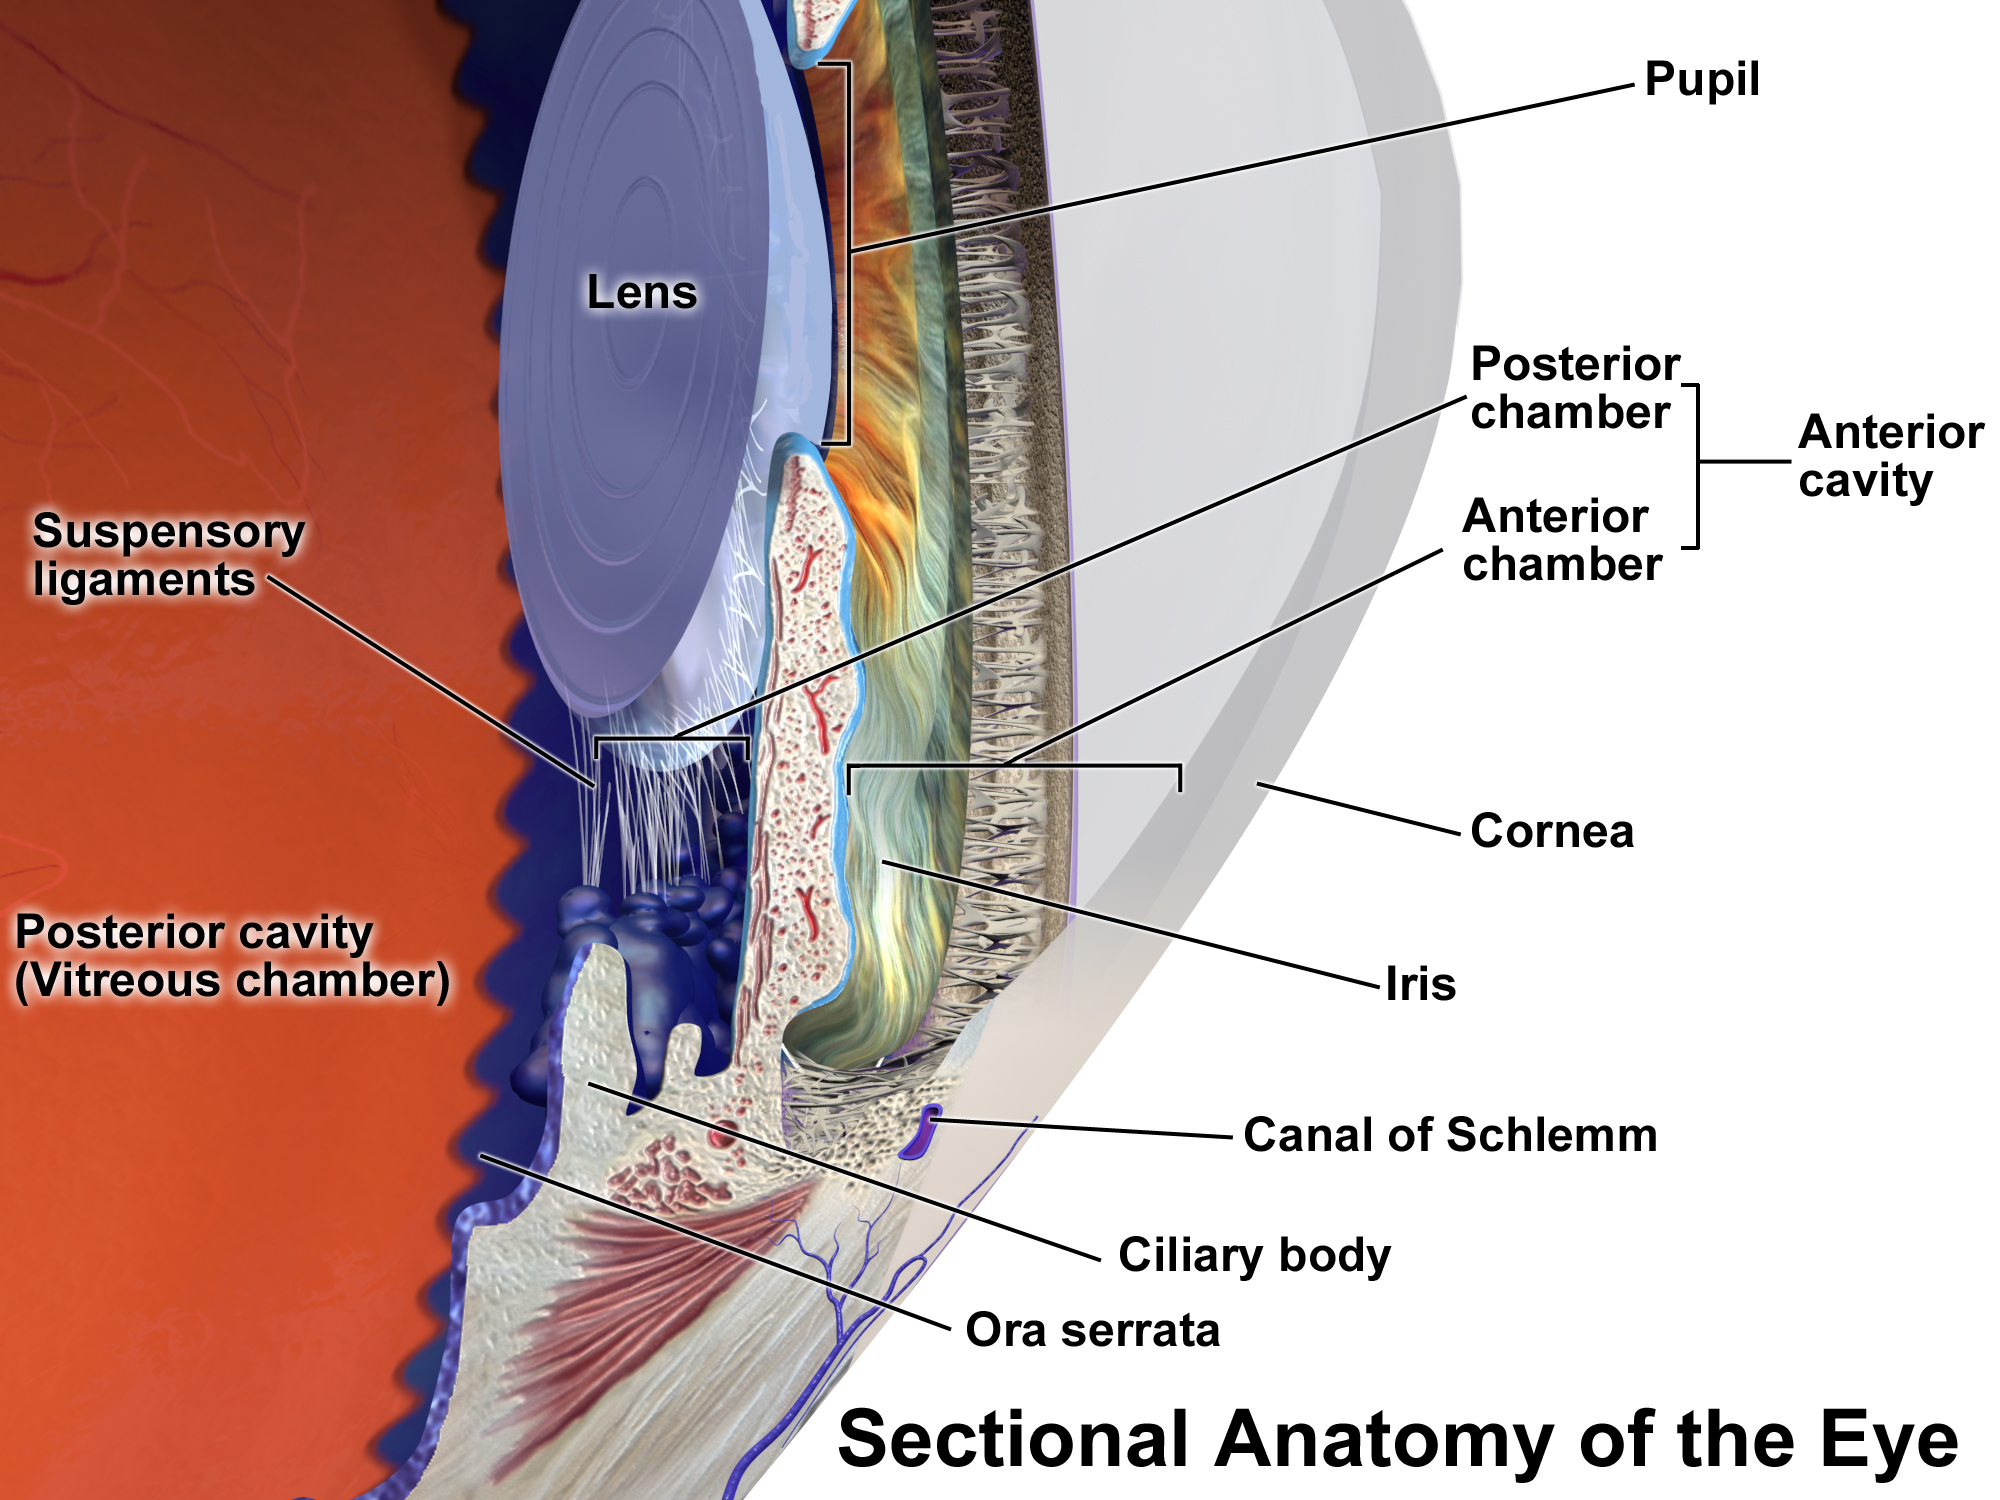
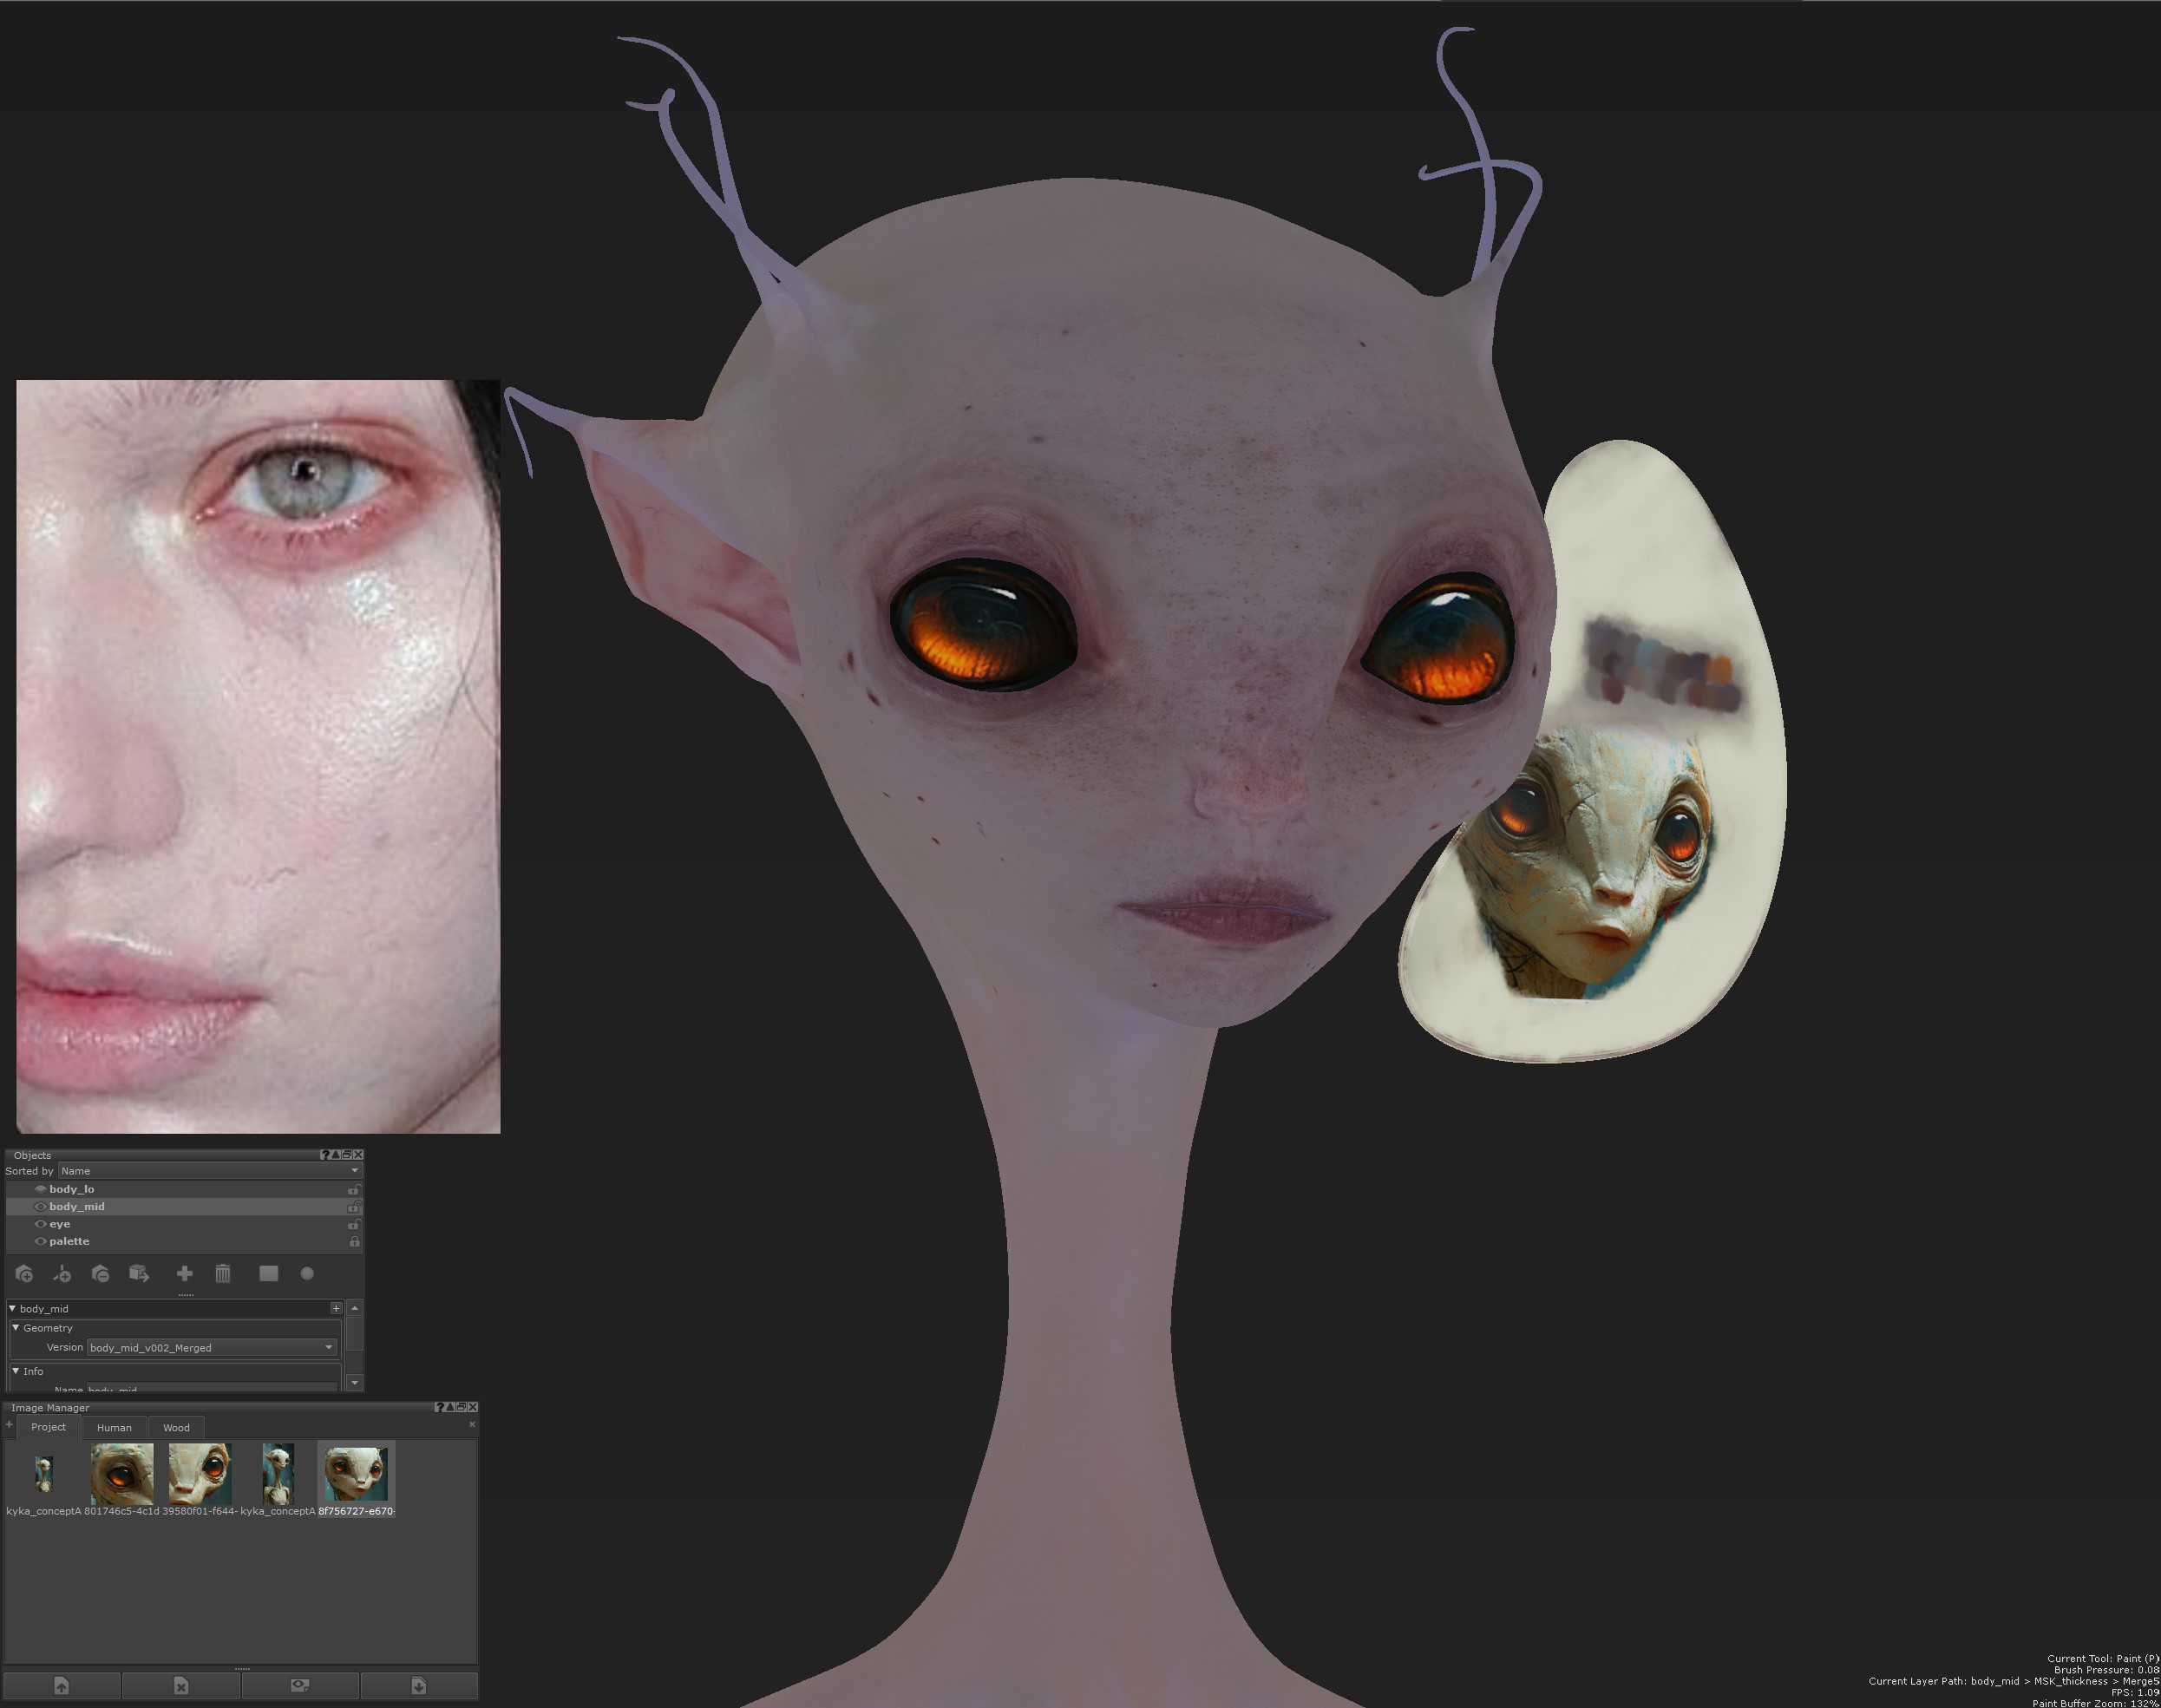
Kyka has very large, expressive eyes so I wanted to really push the quality and boundaries of what we can do in 3d. Usually eyes in VFX are made of fairly simple geometry and then textured to mimic the look of an iris. Sometimes this is enhanced by sculpting in zbrush but this still produces a solid shell with a surface, rather than a complex network of muscle fibers with space between them. In reality there’s much more depth and structure to the eye so I wanted to find a way to more accurately represent that.
For Godzilla I began researching a technique to “grow” an iris in Houdini using a particle simulation. I wasn’t able to complete the desired look for that film but I wanted to revisit and try again for this character.
The iris was colored in Houdini using procedural techniques to create the Cd attribute. This was then passed to RenderMan in lookdev to create the final shading.

Model
Blocking
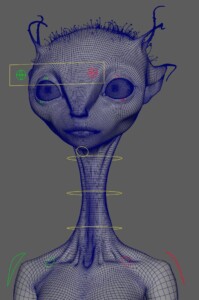
The initial modeling is a very important stage because it defines much of what we see in the final renders. The blocking was done in both maya and zbrush, first establishing scale and proportion and then matching the facial features.
One useful technique is to mask out polygroups in zbrush and then keep these in zremesher. This allows us to assign materials to different areas of the model in maya.
Preparing for Detail
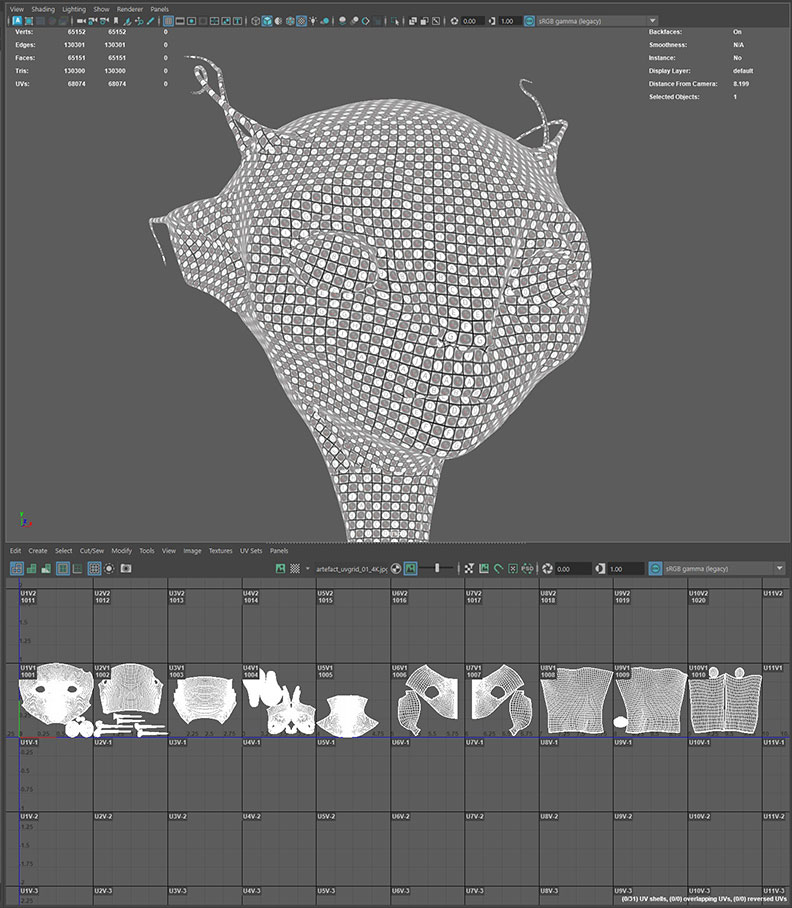
Once the general shape and proportions are established we can work on retopology using quad draw in maya. It’s also good to do the UV layout at this point before going back to zbrush for detail sculpting
Sculpt
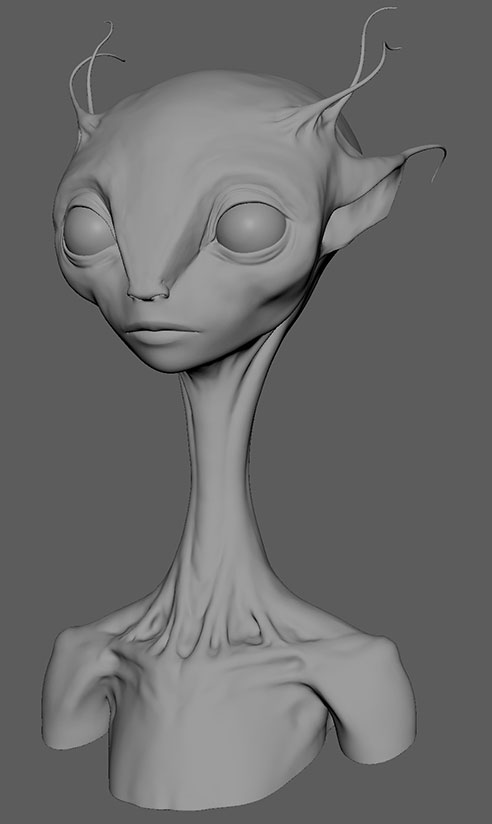
Once we have our organized topology and uvs we can start the detail sculpt in Zbrush. This can bring a lot of realism to the character by disrupting the very smooth, CG shapes and adding organic detail.
We’re mostly concerned with the primary (large) and secondary (medium) details during the sculpt phase. The smaller tertiary details are handled by Symbiote so we just need to hint at pores, wrinkles and the directionality or flow of the skin.
The technique is very simple and it’s best to use only a handful of brushes, the most important of which is clay buildup. This adds a really nice organic feel to the surface which should be smoothed carefully so it’s not lost.
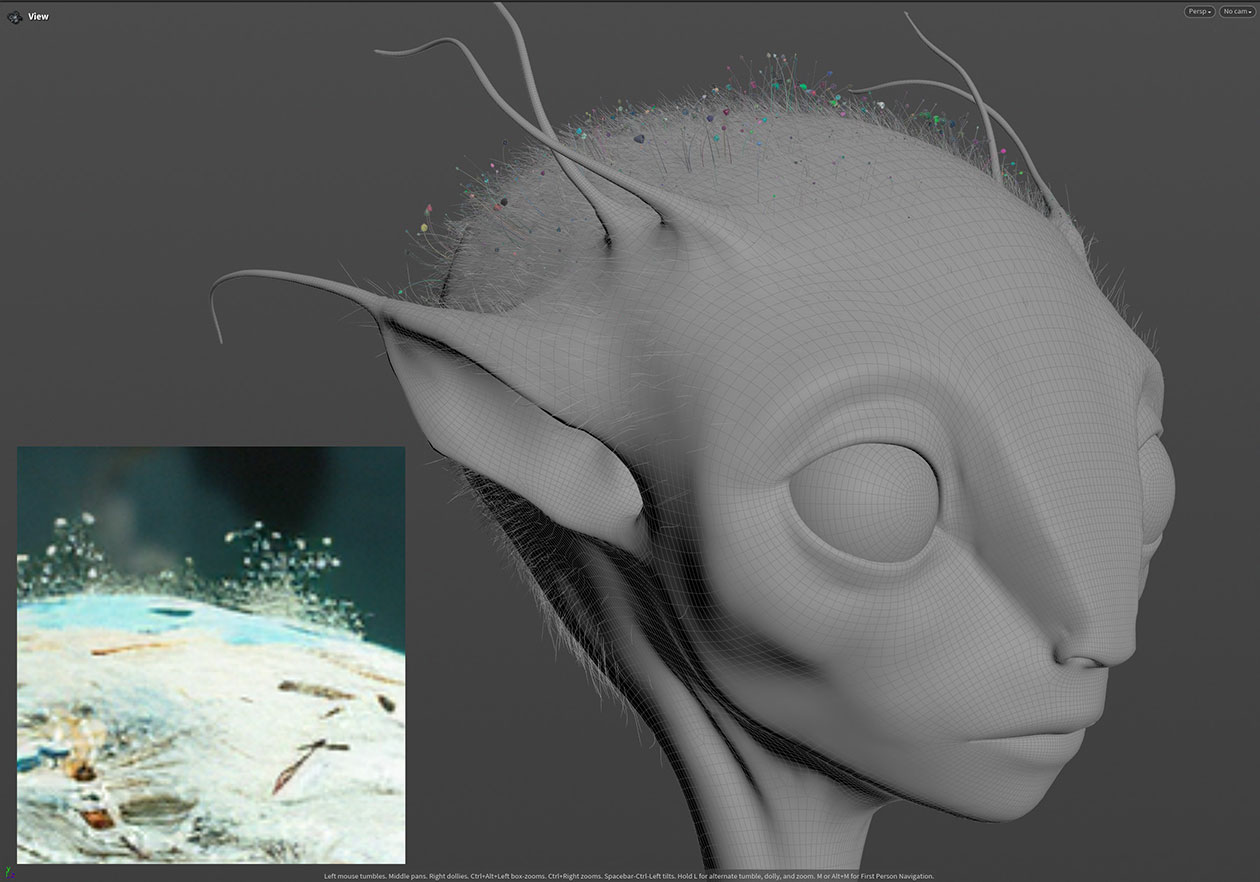
Procedural Modeling
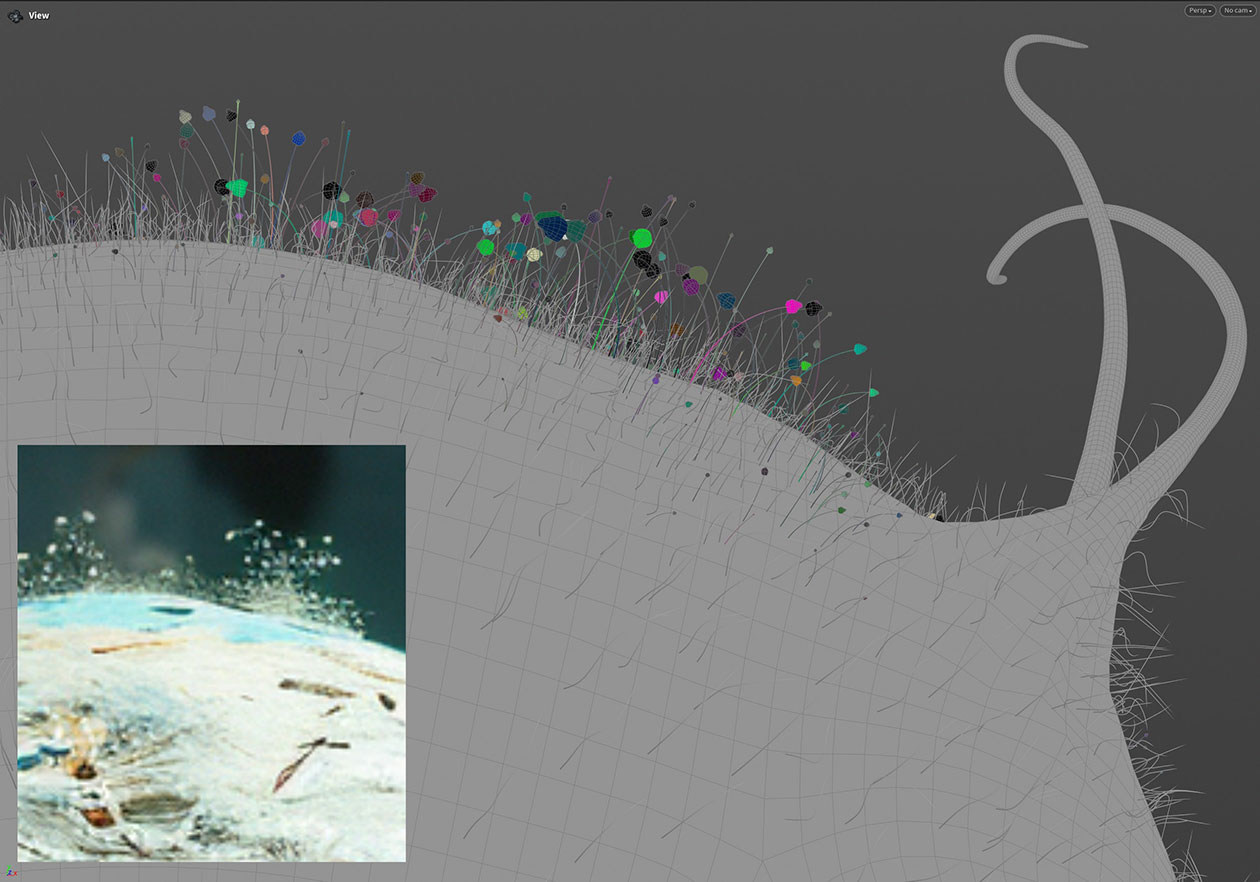
I love using Houdini to add detail to character designs and Kyka gave me the opportunity to scatter some cool procedural elements. Part of her design is a symbiotic fungus that grows on her head. This would be a valued part of her appearance that she would maintain similarly to human hair. She also exudes a very hard, jewel like sap from her sensory tentacles which indicates age and social position

Texture
Texture as always is done in Mari. Substance painter has become popular in vfx but is not suitable for hero film quality characters such as this because it lacks projection tools and can’t handle hi-res maps. Also Mari is node based which is essential for organization and teamwork.
The blocking stage of texture is a very important first step. This involves baking out “mesh maps” which calculate values based on the shape of the geometry. Examples of this are ambient occlusion, cavity, thickness and curvature. These can be used as an aide to painting the initial blocking color map, which should broadly establish the color of the skin. This should be quite blurry at first and without detail.
For the detail stage we can utilize human texture photography as well as more abstract photographs which have sharp features. For Kyka i used a VFace from TexturingXYZ and a mix of other photo material. I also emphasized the different layers of skin which could be blended together in lookdev.

Costume
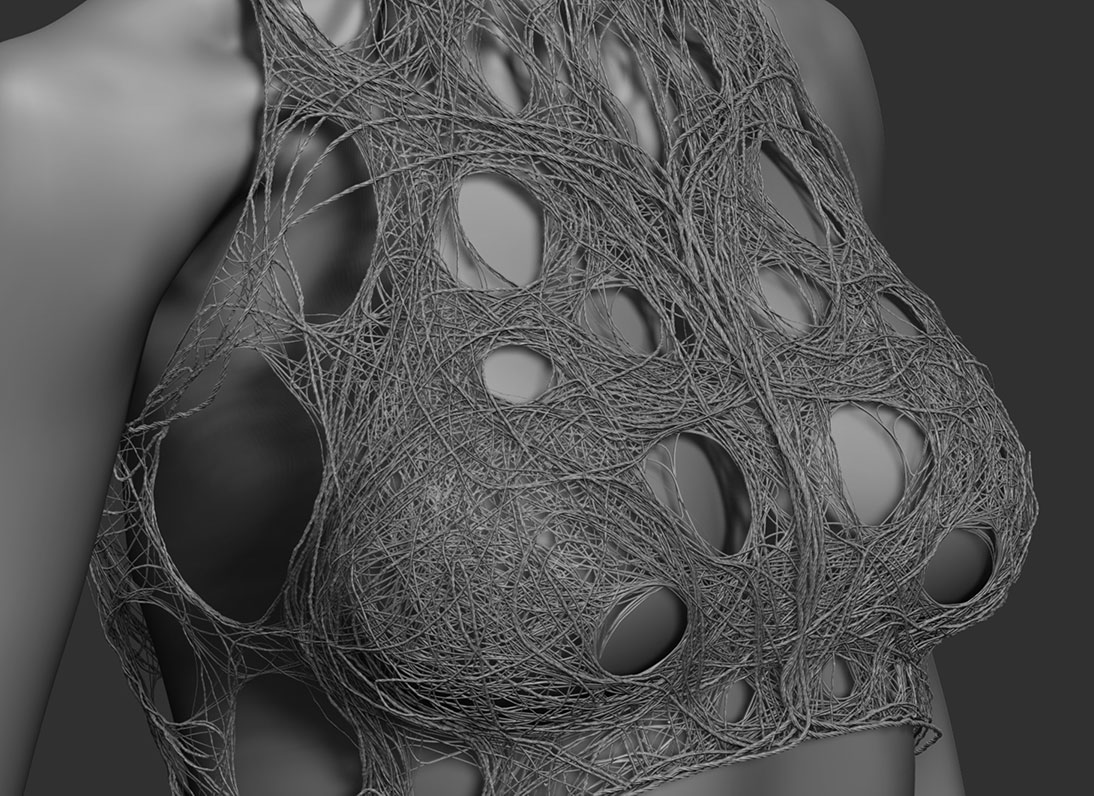
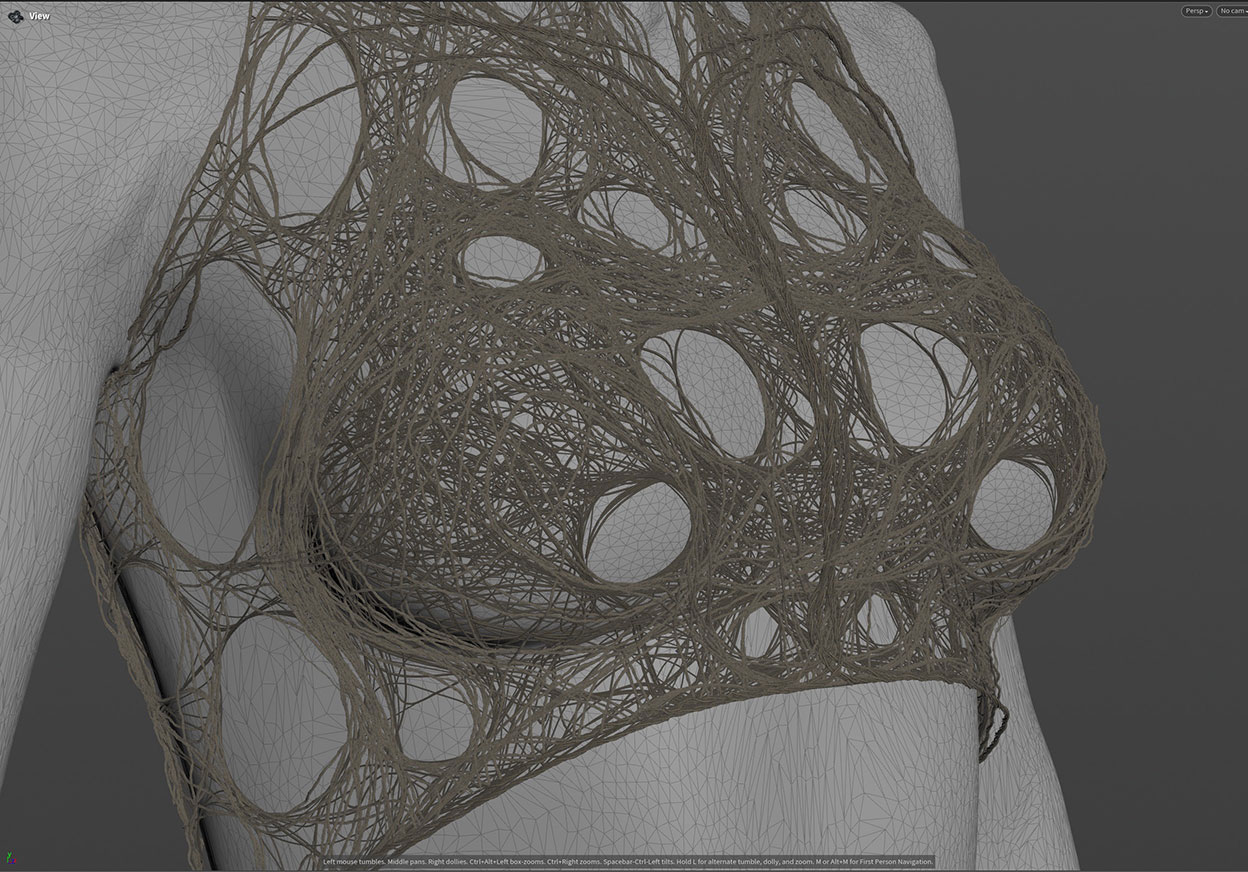
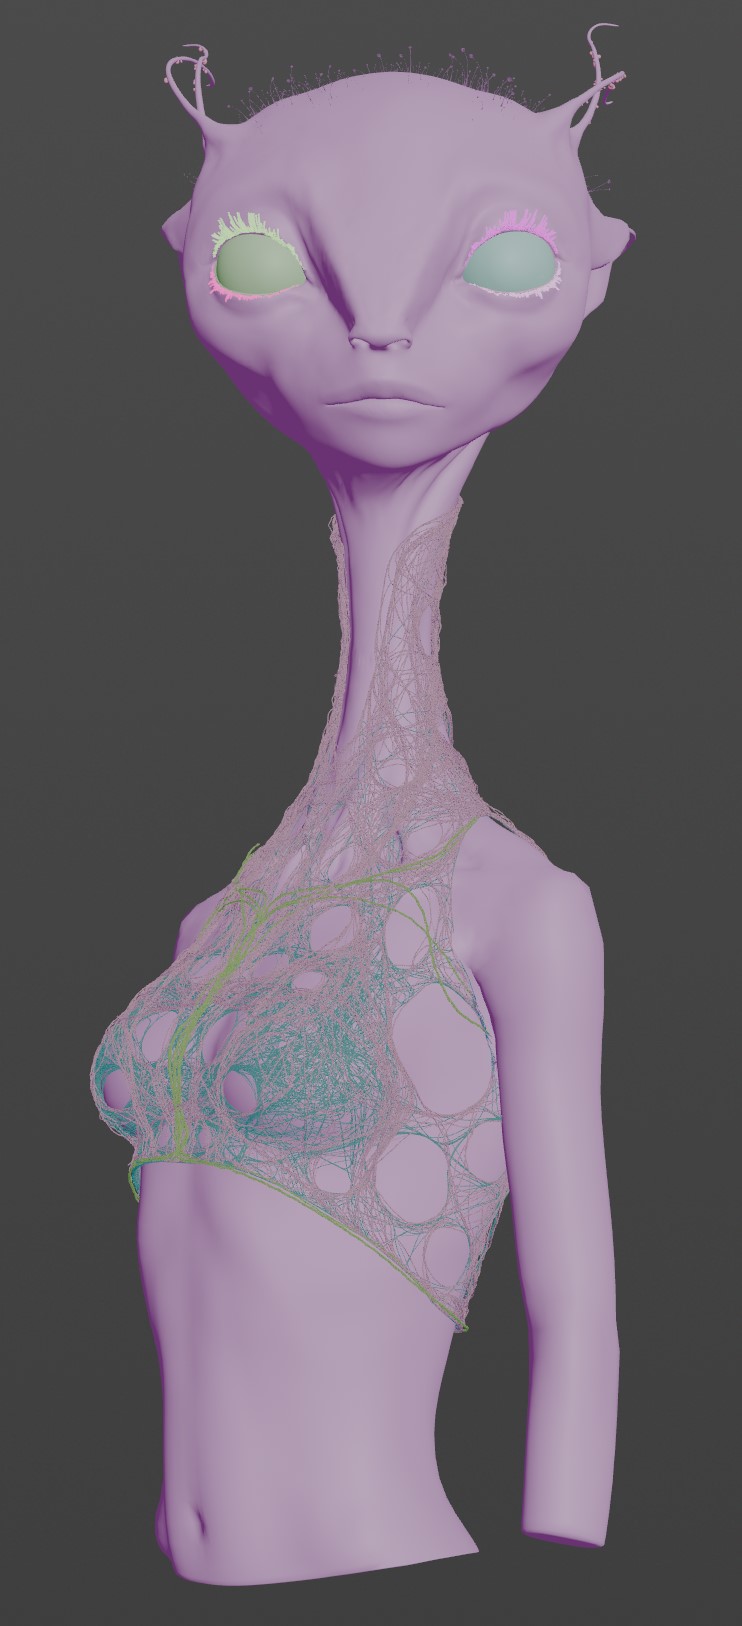
Initially Kyka was meant to be a bust only but I felt the need to emphasize her femininity more by adding part of her body and arms as well as a costume. The costume had to fit with her personality and became a nice way to indicate her species technology level and sophistication. The clothing was blocked out in Marvelous Designer and then brought to Houdini where I used a particle technique to “grow” the fabric on her body and create interesting shapes. I’ve included some reference and WIP images below.

Rig
When developing a creature or character it’s very important to create a pose for presentation. This adds life and realism and gets it out of the bind pose which tends to look very synthetic. The first step in this process is rigging and for Kyka I opted to create a simple rig from scratch in Maya. In production this would be separate from the final production rig created by the rigging department.
Posing and CFX
The rig was used to create a subtle pose in Maya which was then sent to Houdini for a CFX pass. This aligns any non-rigged elements such as the groom and clothing to the posed body shape.

Lookdev
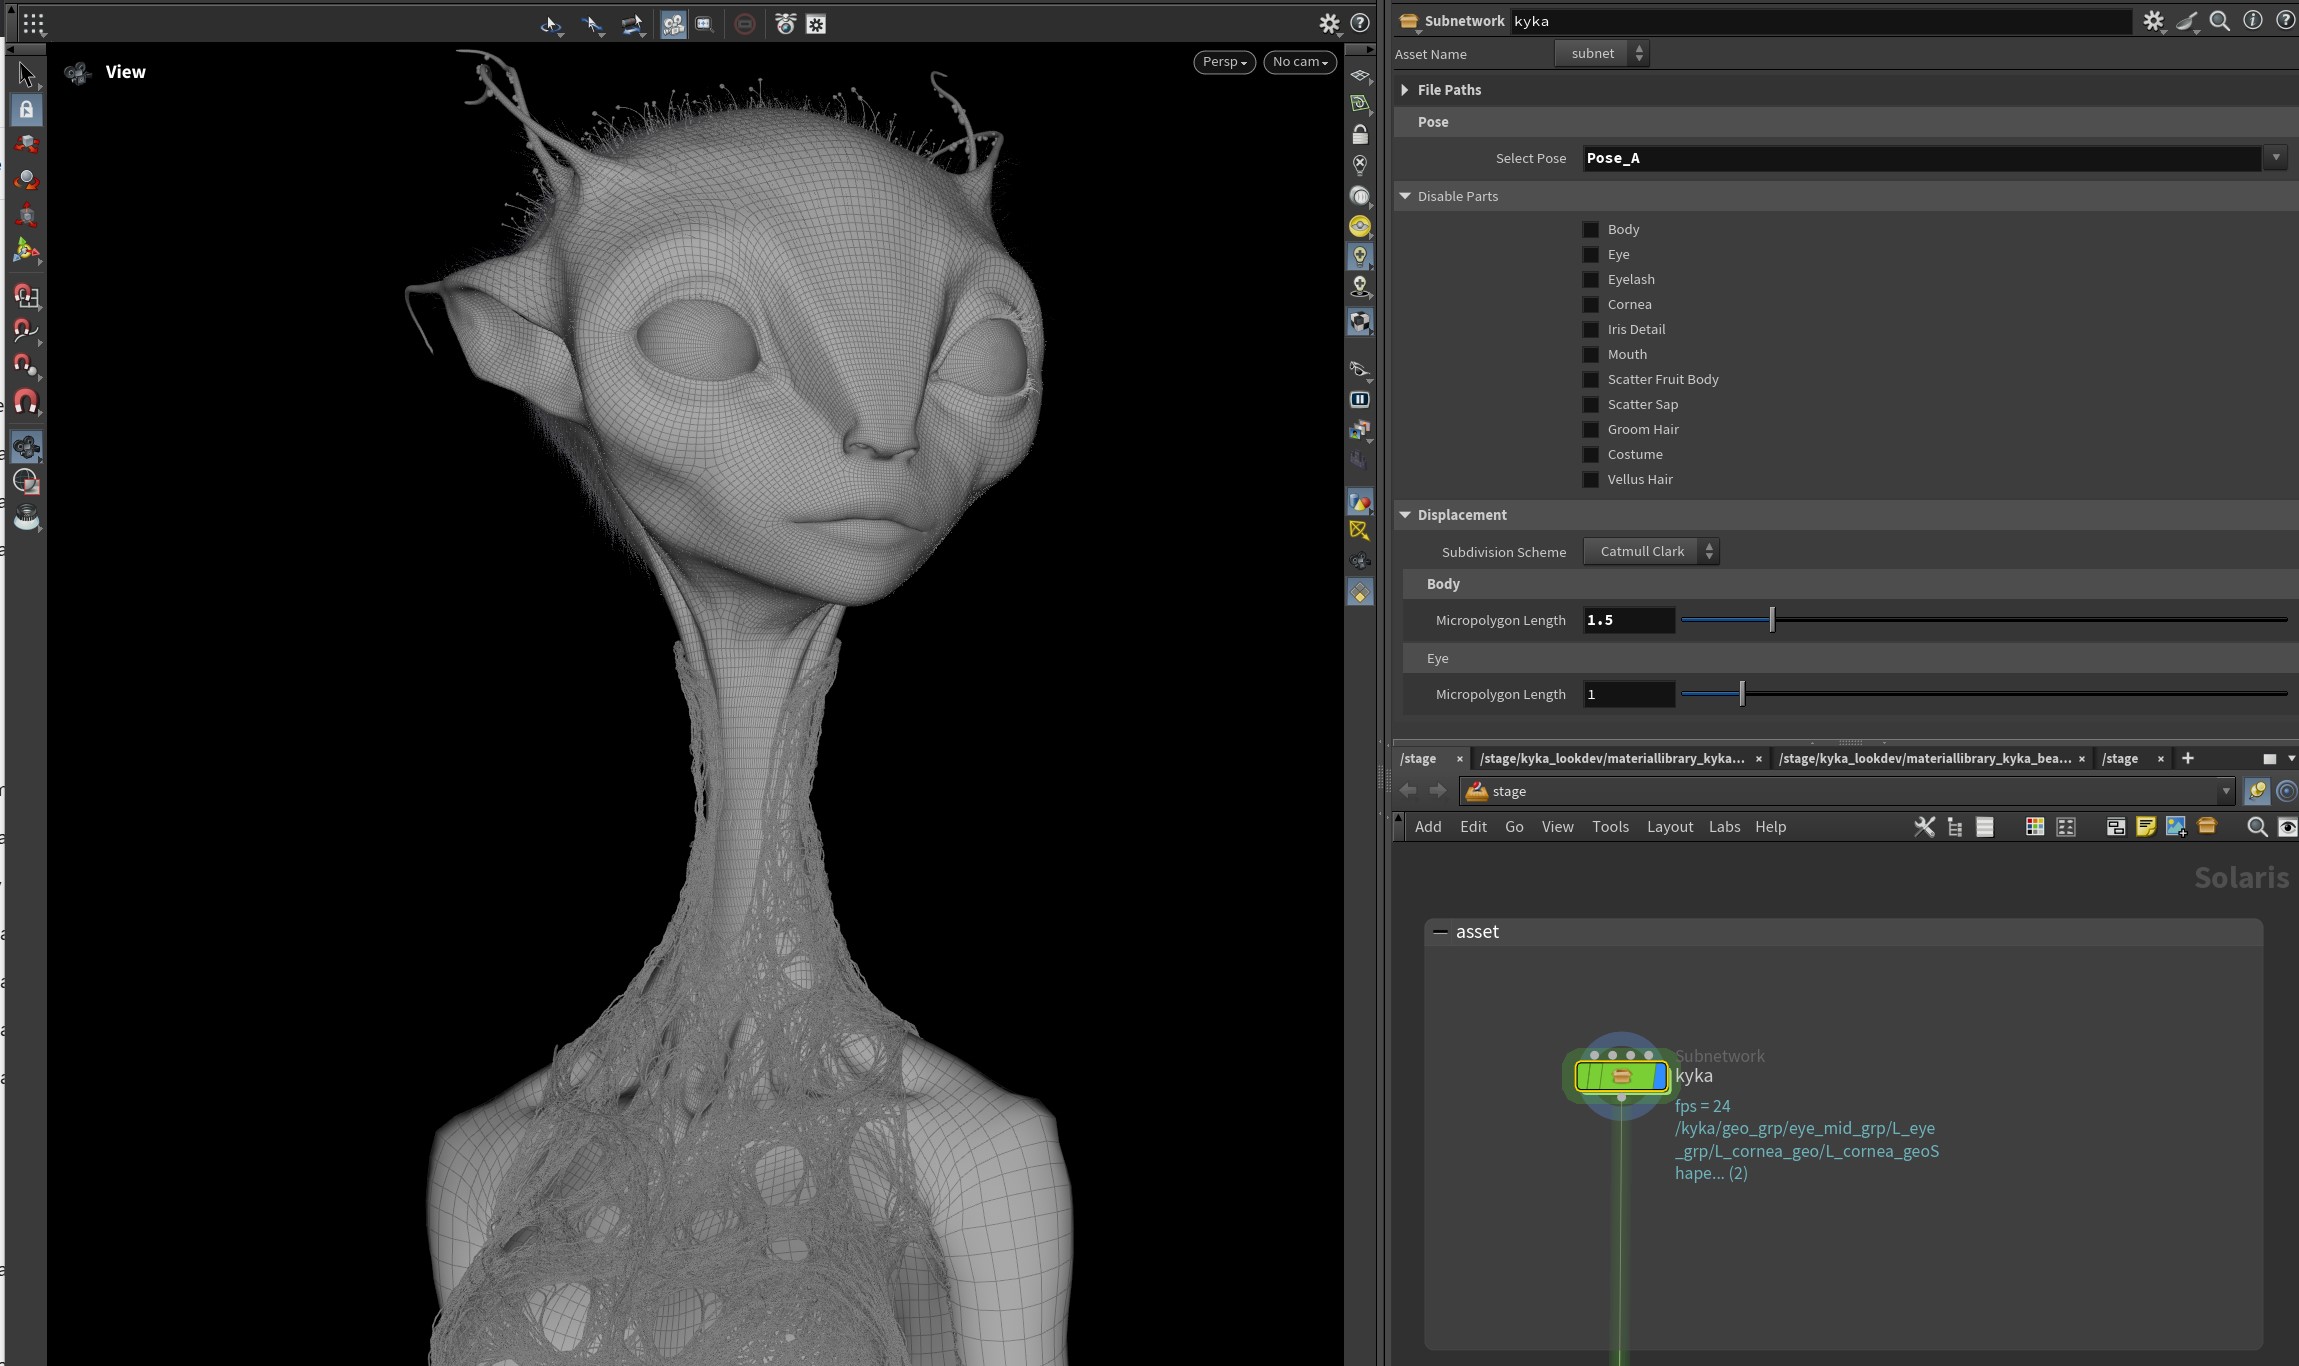
For lookdev I was excited to continue exploring Solaris and RenderMan as well as the final Symbiote skin detail. In Solaris you just need a handful of things to produce a render, which are geometry, materials, lights, camera and a render settings node. I started by building a simple subnet with controls to bring in her published geometry. Then proceeded with RenderMan shader networks
Final Thoughts
This was a really enjoyable project. I was able to continue developing my workflow, created some very nice images and I’m looking forward to creating more characters very soon.